63(77)
4.6 Parameter Setting
Parameters are set via SIEMENS LOGO! Controller. Firstly, confirm parameters
based on demands then input parameters to controller manually. Turn on
control panel and enter LOGO! Setting.
4.7 Parameters List
Param. No.
Function
Remark
B1
Startup reversely running
Cleanup of residual material, default is 5S.
B2
Star start time
Star starting time, default is 10S.
B5
Shredding time
When swing arm moves to lowest position
and time remained, default is 20S.
B6
Interval between startup and first
feeding
After startup, swing arm stays in top and time
remained until first feeding, default is 10S.
B7
Rejected material time remained
Time remained when swing arm returns to
the top, default is 5S.
B9
Shutdown time after start and
reverse running
Shutdown time after reverse running, default
is 5S.
B11
Detect if swing arm stays in upper
and lower limits.
Detect time of swing arm remains in limits,
default is 15 times.
4.8 Parameter Input
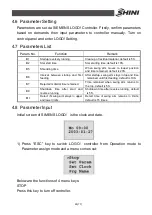
Initial screen of SIMENS LOGO
!
is the clock and date.
1) Press
“
ESC
”
key to switch LOGO
!
controller from Operation mode to
Parameter assign mode and a menu comes out:
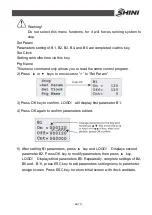
Below are the functions of 4 menu keys:
STOP
Press this key to turn off controller.
Содержание SGS-6080S
Страница 1: ...SGS S Single shaft Shredders Date May 2014 Version Ver B English...
Страница 2: ......
Страница 8: ...8 77...
Страница 24: ...24 77 2 3 3 Cutting Chamber Structure Picture 2 8 Cutting Chamber Structure...
Страница 31: ...31 77 2 3 12 Pushing Device Assembly Picture 2 12 Pushing Device Assembly...
Страница 34: ...34 77 2 3 15 Hydraulic System 2 3 15 1 Principle of Hydraulic System Picture 2 14 Principle of Hydraulic System...
Страница 37: ...37 77 2 4 Wiring Diagram 2 4 1 Wiring Diagram Picture 2 16 Wiring Diagram...
Страница 38: ...38 77 2 4 2 Control Wiring Diagram Picture 2 17 Control Wiring Diagram 1...
Страница 39: ...39 77 Picture 2 18 Control Wiring Diagram 2...
Страница 40: ...40 77 2 4 3 Electrical Components Layout Picture 2 19 Electrical Components Layout 1...
Страница 41: ...41 77 Picture 2 20 Electrical Components Layout 2...


