


ENGLISH
80
80
Photo Mode : Setting the Viewing Options
5
Move
Full View
Move
Move
Full View
Full View
Move
Finish
OK
Select
All
Cancel
Move
Select
1
6
1/6
IN
6
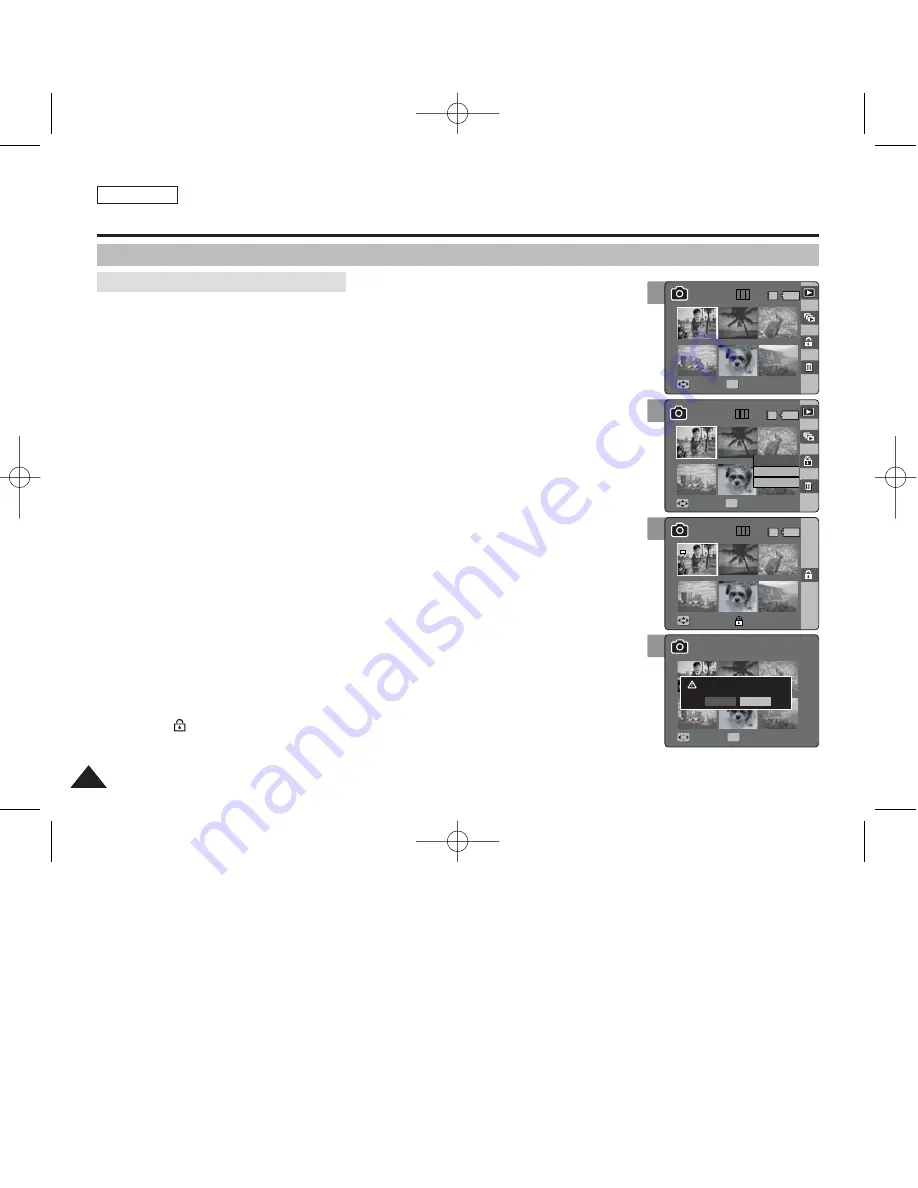
Using the Shortcut Buttons
1. Set the Mode Dial to
Photo
mode.
2. Press the [POWER] button to turn on the device.
3. Press the [Shortcut 1] button.
◆
Switches to Photo view mode.
4. Move the [W/T] zoom switch to W (WIDE).
◆
The screen switches to multi-view.
◆
The photo you were viewing in the single view is selected.
5. Press the [Shortcut 3] button and then select an option by moving the joystick
up / down (
▲
/
▼
) and then press the [OK] button.
◆
<Select>
: Selected photo files will be protected.
◆
<All>
: All photo files will be protected.
◆
<Cancel>
: Cancels protection.
6. If <Select> was selected, select photo files to protect by moving the joystick
left / right / up / down (
œ
œ
/
√
√
/
▲
/
▼
) and press the [OK] button.
7. Press the [Shortcut 3] button again.
◆
The message “Protect?” appears.
8. Select <Yes> to protect the selected photo. Select <No> to cancel protection.
◆
The <
> icon appears on the selected files (Refer to page 84).
4
Move
Move
Full View
Full View
Move
Full View
Move
Finish
OK
Move
Select
6
1/6
IN
6
6
Protecting Photo files in Multi-View
6
7
Move
Full View
Move
Full View
Move
Move
Finish
Finish
Move
Select
6
6
6
1/6
IN
Move
Full View
Move
Full View
Move
Finish
Protect?
Move
Move
Select
Select
OK
Yes
No
6
6
6
00934C SC-MS10 USA~089 9/30/05 10:57 AM Page 80


