•
Gain
— set the audio level of the
frequency band (-20dB to 20dB).
•
Min Freq
— click
^
and set the minimum
frequency that you want the high shelf
audio band limited to (20kHz to 1kHz).
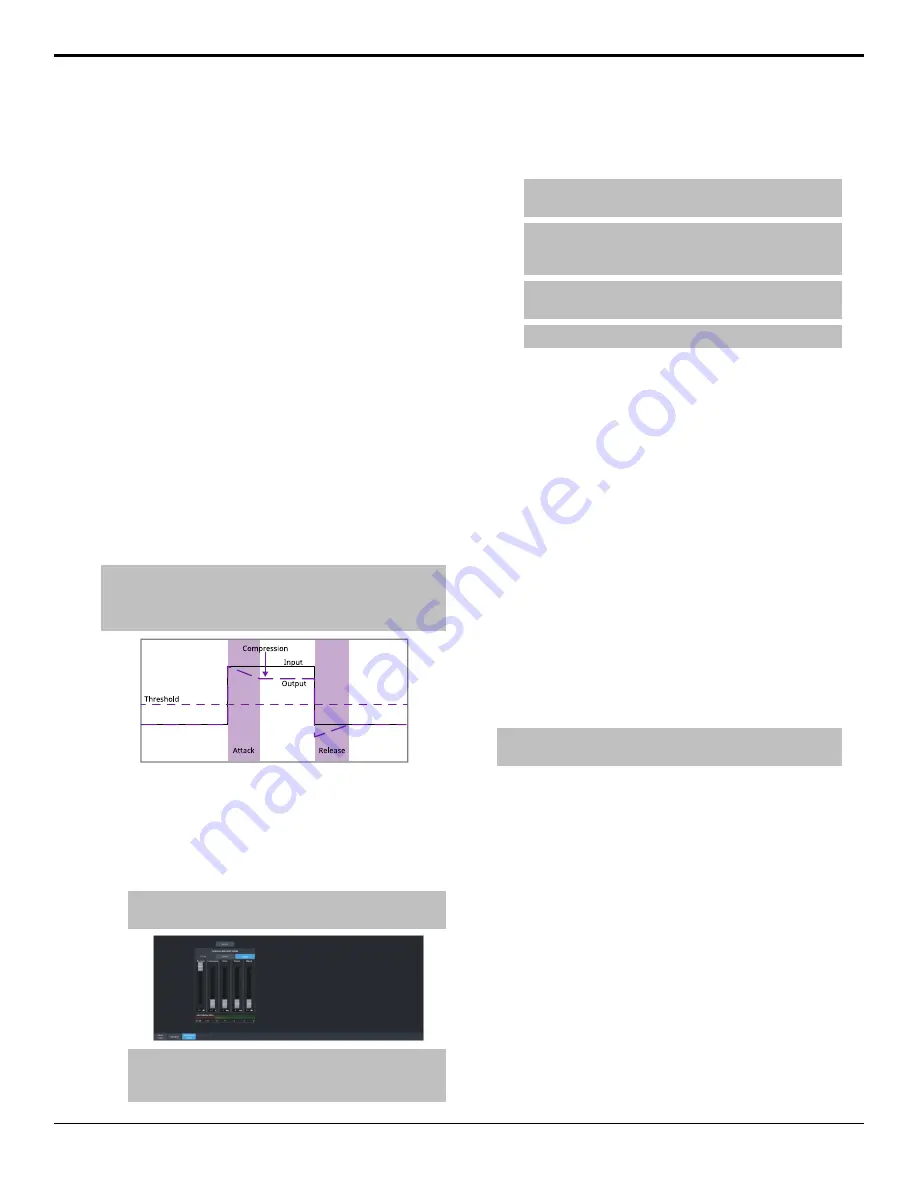
Compressor / Limiter
The audio compressor allows you to restrict
audio levels from passing a threshold level.
These are often used to prevent digital clipping
of audio levels that are too high for output
equipment. Once the threshold is reached, the
compressor starts to reduce the gain at a specific
ratio. The higher the compression ratio, the
harsher the reduction in gain. The compression
continues until the audio level falls below the
threshold. You can adjust how quickly the
compressor is applied once the threshold is
surpassed as well as how long after the level
drops below the threshold that the compressor
is still applied.
Audio compression can be applied at the input
or output stage of the mixer.
Tip:
The compressor is said to be acting as a limiter when the
compression ratio is set very high, or to infinity, and the attack
time is set very low. This has the effect of causing a very abrupt
flattening of the audio level once the threshold is reached.
To Configure a Compressor/Limiter
Apply compression to the audio level to prevent
digital clipping.
1.
Click
Navigation Menu
>
Audio Mixer
>
Effects
>
Compressor Limiter
.
Tip:
Click Mix Compressor Limiter to apply compression
to a mixer output.
Tip:
To the left of the controls is a gain meter for to the
current channel. You can use this to see how your
adjustments are affecting the audio.
2.
Click the audio source button at the top of
the page and select the audio fader that you
want to apply a compressor to.
Tip:
Click Bypass to turn bypass on and have the
compressor not apply to the audio.
Tip:
Click Default and click All Channels to default the
compressor for all channels or Current Channel to default
it for only the currently selected channel.
Tip:
The CL Clip indicator warns you if clipping is occurring
in the Compressor stage for the selected audio source.
Tip:
Click Back to Mix to return to the mixer page.
3.
Use the
Threshold
slider to select the level
(dB) at which the compressor is applied.
4.
Use the
Compression
slider to select the
ratio for the amount of compression you
want to apply. The higher the ratio the more
compression is applied to lower the level.
At
infinity
the audio level is limited to the
threshold.
5.
Use the
Attack
slider to select the amount
of time (ms) you want to pass between the
level surpassing the threshold and the full
compression ratio being applied.
6.
Use the
Release
slider to select the amount
of time (ms) you want to pass between the
level falling below the threshold and the
compression ratio returning to 1:1 (no
compression applied).
7.
Use the
Makeup
slider to increase the gain
of the audio after compression.
Tip:
The Gain Reduction Meter shows how much gain is being
reduced by the compressor.
Ultra User Manual (v6.6) — Audio Mixer • 55
Содержание Carbonite Ultra Series
Страница 1: ...Ultra User Manual v6 6...


