12
Video Operations
Using Buttons to Switch the Video
Here’s how to manually switch between the INPUT (HDMI IN 1–2,
STILL 1–2) video signals/still images.
1.
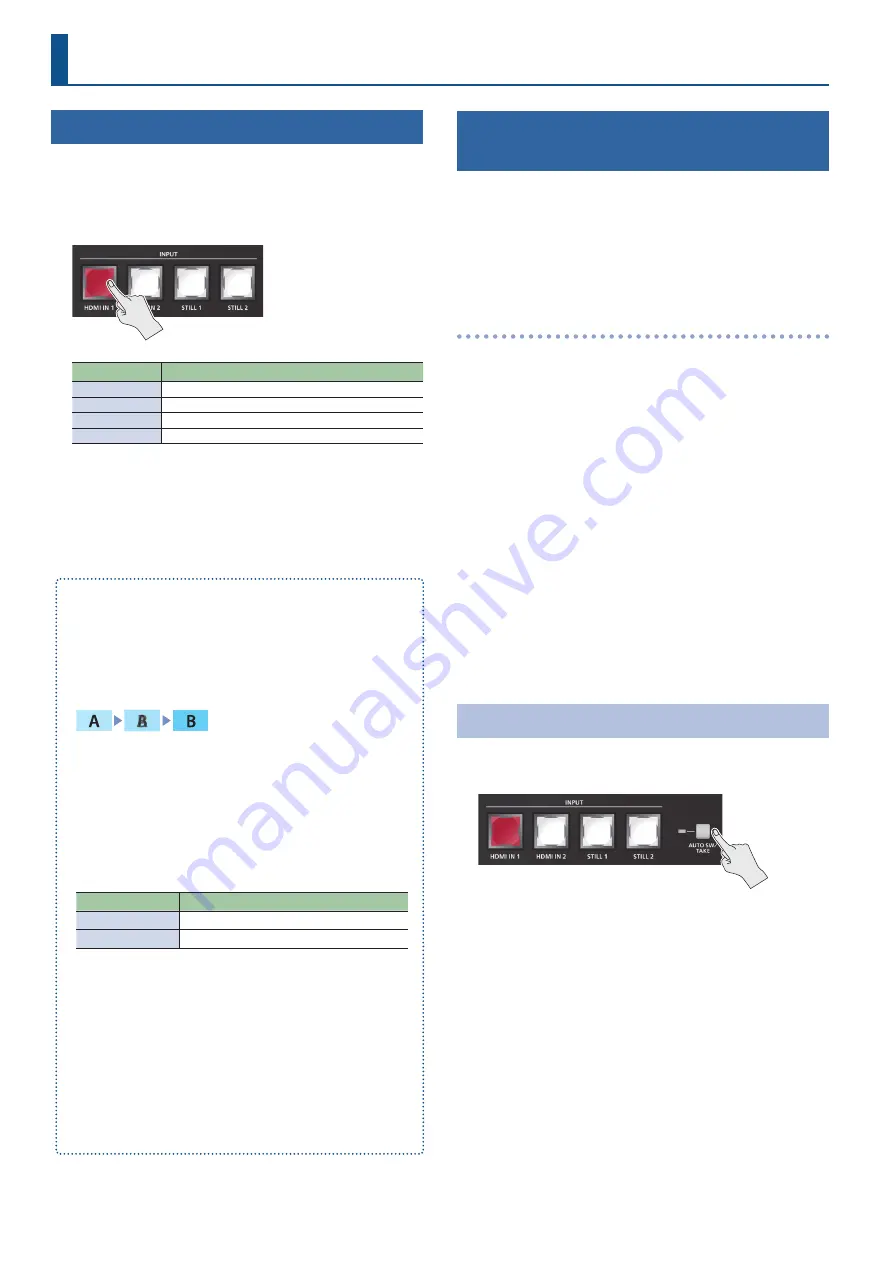
Press an INPUT [HDMI IN 1]–[STILL 2] button to select
the video.
Button
Video status
Lit red
Currently selected video (video now outputting)
Blinking red
Video is transitioning
Lit white
Video input is valid
Unlit
No video input
The selected button blinks red, and the video is gradually switched.
When the video has switched completely, the button changes
from blinking red to lit red.
* When you select scene (p. 14), the input video selection is
canceled.
Ã
Video transition time
You can set the video transition time by using [MENU] button
Ó
“Transition”
Ó
“Time”. This setting is common to the scene (p. 14)
transition time.
Ã
Transition effects
A mix effect is applied when you switch between videos. The two
videos are mixed during the transition.
In the sampling cases, the transition occurs as a cut (instantaneous
switch).
¹
If the transition time is set to “0.0 sec”.
¹
If you press an INPUT button while a transition is occurring.
Ã
Video source for the [STILL 1] button (p. 19)
You can assign the still images and videos imported to an SD card to
the [STILL 1] button.
Set this from the [MENU] button
Ó
“Video Input”
Ó
“STILL 1”
Ó
“Type”.
Value
Explanation
Still
Still images imported to an SD card
Video Player
Videos imported to an SD card
Ã
Video source for the [STILL 2] button (p. 21)
The still images captured from the HDMI IN 1–2/STILL 1 video source
is assigned to the [STILL 2] button.
Capture the still image from the [MENU] button
Ó
“Import”
Ó
“Input
Capture”.
¹
Only one still image can be captured.
¹
Captured still images cannot be reduced in size.
¹
When you turn off the power, the captured still image is lost.
¹
When using the [STILL 2] button, you must capture the image
after the unit starts up.
Switching the Video Automatically
(Auto Switching)
The video/still image of INPUT (HDMI IN 1–2, STILL 1–2) or of scenes
(p. 14) can be switched automatically (the auto switching function).
You can make operation easier by letting the video switch
automatically.
* You can’t use the auto-switching function when PGM Direct (p. 23)
is “Off”.
Operation modes for auto switching
Auto switching provides two operation modes that you can select as
appropriate for your situation: “auto scan” and “video follows audio”.
Switching at a specified interval (auto scan)
This automatically switches the video when a specified length of time
elapses. You can change the duration that each video is shown, and
also switch randomly between videos.
This is convenient when you want to switch between video signals
of multiple cameras, for example when live-streaming a singer-
instrumentalist.
* INPUT (HDMI IN 1–2, STILL 1–2) are skipped if there is no video
input.
Switching according to the mic volume (video follows audio)
This detects the audio that is input from a mic, and automatically
switches to the specified video according to the volume.
For example, if you’re streaming a talk show or a conversation, you
can use this to switch between a closeup of the individual who is
speaking and a wide shot of both people when neither person is
speaking.
Turning the Auto Switching Function On/Off
1.
Press the [AUTO SW/TAKE] button to turn the auto
switching function on (lit).
2.
To turn the auto switching function off, press the
[AUTO SW/TAKE] button once again.
Содержание SR-20HD
Страница 1: ...Reference Manual 02 2022 Roland Corporation...
Страница 68: ...68 Appendix Dimensions 300 86 215 Unit mm...


