


Save location
Once you are done with the test and adjustment, tap the Set reference position button.
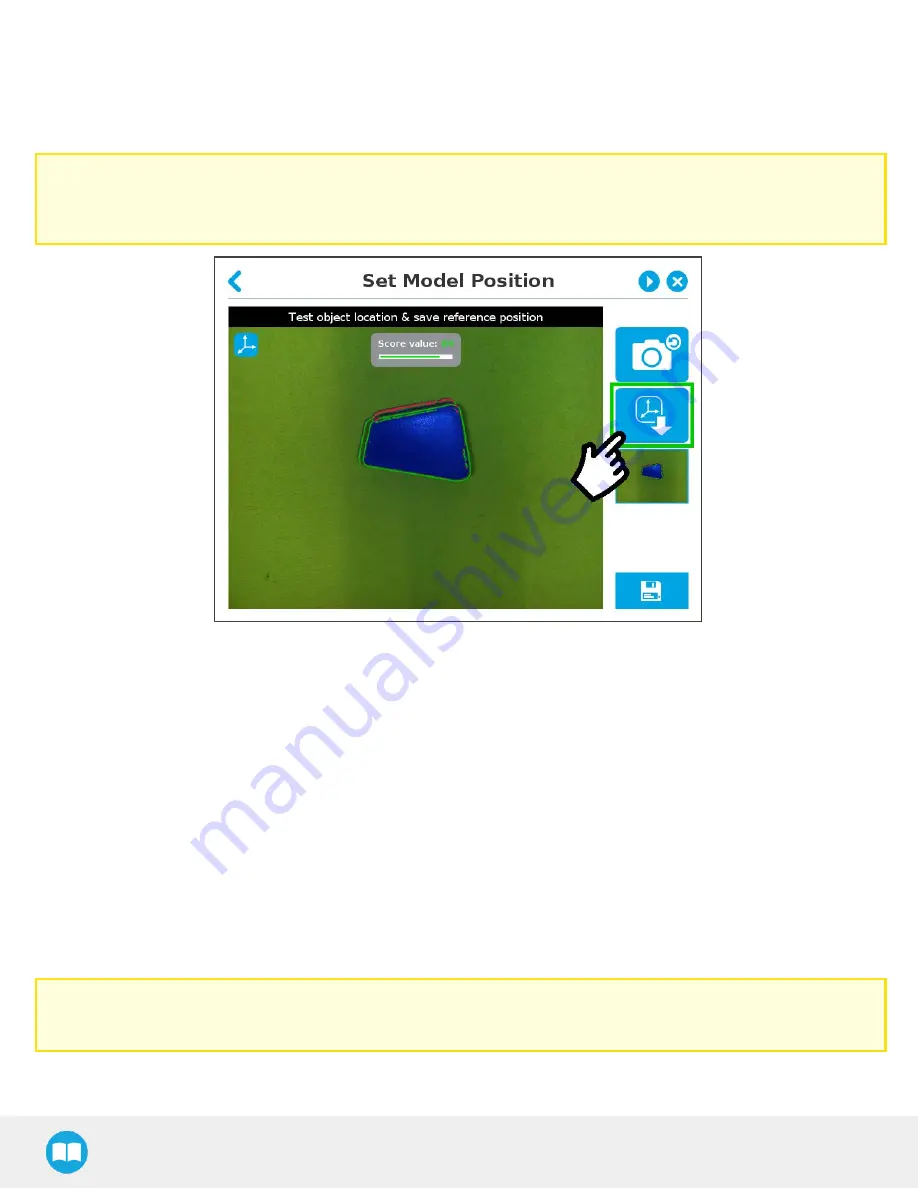
Caution
Do not move the object after saving the position; the subsequent relative movements programmed will be relative to that
position. Please refer to the Cam Locate node section for more details.
Fig. 4-60: Position defined.
Once the position is saved, tap the Save & Reset button in the lower right corner of the teach pendant interface.
When you are done with the teaching process, the Cam Locate node shows a snapshot of your saved object. You can tap Reset to
redefine completely. You can tap Test / Modify to change the detection threshold or both the threshold and the saved object position.
4.6. Cam Locate node
The Cam Locate node is used to teach objects. Once an object is taught through the Cam Locate node, you can use it to detect the
object on a work plane, and to interact with it. See Object Teaching section for a walk through.
Programming
The first thing to do after completing the object teaching is to add a Move node to the Snapshot position. When you exit the object
teaching wizard, the robot arm is already in the Snapshot position location. You can simply add a MoveJ command before the Cam
Locate node and set it to the location of the robot arm.
Caution
Make sure the robot arm is moved to the Snapshot position before executing the Cam Locate node in the robot program.
86
Содержание RWC-CAM-001
Страница 3: ...10 1 Declarationof Incorporation 132 10 2 ngressProtectionCertificate 133 11 Contact 134 3...
Страница 53: ...Wrist Camera Instruction Manual Summary of Camera Settings 53...
Страница 132: ...1 0 Harmonized Standards Declarationsand Certificates 1 0 1 Declaration of Incorporation Wrist Camera Instruction Manual...
Страница 133: ...1 0 2 ngressProtection Certificate 133...


