


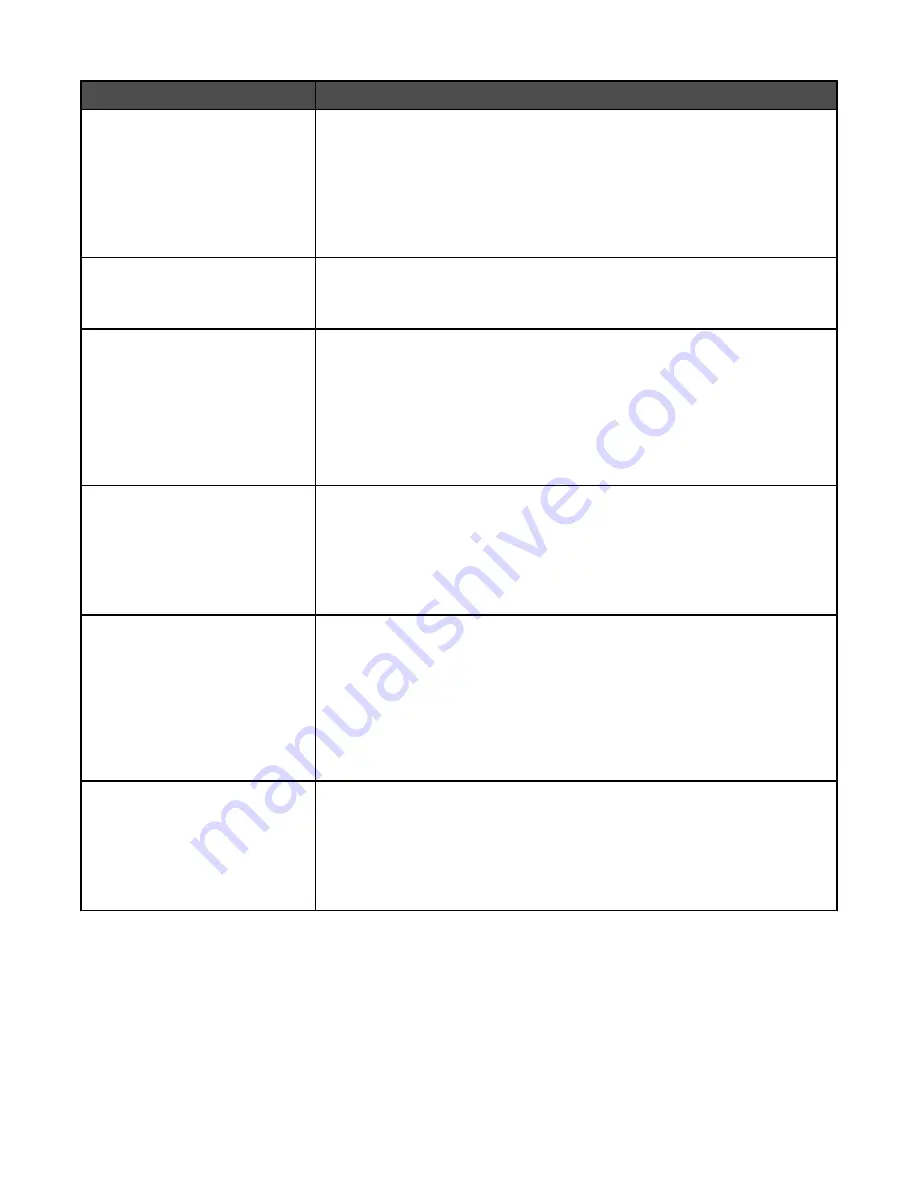
Menu item
Description
Multipage View
Auto
Long Edge
Short Edge
Specifies the orientation of a multiple-page sheet
Notes:
•
Auto is the factory default setting. The printer chooses between portrait
and landscape.
•
Long Edge uses landscape.
•
Short Edge uses portrait.
Multipage Border
None
Solid
Prints a border around each page image when using Multipage Print
Note:
None is the factory default setting.
Staple Job
Off
Auto
Front
Back
2 Staples
4 Staples
Specifies the number and position of staples on a print job
Notes:
•
This menu is available only when the finisher is installed.
•
Off is the factory default setting. Print jobs are not stapled.
•
Auto corner staples every print job.
•
Envelopes are not stapled.
Hole Punch
On
Off
Specifies whether a print job receives hole-punch finishing
Notes:
•
This menu is available only when the finisher is installed.
•
Off is the factory default setting. Print jobs are not hole punched.
•
The On setting instructs the finisher to hole punch every print job.
Hole Punch Mode
2 holes
3 holes
4 holes
Specifies the number of holes punched
Notes:
•
3 is the US factory default setting. The 3 holes setting is available only for
the 3-hole finisher.
•
4 is the international factory default setting. The 4 holes setting is available
only for the 4-hole finisher.
•
This menu is available only when the finisher is installed.
Offset Pages
None
Between Copies
Between Jobs
Stacks copies or print jobs into staggered sets in an output bin
Notes:
•
None is the factory default setting. No pages are offset during the print job.
•
Between Copies offsets each copy of a print job.
•
Between Jobs offsets each print job.
164
Содержание InfoPrint 1759
Страница 1: ...InfoPrint Color 1759 MFP 1769 MFP MT 4886 4887 User s Guide S510 7102 00...
Страница 2: ......
Страница 14: ...14...
Страница 34: ...1 USB port 2 Ethernet port 3 Scanner connector 4 Scanner connector 34...
Страница 111: ...5 Pull the multipurpose feeder down and then open Door B 6 Remove the jammed paper 7 Close Door B 8 Touch Continue 111...
Страница 204: ...If the service message appears again contact Customer Support and report the message 204...
Страница 210: ...9 Insert the new waste toner box 10 Place the new printhead lens cleaner in the notches of Door E 11 Close Door E6 210...
Страница 214: ...8 Insert the waste toner box 9 Place the printhead lens cleaner in the notches of Door E 10 Close Door E6 214...
Страница 272: ...Printed in USA S510 7102 00...