4-35
ROTALIGN 01.2000
Horizontal machine alignment - measurement
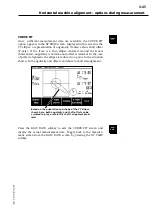
MEASURE AT 0,3,6,9
This method is included for "compatibility" with the OPTALIGN
system. This mode does not use the receiver's inclinometer readings
to calculate the alignment results.
1.
Mark out four clock positions around the shaft by dividing the
shaft circumference by four, or you can use an inclinometer of
your own if the machine is horizontal.
2.
Choose one of the positions to be 12:00 and name the others
3:00, 6:00, 9:00 as viewed along the shaft toward the machine
with the laser.
3.
Turn the shaft to each of the four* clock positions and press the
corresponding key: "0" for 12:00, "3" for 3:00, "6" and "9". A
result can be calculated from just three points, but four naturally
give better accuracy. If your machine is arranged horizontally,
you can set the shaft positions with the inclinometer "clock"
displayed on the screen.
4. Rogue measurements can be selected with the arrow softkey and
deactivated with the "
–
" softkey (see page 4-41 for details).
Note: measurement at each position begins when a number key is
pressed. Therefore, please wait 2 seconds after pressing the
position key before you begin to rotate the shafts to the next
position.
If you are measuring a vertical machine which is mounted on a wall
by its feet, the subsequent calculated feet positions can be shimmed
in the normal way.
F
Note
Содержание ROTALIGN ALI 3.500
Страница 13: ...1 10 ROTALIGN 01 2000 This page intentionally left blank ...
Страница 103: ...4 66 ROTALIGN 01 2000 This page intentionally left blank ...
Страница 121: ...5 18 ROTALIGN 01 2000 This page intentionally left blank ...
Страница 143: ...6 22 ROTALIGN 01 2000 This page has intentionally been left blank ...
Страница 158: ...6 37 ROTALIGN 01 2000 This page intentionally left blank ...


