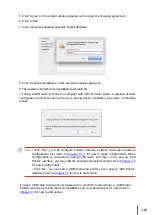
3. Enter the “System Preferences” – “Printers & Scanners” of computer.
4. Click button to select “Add Printer or Scanner”.
5. Select printer and then select the corresponding printer mode from the “Use” menu popping
out.
6. Click “Add”.
1. Turn the power of printer and computer on.
2. Make sure the connection between printer and computer is set up (USB connection or
network connection).
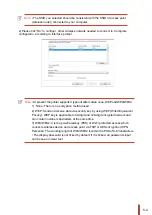
3. Enter the “System Preferences” – “Printers & Scanners” of computer.
4. Click button to select “Add Printer or Scanner”.
5. Select printer and select “Secure AirPrint” (data encryption) or “AirPrint” (no encryption) in
the “Use” option box.
6. Click “Add”.
Note:
• When the printer is connected to computer with USB cable, the system will recognize
and add AirPrint automatically.
• If AirPrint printer of network connection is added, then the connecting USB cable
should be disconnected first before adding the printer.
• AirPrint printer is named after the ending of “AirPrint”.
3-
27
Содержание M6200 series
Страница 90: ...8 10 Select the corresponding SSID 5 Open the document to be printed click on Document Print ...
Страница 91: ...8 After the window pops up set the printing parameters and press the Print button on the top right corner ...
Страница 151: ...14 14 1 Chapter Menu Structure 14 Menu Structure 2 ...
Страница 153: ...15 15 1 Chapter Product Specifications 15 Product Specification 2 ...
Страница 158: ......


