Chapter 2
Getting Started — Connecting
56 - ENGLISH
Connecting
Before connecting
f
Before connecting, carefully read the operating instructions for the external device to be connected.
f
Turn off the power of all devices before connecting cables.
f
Connect cables taking care of the following descriptions. Failure to do so may result in malfunctions.
g
When connecting a cable to a device connected to the projector or the projector itself, touch any nearby
metallic objects to eliminate static electricity from your body before performing work.
g
Do not use unnecessarily long cables to connect a device to the projector or to the projector body. The longer
the cable, the more susceptible to noise it becomes. Since using a cable while it is wound makes it act like an
antenna, it is more susceptible to noise.
g
When connecting cables, connect GND first, then insert the connecting terminal of the connecting device in a
straight manner.
f
Acquire any connection cable necessary to connect the external device to the system that is neither supplied
with the device nor available as an option.
f
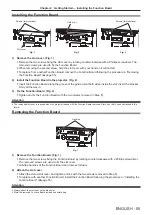
To use the Function Board, install it in the slot in advance.
Requesting a qualified technician to install the Function Board in the slot or remove from the slot is
recommended. A malfunction may occur due to static electricity. Consult your dealer.
For details on installing the Function Board in the slot, refer to “Installing the Function Board” (
x
page 55).
f
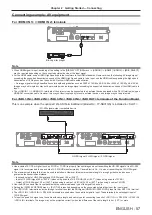
For the connection when the optional 12G-SDI Terminal Board (Model No.: TY-SB01QS) is installed in the slot,
refer to “For <SDI 1 IN> / <SDI 2 IN> / <SDI 3 IN> / <SDI 4 IN> / <SDI OUT> terminals of the Function Board”
(
x
page 57).
f
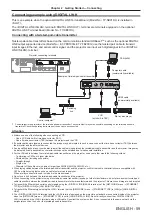
For the connection when the optional DIGITAL LINK Terminal Board (Model No.: TY-SB01DL) is installed in the
slot, refer to “Connecting example using DIGITAL LINK” (
x
page 59).
f
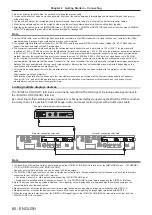
When the projector is used with the optional Wireless Presentation System Receiver Board (Model No.:
TY-SB01WP) or an interface board or module by other manufacturers installed in the slot, refer to the respective
Operating Instructions.
f
If synchronization signals output from computers or video equipment are disrupted due to changes in the video
output setting or other reasons, colors of projected images may be temporarily disrupted.
f
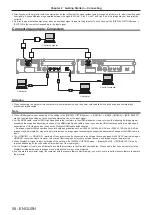
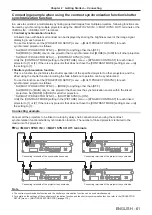
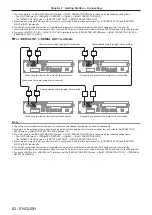
For the connection when linking multiple projectors and using the contrast synchronization function and the
shutter synchronization function, refer to “Connecting example when using the contrast synchronization function/
shutter synchronization function” (
x
page 61).
f
Some computer models or graphic cards are not compatible with the projector.
f
If connecting the projector to a computer that uses an early-type chipset or graphics card compatible with
DisplayPort, the projector or computer may not be operated properly when the signal output from DisplayPort on
the computer is input to the projector. In such a case, switch off the projector or computer and then switch it on.
If the signal output from DisplayPort is input to the projector, use of the computer equipped with the latest
chipset or graphics card is recommended.
f
Connect using an extension device, etc., when installing the projector away from the video equipment. The
projector may not display the image properly when it is connected directly using a long cable.
f
For details of the types of image signals that can be used with the projector, refer to “List of compatible signals”
(
x
page 287).
Содержание PT-REQ12 Series
Страница 63: ...ENGLISH 63 Chapter 3 Basic Operations This chapter describes basic operations to start with...
Страница 208: ...208 ENGLISH Chapter 5 Operations This chapter describes how to use each function...
Страница 266: ...266 ENGLISH Chapter 7 Appendix This chapter describes specifications and after sales service for the projector...

