


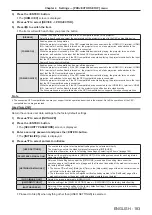


Chapter 4
Settings — [PROJECTOR SETUP] menu
178 - ENGLISH
f
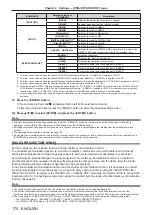
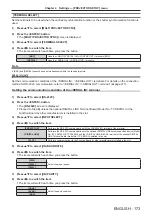
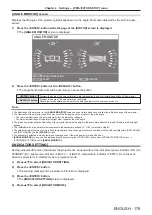
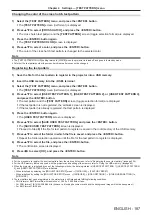
The relationship between the value displayed in [ROLL ANGLE] and the projector tilt status is shown as below. This is the case when
[PITCH ANGLE] is [0°] and [ANGLE MONITOR] is set to zero calibration reset state.
g
[-1°] ~ [-30°]: The projector swings counterclockwise with the top surface facing upward and the screen set in front.
g
[0°]: The projector is horizontal with the top surface facing upward.
g
[+1°] ~ [+30°]: The projector swings clockwise with the top surface facing upward and the screen set in front.
g
[-179°] ~ [-150°]: The projector swings clockwise with the top surface facing downward and the screen set in front.
g
[+180°]: The projector is horizontal with the top surface facing downward.
g
[+179°] ~ [+150°]: The projector swings counterclockwise with the top surface facing downward and the screen set in front.
f
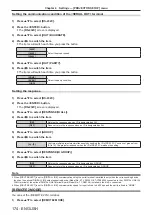
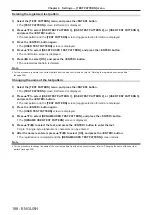
The relationship between the value displayed in [PITCH ANGLE] and the installation attitude of the projector is shown as below. This is the
case when [ROLL ANGLE] is [0°] in the zero calibration reset state.
g
[-1°] ~ [-30°]: The projector swings with the top surface facing upward and the projection lens side facing downward.
g
[0°]: The projector is horizontal with the top surface facing upward.
g
[+1°] ~ [+30°]: The projector swings with the top surface is facing upward and the projection lens side is facing upward.
g
[-179°] ~ [-150°]: The projector swings with the top surface is facing downward and the projection lens side is facing upward.
g
[+180°]: The projector is horizontal with the top surface facing downward.
g
[+179°] ~ [+150°]: The projector swings with the top surface is facing downward and the projection lens side is facing downward.
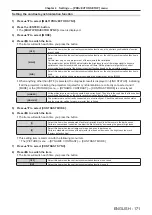
f
If you press the <ENTER> button while displaying [ANGLE INFORMATION] page of the
[STATUS]
screen (5/6 page), the
[ANGLE
MONITOR]
screen which graphically displays the tilt angle of the projector is displayed. For details of
[ANGLE MONITOR]
screen, refer to
“[ANGLE MONITOR] screen” (
x
page 179).
f
If you press the <ENTER> button while displaying [SIGNAL INFORMATION] in the page 6/6 of the
[STATUS]
screen, the
[DETAILED
INFORMATION]
screen can be displayed to view the detailed information of the input signal. Information for multiple input signals may be
displayed depending on the projected image. Press
qw
to switch pages.
f
While the
[DETAILED INFORMATION]
screen is displayed, press the <ENTER> button to display the
[CONTENT INFORMATION]
screen,
and the contents of the InfoFrame information added to the input signal can be displayed.
f
There are items that are displayed or not displayed in [SIGNAL INFORMATION], [DETAILED INFORMATION], and [CONTENT
INFORMATION] depending on the setting and the signal being input.
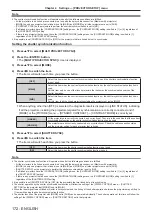
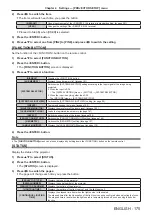
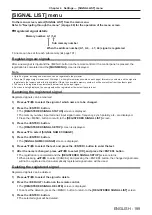
Sending status content via E-mail
The status content can be sent to the E-mail address (up to two addresses) set in “[E-mail set up] page”
(
x
page 240).
1) Press the <ENTER> button while the 1/6 to 4/6 page of the [STATUS] screen is displayed.
f
The selection screen is displayed.
2) Press
as
to select [SEND E-MAIL].
3) Press the <ENTER> button.
f
The
[SELECT E-MAIL ADDRESS]
screen is displayed.
4) Press
as
to select the destination.
5) Press the <ENTER> button.
f
The confirmation screen is displayed.
6) Press
qw
to select [OK], and press the <ENTER> button.
f
The status content is sent.
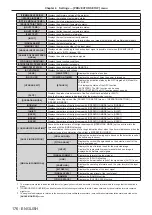
Saving status content in USB memory
The status content can be saved in a USB memory attached to the <USB> terminal.
1) Press the <ENTER> button while the 1/6 to 4/6 page of the [STATUS] screen is displayed.
f
The selection screen is displayed.
2) Press
as
to select [SAVE TO USB MEMORY].
3) Press the <ENTER> button.
f
The confirmation screen is displayed.
4) Press
qw
to select [OK], and press the <ENTER> button.
f
The status content is saved.
Содержание PT-REQ12 Series
Страница 63: ...ENGLISH 63 Chapter 3 Basic Operations This chapter describes basic operations to start with...
Страница 208: ...208 ENGLISH Chapter 5 Operations This chapter describes how to use each function...
Страница 266: ...266 ENGLISH Chapter 7 Appendix This chapter describes specifications and after sales service for the projector...


