Chapter 4
Settings — [PROJECTOR SETUP] menu
ENGLISH - 167
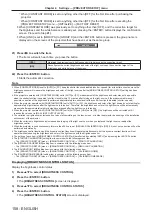
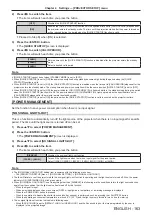
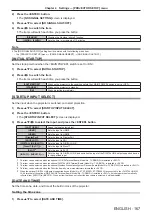
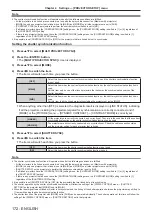
2) Press the <ENTER> button.
f
The
[NO SIGNAL SETTING]
screen is displayed.
3) Press
as
to select [NO SIGNAL SHUT-OFF].
4) Press
qw
to switch the item.
f
The items will switch each time you press the button.
[DISABLE]
Disables the No signal shut‑off function.
[10MIN.] - [90MIN.]
Sets the time in increments of 10 minutes.
Note
f
The [NO SIGNAL SHUT-OFF] setting item is common with the following menu item.
g
The [PROJECTOR SETUP] menu
→
[POWER MANAGEMENT]
→
[NO SIGNAL SHUT-OFF]
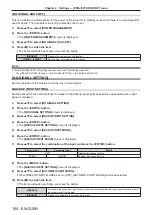
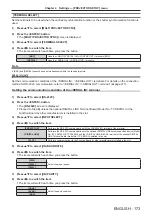
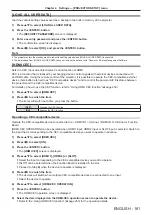
[INITIAL STARTUP]
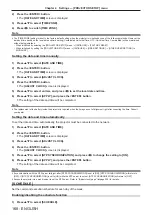
Set the startup method when the <MAIN POWER> switch is set to <ON>.
1) Press
as
to select [INITIAL STARTUP].
2) Press
qw
to switch the item.
f
The items will switch each time you press the button.
[LAST MEMORY]
Starts up the projector in the condition before the <MAIN POWER> switch is set to <OFF>.
[STANDBY]
Starts up the projector in standby.
[ON]
Starts projecting immediately.
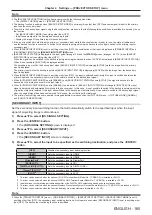
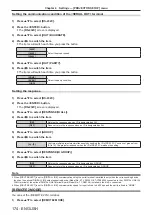
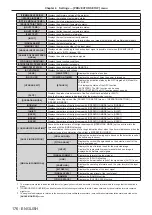
[STARTUP INPUT SELECT]
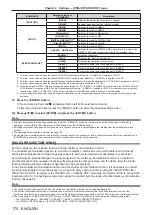
Set the input when the projector is switched on to start projection.
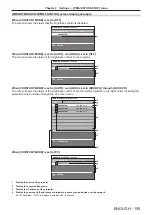
1) Press
as
to select [STARTUP INPUT SELECT].
2) Press the <ENTER> button.
f
The
[STARTUP INPUT SELECT]
screen is displayed.
3) Press
asqw
to select the input, and press the <ENTER> button.
[LAST USED]
Keeps the input selected last.
[HDMI1]
Sets the input to HDMI1.
[HDMI2]
Sets the input to HDMI2.
[DisplayPort]
Sets the input to DisplayPort.
[SDI [SLOT]]
*1
Sets the input to SDI.
[DIGITAL LINK [SLOT]]
*2
Sets the input to DIGITAL LINK.
[PressIT [SLOT]]
*3
Sets the input to PressIT.
[SLOT]
*4
Sets the input to SLOT.
[INPUT1] - [INPUT10]
*2 *5
Sets the input to DIGITAL LINK, and switches the input of the DIGITAL LINK output supported device
to the specified input.
*1 This item can be selected when the optional 12G-SDI Terminal Board (Model No.: TY-SB01QS) is installed in <SLOT>.
*2 This item can be selected when the optional DIGITAL LINK Terminal Board (Model No.: TY-SB01DL) is installed in <SLOT>.
*3 This item can be selected when the optional Wireless Presentation System Receiver Board (Model No.: TY-SB01WP) is installed in <SLOT>.
*4 This item can be selected when the Function Board by other manufacturers is installed in <SLOT>.
*5 When the optional DIGITAL LINK output supported device (Model No.: ET-YFB100G, ET-YFB200G) is connected to the <DIGITAL LINK IN/
LAN> terminal of the optional DIGITAL LINK Terminal Board (Model No.: TY-SB01DL) installed in <SLOT>, its input name is automatically
reflected from [INPUT1] to [INPUT10]. When an item that does not reflect the input name is selected, it will be disabled.
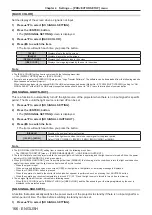
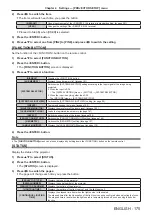
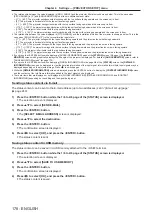
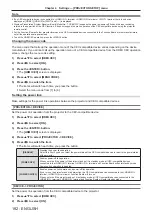
[DATE AND TIME]
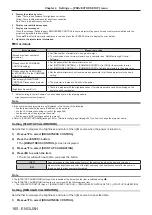
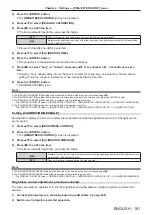
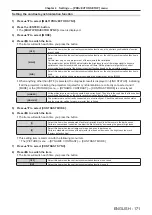
Set the time zone, date, and time of the built-in clock of the projector.
Setting the time zone
1) Press
as
to select [DATE AND TIME].
Содержание PT-REQ12 Series
Страница 63: ...ENGLISH 63 Chapter 3 Basic Operations This chapter describes basic operations to start with...
Страница 208: ...208 ENGLISH Chapter 5 Operations This chapter describes how to use each function...
Страница 266: ...266 ENGLISH Chapter 7 Appendix This chapter describes specifications and after sales service for the projector...


