


I N S T A L L A T I O N
91 / 216
XS10000_manual_ger_eng_it_V1.1.2.doc
R. Kistler
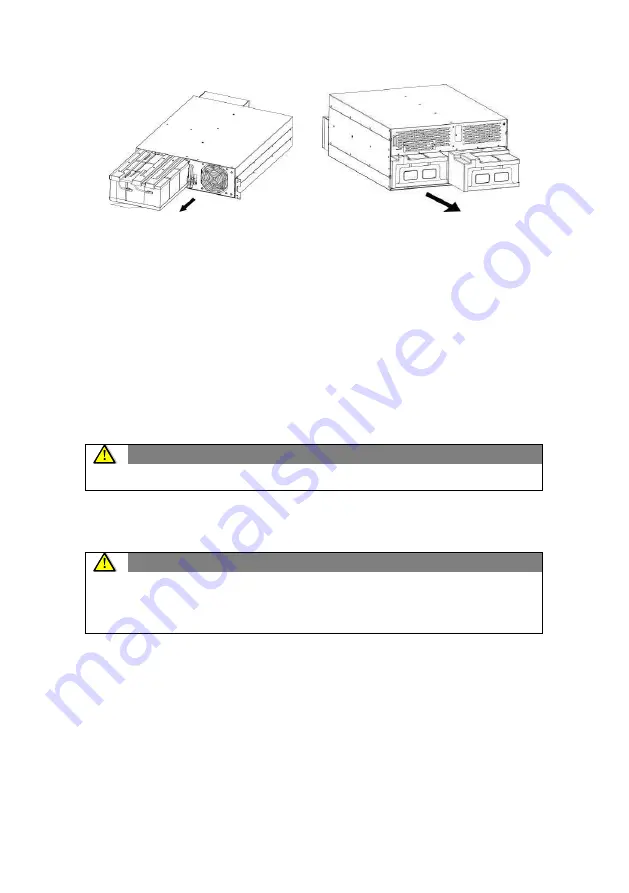
Figure 9: Battery module inserts of the XANTO S 6000 and 10000
6. Align the mounting brackets with the screw holes on each side
of the UPS system/battery module and secure these.
7. If you are installing additional UPS systems or battery mod-
ules, repeat steps 2 to 6.
8. Push the UPS systems and the battery modules into the rack.
9. Secure the UPS system/battery module with the housing
bracket to the rack. Use two M6 x 16 pan-head screws and
two M6 cage nuts.
Repeat the procedure for all additional battery modules.
CAUTION
Battery modules are very heavy.
10. Push the battery module inserts into the UPS systems/battery
modules again.
CAUTION
When connecting the internal batteries, a small spark may
occur. This is normal and does not pose a hazard to people.
Connect the cables quickly and firmly.
11. Connect the plug connection again for the internal batteries.
Press both parts together firmly to ensure a good connection.
XANTO S 10000
only the left side.
Содержание XANTO S 10000
Страница 2: ...2 216 XS6000 XS10000_manual_ger_eng_it_V1 1 2 doc R Kistler ...
Страница 70: ...T E C H N I S C H E D A T E N 70 216 XS6000 XS10000_manual_ger_eng_it_V1 1 2 doc R Kistler 9 3 CE Bestätigung ...
Страница 72: ...72 216 XS6000 XS10000_manual_ger_eng_it_V1 1 2 doc R Kistler ...
Страница 74: ...74 216 XS6000 XS10000_manual_ger_eng_it_V1 1 2 doc R Kistler ...
Страница 142: ...T E C H N I C A L D A T A 142 216 XS6000 XS10000_manual_ger_eng_it_V1 1 2 doc R Kistler 9 3 CE conformity ...
Страница 144: ...144 216 XS6000 XS10000_manual_ger_eng_it_V1 1 2 doc R Kistler ...
Страница 146: ...146 216 XS6000 XS10000_manual_ger_eng_it_V1 1 2 doc R Kistler ...
Страница 214: ...D A T I T E C N I C I 214 216 XS6000 XS10000_manual_ger_eng_it_V1 1 2 doc R Kistler 9 3 Dichiarazione CE ...
Страница 216: ...216 216 XS6000 XS10000_manual_ger_eng_it_V1 1 2 doc R Kistler ...


