Maintenance
7-13
Part 1126187_05
E
2021 Nordson Corporation
Installing the Applicator Needle
NOTE:
Before putting the needle and other items back together, follow the
alignment instructions given in
Vulcan Jet Alignment Tool
(P/N 1130498).
1. Obtain a new applicator needle (5).
2. Hold the top and bottom of the frame plates (1) and insert the spring (4)
and needle (5) into the plastic needle housing (3). Make sure the top part
of the needle housing is in contact with the bottom of the piezo actuator
(2). Using the special needle removal tool, rotate the needle clockwise
until you feel it threading into the piezo actuator. Torque the needle to a
value of 7-8 in-lb.
CAUTION!
Be careful not to cross-thread the needle.
1
4
5
2
3
6
8
7
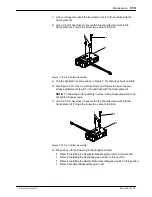
Figure 7-9 Applicator Needle Installation
1. Frame plates
2. Piezo actuator
3. Plastic needle housing
4. Spring
5. Applicator needle
6. Heater block assembly
7. Luer lock
8. Screws
3. Refer to
Installing the Seal Pack
given next.
Содержание Vulcan Jet
Страница 26: ...Description 2 8 Part 1126187_05 E 2021 Nordson Corporation This page intentionally left blank...
Страница 38: ...Installation 3 12 Part 1126187_05 E 2021 Nordson Corporation This page intentionally left blank...
Страница 110: ...Advanced Controller Configuration 6 36 Part 1126187_05 E 2021 Nordson Corporation This page intentionally left blank...
Страница 121: ...Maintenance 7 5 Part 1126187_05 E 2021 Nordson Corporation 1 2 3 5 4 4 6 7 8 Figure 7 2 General Disassembly...
Страница 162: ...Parts 9 4 Part 1126187_05 E 2021 Nordson Corporation Figure 9 2 Vulcan Jet applicator parts...
Страница 163: ...Parts 9 5 Part 1126187_05 E 2021 Nordson Corporation Figure 9 3 Vulcan Jet applicator parts...
Страница 166: ...Parts 9 8 Part 1126187_05 E 2021 Nordson Corporation 5 1 4 2 20 5 9 8 6 7 6X 19 3 Figure 9 5 Controller Assembly...
Страница 171: ......
Страница 172: ......


