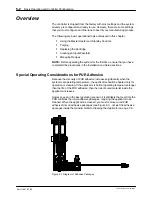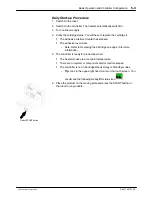
Robot START button
Basic Operation and Controller Configuration
5-3
Part 1126187_05
E
2021
Nordson Corporation
Daily Start-up Procedure
1. Switch On the robot.
2. Switch On the controller. The heaters automatically switch On.
3. Turn on the air supply.
4. Verify the cartridge status. You will have to replace the cartridge if:
S
The Adhesive Lifetime Counter has elapsed.
S
The adhesive level is low.
‐
Note: Refer to
information.
5. The controller is ready for production when:
S
The heated zones are at set point temperature.
S
There are no system or component alert or fault messages.
S
The controller is not in Cartridge Ready Delay or Standby modes.
‐
Tip
: Look in the upper-right hand corner of the touch screen. You
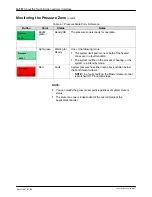
should see the following Ready/OK status icon
.
6. Place the product on the moving plate and press the START button on
the robot to run products.
Содержание Vulcan Jet
Страница 26: ...Description 2 8 Part 1126187_05 E 2021 Nordson Corporation This page intentionally left blank...
Страница 38: ...Installation 3 12 Part 1126187_05 E 2021 Nordson Corporation This page intentionally left blank...
Страница 110: ...Advanced Controller Configuration 6 36 Part 1126187_05 E 2021 Nordson Corporation This page intentionally left blank...
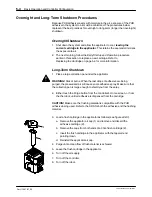
Страница 121: ...Maintenance 7 5 Part 1126187_05 E 2021 Nordson Corporation 1 2 3 5 4 4 6 7 8 Figure 7 2 General Disassembly...
Страница 162: ...Parts 9 4 Part 1126187_05 E 2021 Nordson Corporation Figure 9 2 Vulcan Jet applicator parts...
Страница 163: ...Parts 9 5 Part 1126187_05 E 2021 Nordson Corporation Figure 9 3 Vulcan Jet applicator parts...
Страница 166: ...Parts 9 8 Part 1126187_05 E 2021 Nordson Corporation 5 1 4 2 20 5 9 8 6 7 6X 19 3 Figure 9 5 Controller Assembly...
Страница 171: ......
Страница 172: ......


