Chapter 6
Capturing Images with Simple Operations
49
Photogr
ap
hin
g
Basics of DS-L3
6.6.2
Capturing after Freezing the Live Image
You can temporarily stop the live image to have a still image, and capture and save it as an image file.
1
Check the live image.
Check that the object image is displayed as desired.
2
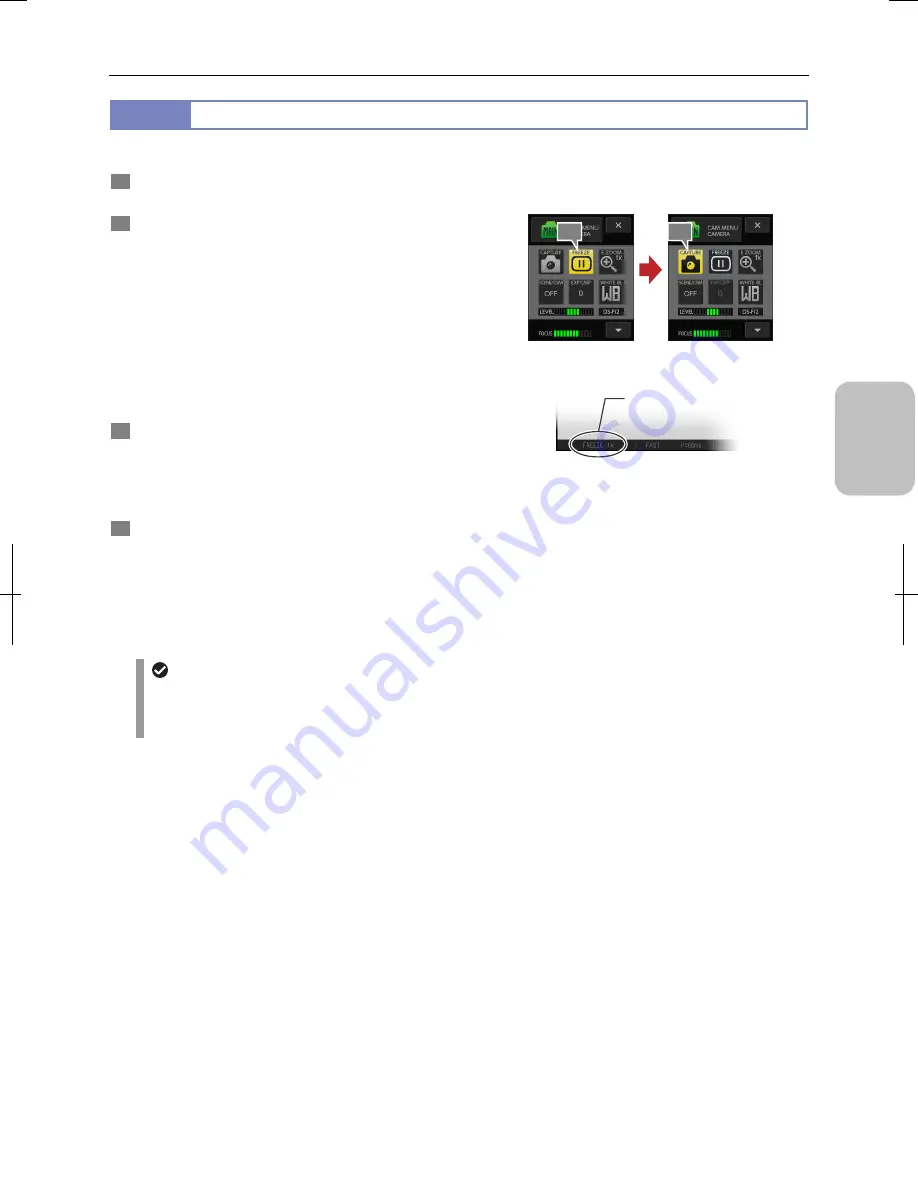
Press the [FREEZE] button of [CAM MENU].
The image at the point when the button is pressed is
displayed as a still image.
While the still image is displayed, a blue frame appears
around the [FREEZE] button. [FREEZE] is displayed on the
task bar.
Pressing the [FREEZE] button again releases the freeze
status. The live image returns and the task bar display
changes from [FREEZE] to [CAM].
Note: Buttons that cannot be used when a still image is
displayed are grayed out.
3
Check the still image state.
Check that the still image is displayed as desired.
To obtain the still image again, press the [FREEZE] button to
release freezing and press it again while checking the live
image.
4
To save the image, press the [CAPTURE] button.
A capture sound is emitted, and the still image is captured
and saved in the specified save folder.
While the image is being saved, the pointer shape changes
on the touch panel LCD monitor. The “Saved..1/1” message
appears on the task bar to indicate that the image has been
saved.
Getting and capturing a still image
Task bar (still image)
Use of the [FREEZE] button and image source settings
With the [FULL IMAGE] is selected as the image source on the [REC MODE] menu accessed from the [CAM
MANU: SHOT/REC], pressing the [FREEZE] button displays a still image in the [FULL] image mode.
Press the [FREEZE] button again to switch from the still image mode and the [FULL] image mode.
2
4
[FREEZE]
Содержание DS-L3
Страница 2: ......


