CHAPTER 5 SAMPLE PROGRAMMING SESSION USING GUI SOFTWARE
User’s Manual U15260EJ3V1UM
72
4.
Starting system
<1> Turn on the switch of the power supply unit cable. Do not connect the FA adapter before turning on the
switch.
Confirm that the Status LED of the PG-FP4 remains dark and that ‘Commands >’ is displayed on the LCD,
indicating that the PG-FP4 is ready for operation.
If this does not happen, the chances are the PG-FP4 is faulty. Consult an NEC Electronics sales
representative or distributor.
<2> Connect the PG-FP4 to the FA adapter
Note
with the target cable.
<3> Start the GUI software.
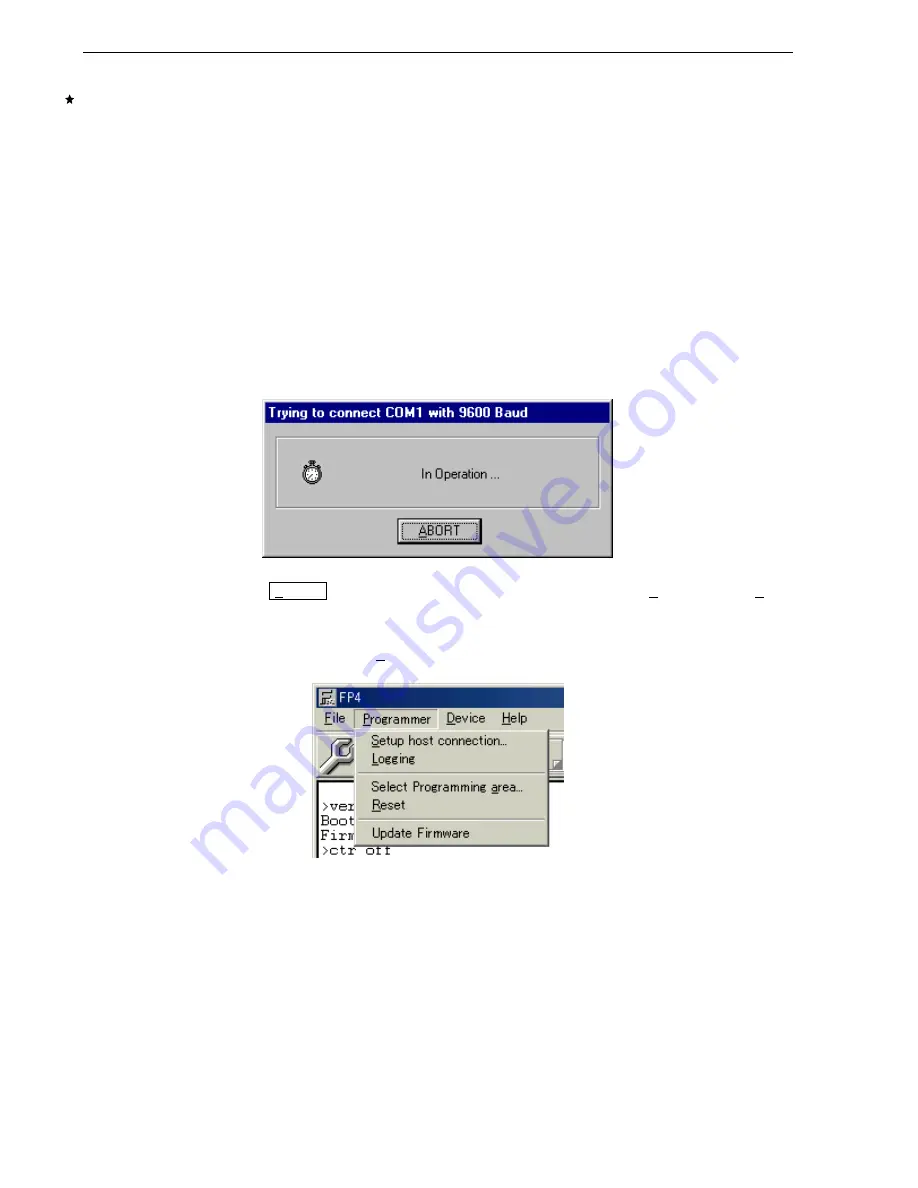
The GUI software tries to establish a connection with the PG-FP4 at 9,600 bps, using COM1.
If it is not successful, it scans other communication rates and ports.
In this example, it is assumed that the PG-FP4 is connected to COM1.
Figure 5-1. Connection Between GUI Software and PG-FP4
<4> You may click the ABORT button and select the communication port from the [Programmer]
→
[Setup
host connection…] menu directly.
Figure 5-2. [Setup host connection…] Menu
<5> Select the appropriate port number to which the PG-FP4 was connected.
The initial communication speed is set to 9,600 bps (factory setting of the PG-FP4).
Note
This is a product of Naito Densei Machida Mfg. Co., Ltd.
Содержание PG-FP4
Страница 2: ...User s Manual U15260EJ3V1UM 2 MEMO ...


