Installing Windows Server 2003 E-21
Network Driver
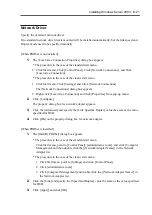
Specify the details of network driver.
One standard network driver that is mounted will be installed automatically, but the link speed and
Duplex mode need to be specified manually.
[When PROSet is not installed]
1.
The [Local Area Connection Properties] dialog box appears.
* The procedure in the case of the standard start menu
1. Click Start menu, Click [Control Panel], Click [Network Connections], and Click
[Local Area Connection].
* The procedure in the case of the classic start menu
1. Click Start menu, Click [Settings] and Click [Network Connections].
The [Network Connections] dialog box appears.
2. Right-click [Local Area Connection] and click [Properties] from pop-up menu.
2.
Click [Configure].
The property dialog box for network adapter appears.
3.
Click the [Advanced] and specify the [Link Speed & Duplex] value the same as the value
specified for HUB.
4.
Click [OK] on the property dialog box for network adapter.
[When PROSet is installed]
1.
The [Intel(R) PROSet] dialog box appears.
* The procedure in the case of the standard start menu
Click Start menu, point to [Control Panel], [administrative tools], and click [Computer
Management] and then double click the [(Network Adapter Name)] in the Network
Adapter list.
* The procedure in the case of the classic start menu
1. Click Start menu, point to [Settings] and click [Control Panel].
2. Click [administrative tools].
3. Click [Computer Management] and double click the [(Network Adapter Name)] in
the Network Adapter list.
2.
Click the [Link] and specify the [Speed and Duplex] value the same as the value specified
for HUB.
3.
Click [Apply] and click [OK].
Содержание N8100-14522F
Страница 16: ...x This page is intentionally left blank...
Страница 122: ...4 54 Configuring Your Server This page is intentionally left blank...
Страница 165: ...Installing and Using Utilities 6 9 4 Click Parameter File Creator Parameter File Creator will appear...
Страница 178: ...6 22 Installing and Using Utilities This page is intentionally left blank...
Страница 190: ...7 12 Maintenance This page is intentionally left blank...
Страница 254: ...A 2 Specifications This page is intentionally left blank...
Страница 262: ...C 2 IRQ This page is intentionally left blank...
Страница 316: ...F 2 Using a Client Computer Which Has a CD Drive This page is intentionally left blank...
Страница 320: ...G 4 Product Configuration Record Table This page is intentionally left blank...

