9-10 Upgrading Your Server
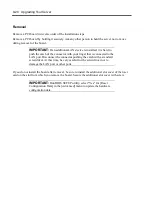
Removal
Follow the procedure as described below to remove hard disk drives.
IMPORTANT:
About data on the hard disk drive
Be sure to take appropriate measures not to leak important data (e.g.,
customers' information or companies' management information) on
the removed hard disk drive to any third parties.
Data seems to be erased when you empty "Recycle Bin" of
Windows or execute the "format" command of the operating system.
However, the actual data remains written on the hard disk drive.
Data not erased completely may be restored by special software and
used for unexpected purposes.
It is strongly recommended that the software or service (both
available at stores) for data erasure should be used in order to avoid
the trouble explained above. For details on data erasure, ask your
sales representative.
Observe the following to disconnect the power cable.
– Do not twist the cable.
– Always hold the cable connector to pull the cable out.
– Hold the cable connector and pull it straight out.
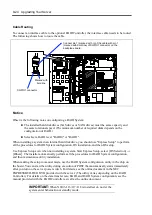
NOTE:
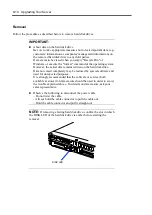
If removing a failing hard disk drive, confirm the slot in which
the DISK LED of the hard disk drive is amber before starting the
removal.
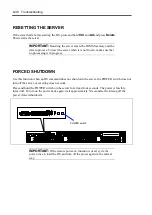
DISK LED
Содержание N8100-14522F
Страница 16: ...x This page is intentionally left blank...
Страница 122: ...4 54 Configuring Your Server This page is intentionally left blank...
Страница 165: ...Installing and Using Utilities 6 9 4 Click Parameter File Creator Parameter File Creator will appear...
Страница 178: ...6 22 Installing and Using Utilities This page is intentionally left blank...
Страница 190: ...7 12 Maintenance This page is intentionally left blank...
Страница 254: ...A 2 Specifications This page is intentionally left blank...
Страница 262: ...C 2 IRQ This page is intentionally left blank...
Страница 316: ...F 2 Using a Client Computer Which Has a CD Drive This page is intentionally left blank...
Страница 320: ...G 4 Product Configuration Record Table This page is intentionally left blank...

