background image

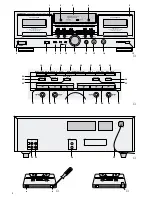
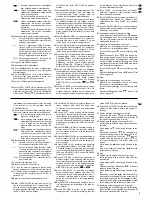
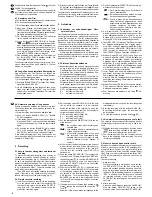
Bitte klappen Sie die Seite 3 heraus. Sie sehen
dann immer die beschriebenen Bedienelemente
und Anschlüsse.

Inhalt

Seite

1

Hinweise für den sicheren Gebrauch . . . . 4

2

Übersicht der Bedienelemente und
Anschlüsse
 . . . . . . . . . . . . . . . . . . . . . . . . . 4

3

Gerät anschließen  . . . . . . . . . . . . . . . . . . . 6

4

Wiedergabe . . . . . . . . . . . . . . . . . . . . . . . . . 6

4.1

Welche Kassetten sind geeignet?  . . . . . . . . 6

4.2

Ein- und Ausschalten  . . . . . . . . . . . . . . . . . . 6

4.3

Kassette abspielen . . . . . . . . . . . . . . . . . . . . 6

4.4

Vor- und Rücklauf / mit automatischem
Start der Wiedergabe . . . . . . . . . . . . . . . . . . 7

4.5

Titel anwählen  . . . . . . . . . . . . . . . . . . . . . . . 7

4.6

Wiederholtes Abspielen eines Titels  . . . . . . 7

4.7

Anspielen aller Titel  . . . . . . . . . . . . . . . . . . . 8

4.8

Lange Pausen automatisch überspringen  . . 8

5

Aufnahme  . . . . . . . . . . . . . . . . . . . . . . . . . . 8

5.1

Kassetten vor unbeabsichtigtem 
Überspielen sichern  . . . . . . . . . . . . . . . . . . . 8

5.2

Einfache Kassettenaufnahme  . . . . . . . . . . . 8

5.3

Neustart der Aufnahme bei einem Fehler  . . 9

5.4

Nach einem Titel eine 4-Sekunden-Pause 
einfügen  . . . . . . . . . . . . . . . . . . . . . . . . . . . . 9

5.5

Parallelaufnahme  . . . . . . . . . . . . . . . . . . . . . 9

5.6

Kassette kopieren (Dubbing)  . . . . . . . . . . . . 9

5.7

CD-Spieler startet Kassettenaufnahme  . . .10 

5.8

Automatische CD-Aufnahme auf Kassette  .10 

6

Betrieb mit einer Schaltuhr oder über 
den Timer des Receivers DSR-2000 
 . . . . 11

7

Pflege  . . . . . . . . . . . . . . . . . . . . . . . . . . . . 11

7.1

Richtige Lagerung von Kassetten  . . . . . . . 11

7.2

Reinigung von Tonkopf und Bandführung  . 11

7.3

Tonkopf entmagnetisieren  . . . . . . . . . . . . . 11

8

Beseitigung von Störungen  . . . . . . . . . . 11

9

Technische Daten  . . . . . . . . . . . . . . . . . . .13 

Das Dolby-Rauschunterdrückungssystem wurde
unter der Lizenz von Dolby Laboratories Licensing
Corporation hergestellt. „DOLBY“ und das Doppel-
D-Symbol 

sind Warenzeichen der Dolby Labora-

tories Licensing Corporation.

1

Hinweise für den sicheren Gebrauch

Dieses Gerät entspricht der EU-Richtlinie Nr.
89/336/EWG für elektromagnetische Verträglichkeit.

Das Gerät wird mit lebensgefährlicher Netzspan-
nung (230 V~) versorgt. Nehmen Sie deshalb nie-
mals selbst Eingriffe im Gerät vor. Durch unsach-
gemäßes Vorgehen besteht die Gefahr eines
elektrischen Schlages. Außerdem erlischt beim
Öffnen des Gerätes jeglicher Garantieanspruch.

Beachten Sie für den Betrieb auch unbedingt die fol-
genden Punkte:

Das Gerät ist nur zur Verwendung in Räumen ge-
eignet.

Wenn das Gerät von einem kühlen Ort in einem
warmen Raum gestellt wird, entsteht Kondensati-
onsfeuchtigkeit am Gerät. Das beeinträchtigt die
Funktion. Darum das Gerät erst in Betrieb neh-
men, wenn es die gleiche Temperatur hat wie die
Umgebungsluft.

Betreiben Sie das Gerät nur bei Temperaturen
über 5°C.

Schützen Sie das Gerät vor Hitze, Feuchtigkeit,
Staub und direktem Sonnenlicht.

Betreiben Sie das Gerät nicht in der Nähe von Ob-
jekten, die ein Magnetfeld ausstrahlen, z. B. Ma-
gnete, Motoren, Lautsprecher, Fernsehgeräte usw.

Das Gerät nicht in Betrieb nehmen und sofort den
Netzstecker ziehen, wenn:
1. sichtbare Schäden am Gerät oder an der Netz-
anschlußleitung vorhanden sind,
2. nach einem Sturz oder ähnlichem der Verdacht
auf einen Defekt besteht,
3. Funktionsstörungen auftreten.
Das Gerät in jedem Fall zur Reparatur in eine

Fachwerkstatt geben.

Eine beschädigte Netzanschlußleitung darf nur
durch den Hersteller oder eine autorisierte Fach-
werkstatt ersetzt werden.

Den Netzstecker nie an der Zuleitung aus der
Steckdose ziehen.

Wird das Gerät zweckentfremdet, falsch bedient
oder nicht fachgerecht repariert, kann für eventu-
elle Schäden keine Haftung übernommen werden.

Zum Reinigen des Gehäuses nur ein trockenes
Staubtuch verwenden, auf keinen Fall Chemika-
lien oder Wasser.

2

Übersicht der Bedienelemente und
Anschlüsse

2.1 Frontseite und Fernbedienung

Kassettenfach für Laufwerk 1

Rückstelltaste des Zählwerks für Laufwerk 1 auf

„0000“

Display mit Pegelanzeige

Rückstelltaste des Zählwerks für Laufwerk 2 auf

„0000“

Kassettenfach für Laufwerk 2

Ein-/Ausschalter

Taste zum Öffnen des Kassettenfachs 1

Schiebeschalter für den Timer, nur in Verbindung

mit dem MONACOR-Receiver DSR-2000:
OFF = Timer ausgeschaltet
REC = Timer schaltet auf Aufnahme
PLAY = Timer schaltet auf Wiedergabe

VORSICHT: Steht der Schalter auf REC oder
PLAY, startet sofort eine Aufnahme bzw. die Wie-
dergabe, wenn der Recorder mit dem Ein-/ Aus-
schalter (6) in Betrieb genommen wird!

Wahlschalter für das automatische Aufnehmen

oder Abspielen beider Kassettenseiten bzw. bei-
der Laufwerke:

Please unfold page 3. Then you can always see
the operating elements and connections de-
scribed.

Contents

Page

1

Safety notes  . . . . . . . . . . . . . . . . . . . . . . . . 4

2

Operating elements and connections  . . . 4

3

Connection  . . . . . . . . . . . . . . . . . . . . . . . . . 6

4

Replay  . . . . . . . . . . . . . . . . . . . . . . . . . . . . . 6

4.1

Which cassettes are suitable?  . . . . . . . . . . . 6

4.2

Switching on and off . . . . . . . . . . . . . . . . . . . 6

4.3

Playing a cassette  . . . . . . . . . . . . . . . . . . . . 6

4.4

Rewinding the cassette forwards or back-
wards/with automatic start of the replay  . . . 7

4.5

Select title  . . . . . . . . . . . . . . . . . . . . . . . . . . 7

4.6

Repeated replay of a title  . . . . . . . . . . . . . . . 7

4.7

Short monitoring of all titles  . . . . . . . . . . . . . 7

4.8

Automatic skipping of long pauses  . . . . . . . 8

5

Recording  . . . . . . . . . . . . . . . . . . . . . . . . . . 8

5.1

Secure cassette against unintentional dub-
bing  . . . . . . . . . . . . . . . . . . . . . . . . . . . . . . . 8

5.2

Simple cassette recording  . . . . . . . . . . . . . . 8

5.3

New start of the recording in case of a fault . 8

5.4

Insert a 4-second pause after a title . . . . . . . 8

5.5

Parallel recording  . . . . . . . . . . . . . . . . . . . . . 9

5.6

Cassette dubbing  . . . . . . . . . . . . . . . . . . . . . 9

5.7

CD player starts cassette recording . . . . . . . 9

5.8

Automatic CD recording on cassette  . . . . . 10

6

Operation with a switch clock or via the
timer of the receiver DSR-2000
 . . . . . . . . 10

7

Care  . . . . . . . . . . . . . . . . . . . . . . . . . . . . . . 11

7.1

Correct storing of cassettes  . . . . . . . . . . . . 11

7.2

Cleaning of sound head and tape guidance 11

7.3

Demagnetize sound head  . . . . . . . . . . . . . 11

8

Troubleshooting  . . . . . . . . . . . . . . . . . . . . 11

9

Specifications . . . . . . . . . . . . . . . . . . . . . . 12

The Dolby noise reduction system has been manu-
factured under license of Dolby Laboratories Licens-
ing Corporation. “DOLBY”, and the double symbole

are trade-marks of Dolby Laboratories Licensing

Corporation.

1

Safety Notes

This appliance corresponds to the EC Directives No.
89/336/EWG for electromagnetic compatibility.

This unit uses lethally high voltage (230 V~). To
prevent a shock hazard do not open the cabinet.
Leave servicing to authorized skilled personnel
only. Any guarantee claim expires if the unit has
been opened.

For the operation also watch in any case the follow-
ing items:

The unit is only suitable for indoor use.

If the unit is placed from a cool place to a warm
room, condensating humidity comes into being.
This impairs the function. Therefore only set the
unit into operation if it has the same temperature
as the ambient air.

Only operate the unit with temperatures above 5°C.

Protect the unit from heat, humidity, dust, and di-
rect sun radiation.

Do not operate the unit near objects radiating a
magnet field, e. g. magnets, motors, speakers, TV
sets, etc.

Do not set the unit into operation and immediately
take the mains plug out of the mains socket if:
1. damage at the unit or mains cable can be seen.
2. a defect might have occurred after a drop or
similar accident.
3. there are malfunctions.
The unit must in any case be repaired by author-
ized skilled personnel.

A damaged mains cable must only be repaired by
the manufacturer or authorized skilled personnel.

Never pull the mains plug out of the mains socket
by means of the mains cable.

4

GB

D

A

CH

If the unit is used for purposes other than originally
intended, if it is operated in the wrong way or not
repaired by authorized skilled personnel, there is
no liability for possible damage.

For the cleaning of the housing only use a dry cloth
for dust removing, by no means chemicals or water.

Important for U. K. Customers!
The wires in this mains lead are coloured in ac-
cordance with the following code:
blue = neutral
brown = live
As the colours of the wires in the mains lead of this
appliance may not correspond with the coloured
markings identifying the terminals in your plug,
proceed as follows:
1. The wire which is coloured blue must be con-
nected to the terminal in the plug which is marked
with the letter or coloured black.
2. The wire which is coloured brown must be con-
nected to the terminal which is marked with the let-
ter or coloured red.

2

Operating Elements and Connections

2.1 Front panel and remote control

Cassette compartment for deck 1

Reset button of the counter indicator for deck 1 to

"0000"

Display with level indication

Reset button of the counter indicator for deck 2 to

"0000"

Cassette compartment for deck 2

POWER switch

Button to open the cassette compartment 1

Sliding switch for the timer, only in connection

with the MONACOR receiver DSR-2000:
OFF = timer is switched off
REC = timer is prepared to switch to recording
PLAY = timer is prepared to switch to replay

CAUTION: If the switch is set to REC or PLAY,

Содержание TDD-2000

Страница 1: ...nual Mode d emploi Istruzioni per l uso Gebruiksaanwijzing Handleiding Manual de instrucciones Manual de instru es Brugsanvisning Bruksanvisning K ytt ohje TDD 2000 Best Nr 21 0070 Stereo Doppel Casse...

Страница 2: ...lijkheden leren kennen Door deze instructies op te volgen zal een slechte werking vermeden worden en zal een eventueel letsel aan uzelf en schade aan uw toestel tengevolge van onzorgvul dig gebruik wo...

Страница 3: ...RECORD PAUSE EJECT IC LOGIC TRANSPORT CONTROL REC PLAY 2 HIGH SPEED DUBBING MIC PHONES AUTO NOR DUBBING HIGH CARS PARALLEL REC BALANCE L R MIN MAX DOLBY NR B OFF C REC LEVEL DOLBY B C NR HX PRO dB 30...

Страница 4: ...ten bzw bei der Laufwerke Please unfold page 3 Then you can always see the operating elements and connections de scribed Contents Page 1 Safety notes 4 2 Operating elements and connections 4 3 Connect...

Страница 5: ...d twice By pushing the button several times always one title further back is rewound 31 Replaying with playing direction to the right By pushing the button again while replaying the actual title can b...

Страница 6: ...stopped push button 6 To remove the cassette push the button EJECT 7 resp 15 but only in case the cassette has been stopped 6 GB D A CH Bei der Wiedergabe mit Laufrichtung nach links Beim Dr cken der...

Страница 7: ...end oft der gew hlten Anzahl Die 4 4 Rewinding the cassette forwards or back wards with automatic start of the replay After stopping the cassette with the button the tape can be rewound forwards and b...

Страница 8: ...starten Durch erneutes Dr cken dieser Taste kann die Aufnahme unterbrochen werden 9 Zum Beenden der Aufnahme die Taste 29 dr cken 4 8 Automatic skipping of long pauses If there are pauses between the...

Страница 9: ...mekassette k rzer als die der zu kopieren den Kassetten Abb 6 fehlen nat rlich die letz ten Titel auf jeder Seite Ist die Spieldauer der Aufnahmekassette l nger Abb 7 befindet sich am Ende jeder Seite...

Страница 10: ...th the button resp Attention If the button is pushed which corre sponds to the displayed direction the recording starts immediately 6 Stop the CD player 7 Switch off the recording stand by at the reco...

Страница 11: ...assette ist unbespielt Bespielte Kassette einlegen 8 2 Band l uft nicht beim Dr cken einer der Tasten f r Wiedergabe oder Umspulen 1 Kassettenklappe nicht richtig geschlossen Klappe richtig schlie en...

Страница 12: ...auf Position B oder C stellen 4 Tonkopf ist magnetisiert Tonkopf entmagnetisieren siehe Kapitel 7 3 Tonkopf entmagnetisieren 8 11 Ton vibriert 1 Antriebswelle und oder Andruckrolle sind ver schmutzt...

Страница 13: ...20 16 000 Hz 3 dB Reineisenband 20 16 000 Hz 3 dB Klirrfaktor 0 6 St rabstand Reineisenband mit Dolby C 71 dB mit Dolby B 61 dB ohne Dolby 53 dB Gleichlaufschwankungen 0 08 WRMS 0 22 DIN Mikro Eingang...

Страница 14: ...pour lire ou enregis trer automatiquement les deux faces d une cas sette les deux lecteurs l appareil s arr te apr s la lecture enre gistrement d une face Vi preghiamo di aprire completamente la pagi...

Страница 15: ...ses RCA pour les entr es audio Enregistre ment Droite Gauche il recorder si ferma dopo la riprodu zione registrazione di un lato della cas setta durante la riproduzione i due lati della cassetta saran...

Страница 16: ...r t 34 Prese jack 3 5 mm per il pilotaggio degli appa recchi facenti parte del sistema 35 Collegamento rete 230 V 50 Hz 3 Collegare l apparecchio 1 Collegare le prese audio d uscita PLAY 33 con i rela...

Страница 17: ...e a destra avvolgimento indietro avvolgimento avanti Nel caso di riproduzione a sinistra avvolgimento avanti avvolgimento indietro Se dopo l avvolgimento la riproduzione deve partire automaticamente d...

Страница 18: ...EC MUTE 23 la pause est ins r e Une loce porta il nastro all inizio del prossimo titolo per riavviare quindi la riproduzione 4 Premendo il tasto BLANK SCAN una seconda volta o azionando i tasti 29 o P...

Страница 19: ...trazione deve iniziare 2 Portare il selettore DOLBY NR 10 nella posi zione desiderata vedere capitolo 5 2 Registra zione semplice 3 Portare il selettore DIRECTION 9 nella posi zione desiderata il regi...

Страница 20: ...ettre le vo lume de l amplificateur sur le minimum alla direzione indicata la registrazione parte im mediatamente 6 Fermare il lettore CD 7 Sul registratore disattivare l attesa di registra zione con...

Страница 21: ...ecture est sale Nettoyez la voir chapitre 7 2 vicino ad apparecchi elettrici altoparlanti ed oggetti magnetici 7 2 Pulizia delle testine e delle guide nastro Ogni nastro di una cassetta perde delle pa...

Страница 22: ...ur e de rembobinage C 60 110 secondes environ Bande passante bande normale 20 15 000 Hz 3 dB bande CrO2 20 16 000 Hz 3 dB bande fer 20 16 000 Hz 3 dB Taux de distorsion 0 6 Rapport signal sur bruit ba...

Страница 23: ...upresi n de ruidos ha sido rea lizado con la licencia de Dolby Laboratories Licens ing Corporation DOLBY y el s mbolo de doble D son s mbolos registrados por Dolby Laborato ries Licensing Corporation...

Страница 24: ...te selecteren moet de toets tweemaal ingedrukt worden Door de toets verschillende keren in te drukken wordt telkens een track verder teruggespoeld 31 Afspelen met afspeelrichting naar rechts Door de...

Страница 25: ...worden Het display toont steeds de overeenkomstige richting 5 Wenst men het afspelen te stoppen druk dan op de toets plificador Respetar los c digos de colores de los conectores rojo canal derecho bla...

Страница 26: ...male weergave van het andere deck Wenst u ook hier een korte voorbeluistering van de tracks druk dan opnieuw op de INTRO CHECK toets puede mover en un sentido o otro 20 t tulos como m ximo Para utiliz...

Страница 27: ...oofd stuk 4 5 Bij eigen opnames kunt u met de REC MUTE toets 23 automatisch een pauze van 4 se conden inlassen 5 2 Grabaci n 1 Poner el cassette rebobinarlo al principio del lugar donde desee empezar...

Страница 28: ...G toetsen NOR toets 19 voor opname met normale snel heid aan te raden voor opnames met een hoge Replay deck 1 Recording deck 2 rewinding forward page 1 page 2 page 1 page 2 Stop Recording deck 2 Repla...

Страница 29: ...of twee cassettes in het compartiment Bij twee cassettes wordt steeds eerst deck 2 op gestart De lege spoel van de cassette moet zich aan de rechterzijde bevinden aangezien steeds mente regul ndose el...

Страница 30: ...n voor de andere richting of draai de cassette om 8 3 De functies trackkeuze herhaling van een track korte voorafluistering van een track en overslaan van lange pauzes werken niet correct 1 Tussen de...

Страница 31: ...eens volledig vooruit en achteruit te spoelen 3 De band is beschadigd Gebruik een andere cassette 8 12 De opname of het afspelen start onmiddel lijk na het inschakelen 1 De TIMER schakelaar 8 staat in...

Страница 32: ...igst side 3 ud De kan nu hele tiden se de beskrevne betjeningsfunktioner og tilslutninger Indholdsfortegnelse Side 1 Gode r d om sikker brug 32 2 Oversigt over betjeningselementer og tilslutninger 32...

Страница 33: ...a a direita Carregando na tecla novamente durante a reprodu o o t tulo em leitura pode ser repetido tantas vezes quantas se carregar nesta tecla m x 8 vezes 2 2 Painel Traseiro 32 Jack para as entrada...

Страница 34: ...ntido com as teclas ou 3 Tilslutning af apparatet 1 Forbind udgangsb sningerne PLAY 33 via phonokablet med den tilsvarende indgang TAPE PLAY p receiver eller forst rker Bem rk far vekoden p ledning og...

Страница 35: ...o prima a tecla BLANK SCAN 17 no mostrador aparece BLANK SCAN Bem rk Ved ber ring af knapperne eller under afspilningen spoles tilbage til numme rets start henholdsvis frem til den n ste titel se n st...

Страница 36: ...5 1 Sikring af kassetter mod utilsigtet overspilning For at hindre kassetter med egne optagelser i at blive overspillet eller slettet ved en fejltagelse skal tap pene a og b br kkes af billede 4 Ved k...

Страница 37: ...en der skal optages 5 Skift til optagestilling med RECORD knappen 25 p l bev rk 1 eller 2 Indstil indspilningsniveauet med REC LEVEL knappen 11 og balancen med BALANCE knappen 12 6 Sl optagestillingen...

Страница 38: ...o nummer Samtidig skifter optageren til optagestil ling 9 Optagelsen kan afbrydes med knappen p CD afspilleren efter nogle sekunder skifter opta geren til stand by og kan altid forts ttes igen Optage...

Страница 39: ...l Pare a grava o rode o controlo de n vel REC LEVEL 11 de forma a que as passagens de maior volume s acendam no indicador o seg mento 0 dB Renseb ndet skal blot il gges som en almindelig kassette Here...

Страница 40: ...undos Resposta de Frequ ncia Fita Normal 20 a 15 000 Hz 3 dB Fita de Cr mio 20 a 16 000 Hz 3 dB Fita Metal 20 a 16 000 Hz 3 dB Distor o 0 6 Rela o Sinal Ru do com Fita de Metal Com DOLBY C 71 dB Com D...

Страница 41: ...nt jen sijainnit Sis lt Sivu 1 Turvallisuusohjeet 41 2 Osat ja liit nn t 41 3 Kytkent 43 4 Soitto 43 4 1 Mitk kasetit ovat sopivia 43 4 2 Virran kytkeminen 43 4 3 Kasettien soitto 43 4 4 Kelaus eteenp...

Страница 42: ...und men risken f r h rselskada best r trots det Var d rf r f rsiktig vid lyssning med h rlurar kasetin molemmat puolet k ytet n per kk in yhden kerran soitossa nauhuri soittaa kasetin molem mat puolet...

Страница 43: ...ader dis comix och d rf r inte har pauser mellan sp ren 4 6 Repetering av spelat sp r Om ett sp r skall spelas flera g nger tryck p re spektive playknapp s m nga ggr som sp ret skall repeteras Max 8 g...

Страница 44: ...r att s kfunktionen Intro check resp spolning till n sta f reg ende sp r skall fungera Se ven tekniskt information i kapitlet v lja sp r Jos painat kelausn pp int kahdesti nauha kelau tuu koko matkan...

Страница 45: ...tista suojaliuskat a ja b kuva 4 Myynniss olevat nauhoitetut kasetit on yleens jo suojattu valmistajan toimesta Kuvassa 4 suojaliuska b suojaa puolta jonka etiketti on n kyviss t ss tapauksessa 1 puol...

Страница 46: ...avspelning som v ckning avses 9 St ll in nskad tid f r start p recivern alternativt den yttre timern St ng av recivern alt St ll timern till automatisk funktion N r inst lld tid n s startar in avspeln...

Страница 47: ...oitton pp int koska t ll in nitys alkaa v lit t m sti 6 Pys yt CD soitin soittimen omalla STOP n pp imell 7 Kytke nityksen valmiustila pois nauhurista n pp imell 29 ja paina RECORD n pp int 25 uudelle...

Страница 48: ...taan l pi jolloin kasetti puhdistaa nip n ja nauhanohjaimen automaattisesti 7 3 nip n demagnetointi nip tulee v ist m tt magneettiseksi jonkin ajan kuluttua T m my s heikent nenlaatua Siksi puhdistuks...

Страница 49: ...uhdistus 2 Nauha ei ole keloilla oikein Kirist nauha k nt m ll toisesta kelasta ja kelaa kasetti kertaalleen kokonaan eteen ja taakse 3 Nauha on vaurioitunut Vaihda kasetti 8 12 nitys tai soitto alkaa...

Страница 50: ...Copyright by INTER MERCADOR GMBH CO KG Bremen Germany All rights reserved 03 96 02...

Отзывы: