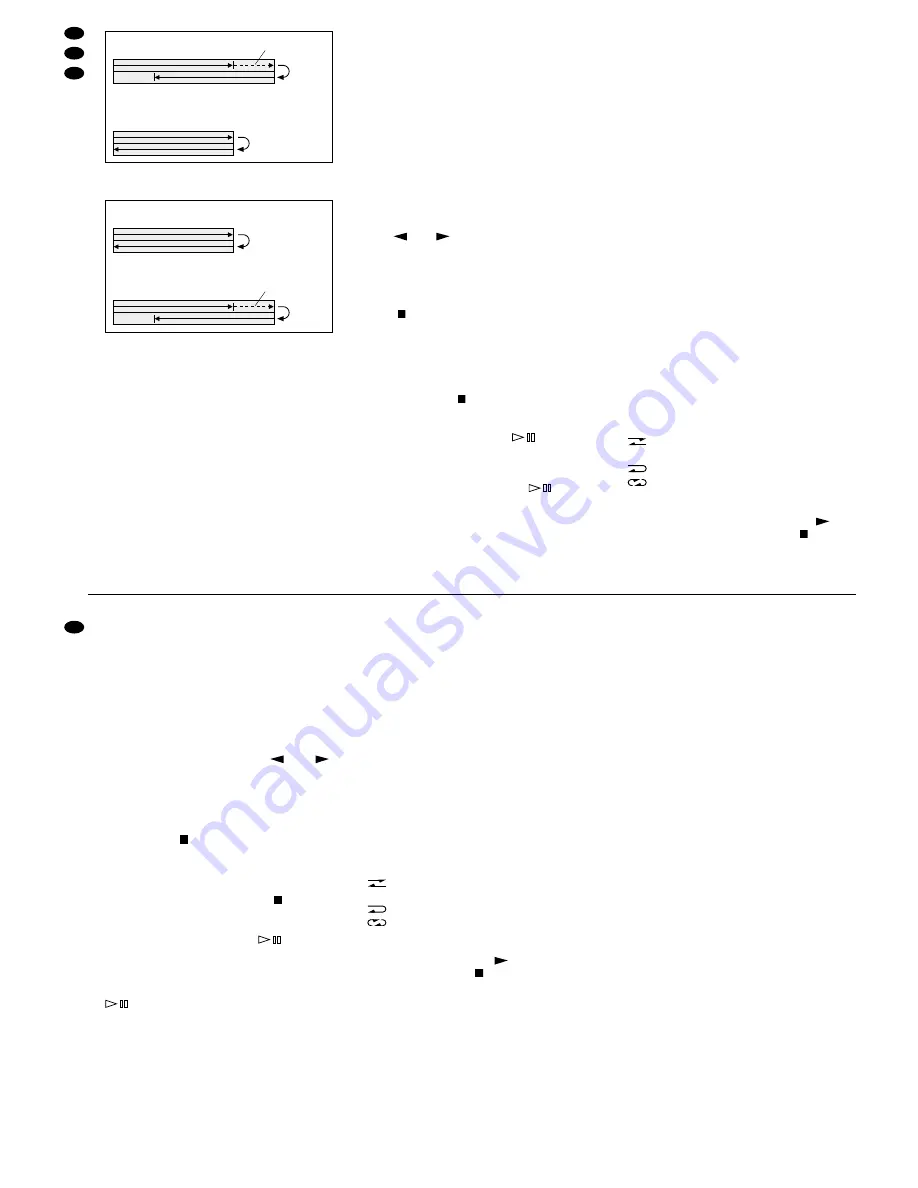
background image

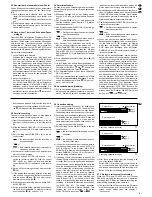
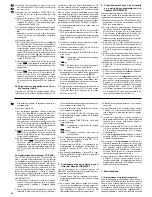
Aufnahmekassette ist kürzer

Aufnahmekassette ist länger

6) Nach diesen Vorbereitungen das Kopieren mit

einer der Tasten DUBBING starten:

Taste NOR (19) für das Kopieren mit normaler
Geschwindigkeit, zu empfehlen bei hochwertigen
Aufnahmen und bei Kassetten mit hohem Aufnah-
mepegel.

Taste HIGH (20) für das Kopieren mit doppelter
Geschwindigkeit.

5.7 CD-Spieler startet Kassettenaufnahme

Beim Betrieb des zum Recorder dazugehörigen 
CD-Spielers CD-2000 und des HiFi-Receivers DSR-
2000 kann durch Starten der CD-Wiedergabe gleich-
zeitig die Kassettenaufnahme automatisch mit ge-
startet werden.

1) Der Recorder, der HiFi-Receiver und der CD-

Spieler müssen miteinander durch die beiliegen-
den Steuerkabel verbunden sein (siehe auch Ka-
pitel 3 „Gerät anschließen“).

2) Kassette(n) einlegen. Sind zwei Kassetten einge-

legt, wird immer mit dem Laufwerk 2 zuerst ge-
startet.

3) Die Schalter DIRECTION (9) und DOLBY NR (10)

in die gewünschte Position schieben (siehe Kapi-
tel 5.2 „Einfache Kassettenaufnahme“).

4) Die Taste RECORD (25) drücken, die CD anspie-

len und den Aufnahmepegel mit dem Regler REC
LEVEL (11) einstellen sowie die Balance für die
Aufnahme mit dem Regler BALANCE (12).

5) Ist im Display eine andere Bandlaufrichtung als

gewünscht angezeigt, die Laufrichtung mit der
Taste bzw. ändern.
Achtung: Wird die Taste gedrückt, die mit der an-
gezeigten Laufrichtung übereinstimmt, startet so-
fort die Aufnahme!

6) Den CD-Spieler stoppen.
7) Am Recorder die Aufnahmebereitschaft mit der

Taste 

(29) ausschalten und die Taste RE-

CORD (25) erneut drücken. Dieser Bedienschritt
ist besonders wichtig. Wird er nicht durchgeführt,
kann die Aufnahme nicht mit dem CD-Spieler zu-
sammen starten!
Es ist auch darauf zu achten, daß am HiFi-Recei-
ver der CD-Spieler angewählt ist. Wenn nicht, am
Recorder die Taste 

(29) drücken, am Receiver

den CD-Spieler anwählen und dann die Taste RE-
CORD (25) betätigen.

8) Am CD-Spieler mit der Taste 

oder durch

Eintippen der gewünschten Titelnummer die Wie-
dergabe starten. Gleichzeitig schaltet der Recor-
der auf Aufnahme.

9) Die Aufnahme kann mit der Taste 

am CD-

Spieler unterbrochen werden (der Recorder
schaltet nach einigen Sekunden auf Aufnahme-
bereitschaft) und auch wieder fortgeführt werden.
Die Aufnahme wird am Ende der CD automatisch
beendet oder durch Drücken der Taste STOP am
CD-Spieler.

5.8 Automatische CD-Aufnahme auf Kassette

(CARS)

Durch CARS (Computer Aided CD Recording
System = computerunterstütztes CD-Aufnahme-
system) kann eine CD-Aufnahme mit automatischer
Pegeleinstellung auf Kassette erfolgen. Dabei wer-
den alle Titel der CD im Schnellauf angespielt und
der optimale Aufnahmepegel eingestellt. Am Kasset-
tenanfang wird eine 8-Sekunden-Pause eingefügt.
Die CD startet dann erneut von Anfang an, und
gleichzeitig beginnt die Aufnahme - alles automa-
tisch! Diese Funktion ist nur in Verbindung mit dem
zum Recorder dazugehörigen MONACOR CD-Spie-
ler CD-2000 und dem MONACOR HiFi-Receiver
DSR-2000 möglich.

1) Der Recorder, der HiFi-Receiver und der CD-

Spieler müssen miteinander durch die beiliegen-
den Steuerkabel verbunden sein (siehe auch Ka-
pitel 3 „Gerät anschließen“).

2) Mit der Taste EDIT auf der Fernbedienung des

CD-Spielers die Editierfunktion zum Auswählen
von Titeln und der Länge der Aufnahmekassette
aufrufen (siehe Bedienungsanleitung des CD-
Spielers).

3) Kassette mit der leeren Spule nach rechts einle-

gen und eventuell an den Bandanfang zurückspu-
len.

4) Den DOLBY NR (10) in die gewünschte Position

schieben (siehe Kapitel 5.2 „Einfache Kassetten-
aufnahme“).

5) Den Schiebeschalter DIRECTION (9) auf die ge-

wünschte Funktion stellen:

= Der Recorder stoppt nach der Aufnahme

einer Kassettenseite.

oder
= Beide Kassettenseiten werden automa-

tisch nacheinander aufgenommen.

6) Im Display muß die Bandlaufrichtung nach rechts

angezeigt sein. Wenn nicht, die Taste 

(31)

drücken und danach sofort die Taste 

(29).

7) Die Taste CARS (21) betätigen. Der automatische

Aufnahmevorgang beginnt. Die Pegeleinstellung

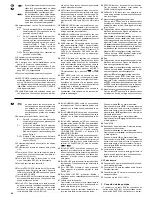
Wiedergabe Laufwerk 1

Aufnahme Laufwerk 2

Vorspulen

Seite 1
Seite 2

Seite 1
Seite 2

Stop

Aufnahme Laufwerk 2

Wiedergabe Laufwerk 1

Vorspulen

Seite 1
Seite 2

Seite 1
Seite 2

Stop

2) Insert cassette(s). If two cassettes are inserted,

always at first deck 2 is started.

3) Slide the switch DIRECTION (9) and DOLBY NR

(10) to the desired position (see chapter 5.2 "Sim-
ple cassette recording").

4) Push the button RECORD (25), shortly start to

play the CD, and adjust the recording level with
the control REC LEVEL (11) as well as the balance
for the recording with the control BALANCE (12).

5) If another tape direction than desired is displayed,

change the direction with the button  

resp.

.

Attention: If the button is pushed which corre-
sponds to the displayed direction, the recording
starts immediately!

6) Stop the CD player.

7) Switch off the recording stand-by at the recorder

with the button 

(29) and push the button RE-

CORD (25) again. This operation step is of spe-
cial importance. If it is not carried out, the record-
ing cannot start together with the CD player!
Also watch that the CD player is selected at the
HiFi receiver. If not, push the button 

(29) at the

recorder, select the CD player at the receiver and
then push the button RECORD (25).

8) Start the replay with the button 

at the CD

player or by inserting the desired title number. At
the same time the recorder is switched to record-
ing mode.

9) The recording can be interrupted with the button

at the CD player (after some seconds the

recorder is switched to recording stand-by) and
also be continued again. The recording is auto-
matically stopped at the end of the CD or by push-
ing the button STOP at the CD player.

5.8 Automatic CD recording on cassette

(CARS)

By CARS (Computer Aided CD Recording System) a
CD can be recorded with automatic level adjustment
on a cassette. Hereby all titles of the CD are shortly
monitored with advance/reverse run. and the opti-
mum recording level is adjusted. At the cassette be-

ginning a 8-second pause is inserted. The CD starts
again from the beginning, and at the same time the
recording starts - a fully automatic function! This
function is only possible in connection with the
MONACOR CD player CD-2000 and the MONACOR
HiFi receiver DSR-2000 matching the recorder.
1) The recorder, the HiFi receiver, and the CD player

must be connected with the enclosed control ca-
bles (also see chapter 3 "Connection").

2) With the button EDIT on the remote control of the

CD player call up the edit function to select titles
and the length of the recording cassette (see in-
struction manual of the CD player).

3) Insert cassette with the empty bobbin to the right

and rewind back to the tape beginning, if neces-
sary.

4) Slide the DOLBY NR (10) to the desired position

(see chapter 5.2 "Simple cassette recording").

5) Set the sliding switch DIRECTION (9) to the de-

sired function:

= The recorder stops after recording of one

cassette side

or
= Both cassette sides are automatically re-

corded one after the other.

6) The display must show the tape direction to the

right. If not, push the button 

(31) and after that

immediately the button 

(29).

7) Push the button CARS (21). The automatic

recording starts. Thereby the level adjustment
can take up to 3

1

/

2

minutes according to the CD.

8) After the recording the CD player and the re-

corder are switched to Stop. If it is desired to stop
before, push the button STOP at the CD player.

6

Operation with a Switch Clock or via
the Timer of the Receiver DSR-2000

In connection with a switch clock or with the HiFi re-
ceiver DSR-2000 matching the recorder the replay or
a recording can automatically be started at a time
selected before.

1) Connect the mains plug of the recorder in the

switch clock resp. in the power supply jack at the
rear panel of the receiver DSR-2000.

2) In case of an operation with a switch clock also all

other units (e.g. amplifier, receiver) must get their
power supply via the switch clock. The switch
clock must at first be set to ON for the pre-adjust-
ment of the HiFi system (independent of the ad-
justed switching time).

3) Switch on all necessary units with their power

switches.

4) If at the HiFi system also the MONACOR CD

player CD-2000 is connected, no CD must be in
the CD player. Otherwise with switching on the
timer the replay starts from the CD player resp.
the CD is recorded on the cassette.

5) Insert cassette(s). If two cassettes are inserted, at

first always deck 2 is started. The empty bobbin of
the cassette must be at the right side because it is
always started with direction to the right.

6) Slide the switch DIRECTION (9) and DOLBY NR

(10) to the desired position (see chapter 4.3
"Playing a cassette" resp. 5.2 "Simple cassette
recording").

7) For an automatic replay slide the switch TIMER

(8) in position PLAY. Adjust the desired volume at
the receiver.

8) For an automatic recording adjust the station at

the tuner/receiver from which it is to be recorded.
Push the button RECORD (25) at the recorder.
Adjust with the control REC LEVEL (11) the level
and with the control BALANCE (12) the balance
of the recording. Slide the switch TIMER (8) in po-
sition REC. Then the volume of the amplifier can
be set to minimum.

9) Select the switching time at the receiver DSR-

2000 resp. at the switch clock. Switch off the re-
ceiver resp. set the switch clock to automatic
operation. As soon as the selected time is rea-
ched, the HiFi system is switched on and the re-
play resp. recording is started.

10

GB

D

A

CH

Содержание TDD-2000

Страница 1: ...nual Mode d emploi Istruzioni per l uso Gebruiksaanwijzing Handleiding Manual de instrucciones Manual de instru es Brugsanvisning Bruksanvisning K ytt ohje TDD 2000 Best Nr 21 0070 Stereo Doppel Casse...

Страница 2: ...lijkheden leren kennen Door deze instructies op te volgen zal een slechte werking vermeden worden en zal een eventueel letsel aan uzelf en schade aan uw toestel tengevolge van onzorgvul dig gebruik wo...

Страница 3: ...RECORD PAUSE EJECT IC LOGIC TRANSPORT CONTROL REC PLAY 2 HIGH SPEED DUBBING MIC PHONES AUTO NOR DUBBING HIGH CARS PARALLEL REC BALANCE L R MIN MAX DOLBY NR B OFF C REC LEVEL DOLBY B C NR HX PRO dB 30...

Страница 4: ...ten bzw bei der Laufwerke Please unfold page 3 Then you can always see the operating elements and connections de scribed Contents Page 1 Safety notes 4 2 Operating elements and connections 4 3 Connect...

Страница 5: ...d twice By pushing the button several times always one title further back is rewound 31 Replaying with playing direction to the right By pushing the button again while replaying the actual title can b...

Страница 6: ...stopped push button 6 To remove the cassette push the button EJECT 7 resp 15 but only in case the cassette has been stopped 6 GB D A CH Bei der Wiedergabe mit Laufrichtung nach links Beim Dr cken der...

Страница 7: ...end oft der gew hlten Anzahl Die 4 4 Rewinding the cassette forwards or back wards with automatic start of the replay After stopping the cassette with the button the tape can be rewound forwards and b...

Страница 8: ...starten Durch erneutes Dr cken dieser Taste kann die Aufnahme unterbrochen werden 9 Zum Beenden der Aufnahme die Taste 29 dr cken 4 8 Automatic skipping of long pauses If there are pauses between the...

Страница 9: ...mekassette k rzer als die der zu kopieren den Kassetten Abb 6 fehlen nat rlich die letz ten Titel auf jeder Seite Ist die Spieldauer der Aufnahmekassette l nger Abb 7 befindet sich am Ende jeder Seite...

Страница 10: ...th the button resp Attention If the button is pushed which corre sponds to the displayed direction the recording starts immediately 6 Stop the CD player 7 Switch off the recording stand by at the reco...

Страница 11: ...assette ist unbespielt Bespielte Kassette einlegen 8 2 Band l uft nicht beim Dr cken einer der Tasten f r Wiedergabe oder Umspulen 1 Kassettenklappe nicht richtig geschlossen Klappe richtig schlie en...

Страница 12: ...auf Position B oder C stellen 4 Tonkopf ist magnetisiert Tonkopf entmagnetisieren siehe Kapitel 7 3 Tonkopf entmagnetisieren 8 11 Ton vibriert 1 Antriebswelle und oder Andruckrolle sind ver schmutzt...

Страница 13: ...20 16 000 Hz 3 dB Reineisenband 20 16 000 Hz 3 dB Klirrfaktor 0 6 St rabstand Reineisenband mit Dolby C 71 dB mit Dolby B 61 dB ohne Dolby 53 dB Gleichlaufschwankungen 0 08 WRMS 0 22 DIN Mikro Eingang...

Страница 14: ...pour lire ou enregis trer automatiquement les deux faces d une cas sette les deux lecteurs l appareil s arr te apr s la lecture enre gistrement d une face Vi preghiamo di aprire completamente la pagi...

Страница 15: ...ses RCA pour les entr es audio Enregistre ment Droite Gauche il recorder si ferma dopo la riprodu zione registrazione di un lato della cas setta durante la riproduzione i due lati della cassetta saran...

Страница 16: ...r t 34 Prese jack 3 5 mm per il pilotaggio degli appa recchi facenti parte del sistema 35 Collegamento rete 230 V 50 Hz 3 Collegare l apparecchio 1 Collegare le prese audio d uscita PLAY 33 con i rela...

Страница 17: ...e a destra avvolgimento indietro avvolgimento avanti Nel caso di riproduzione a sinistra avvolgimento avanti avvolgimento indietro Se dopo l avvolgimento la riproduzione deve partire automaticamente d...

Страница 18: ...EC MUTE 23 la pause est ins r e Une loce porta il nastro all inizio del prossimo titolo per riavviare quindi la riproduzione 4 Premendo il tasto BLANK SCAN una seconda volta o azionando i tasti 29 o P...

Страница 19: ...trazione deve iniziare 2 Portare il selettore DOLBY NR 10 nella posi zione desiderata vedere capitolo 5 2 Registra zione semplice 3 Portare il selettore DIRECTION 9 nella posi zione desiderata il regi...

Страница 20: ...ettre le vo lume de l amplificateur sur le minimum alla direzione indicata la registrazione parte im mediatamente 6 Fermare il lettore CD 7 Sul registratore disattivare l attesa di registra zione con...

Страница 21: ...ecture est sale Nettoyez la voir chapitre 7 2 vicino ad apparecchi elettrici altoparlanti ed oggetti magnetici 7 2 Pulizia delle testine e delle guide nastro Ogni nastro di una cassetta perde delle pa...

Страница 22: ...ur e de rembobinage C 60 110 secondes environ Bande passante bande normale 20 15 000 Hz 3 dB bande CrO2 20 16 000 Hz 3 dB bande fer 20 16 000 Hz 3 dB Taux de distorsion 0 6 Rapport signal sur bruit ba...

Страница 23: ...upresi n de ruidos ha sido rea lizado con la licencia de Dolby Laboratories Licens ing Corporation DOLBY y el s mbolo de doble D son s mbolos registrados por Dolby Laborato ries Licensing Corporation...

Страница 24: ...te selecteren moet de toets tweemaal ingedrukt worden Door de toets verschillende keren in te drukken wordt telkens een track verder teruggespoeld 31 Afspelen met afspeelrichting naar rechts Door de...

Страница 25: ...worden Het display toont steeds de overeenkomstige richting 5 Wenst men het afspelen te stoppen druk dan op de toets plificador Respetar los c digos de colores de los conectores rojo canal derecho bla...

Страница 26: ...male weergave van het andere deck Wenst u ook hier een korte voorbeluistering van de tracks druk dan opnieuw op de INTRO CHECK toets puede mover en un sentido o otro 20 t tulos como m ximo Para utiliz...

Страница 27: ...oofd stuk 4 5 Bij eigen opnames kunt u met de REC MUTE toets 23 automatisch een pauze van 4 se conden inlassen 5 2 Grabaci n 1 Poner el cassette rebobinarlo al principio del lugar donde desee empezar...

Страница 28: ...G toetsen NOR toets 19 voor opname met normale snel heid aan te raden voor opnames met een hoge Replay deck 1 Recording deck 2 rewinding forward page 1 page 2 page 1 page 2 Stop Recording deck 2 Repla...

Страница 29: ...of twee cassettes in het compartiment Bij twee cassettes wordt steeds eerst deck 2 op gestart De lege spoel van de cassette moet zich aan de rechterzijde bevinden aangezien steeds mente regul ndose el...

Страница 30: ...n voor de andere richting of draai de cassette om 8 3 De functies trackkeuze herhaling van een track korte voorafluistering van een track en overslaan van lange pauzes werken niet correct 1 Tussen de...

Страница 31: ...eens volledig vooruit en achteruit te spoelen 3 De band is beschadigd Gebruik een andere cassette 8 12 De opname of het afspelen start onmiddel lijk na het inschakelen 1 De TIMER schakelaar 8 staat in...

Страница 32: ...igst side 3 ud De kan nu hele tiden se de beskrevne betjeningsfunktioner og tilslutninger Indholdsfortegnelse Side 1 Gode r d om sikker brug 32 2 Oversigt over betjeningselementer og tilslutninger 32...

Страница 33: ...a a direita Carregando na tecla novamente durante a reprodu o o t tulo em leitura pode ser repetido tantas vezes quantas se carregar nesta tecla m x 8 vezes 2 2 Painel Traseiro 32 Jack para as entrada...

Страница 34: ...ntido com as teclas ou 3 Tilslutning af apparatet 1 Forbind udgangsb sningerne PLAY 33 via phonokablet med den tilsvarende indgang TAPE PLAY p receiver eller forst rker Bem rk far vekoden p ledning og...

Страница 35: ...o prima a tecla BLANK SCAN 17 no mostrador aparece BLANK SCAN Bem rk Ved ber ring af knapperne eller under afspilningen spoles tilbage til numme rets start henholdsvis frem til den n ste titel se n st...

Страница 36: ...5 1 Sikring af kassetter mod utilsigtet overspilning For at hindre kassetter med egne optagelser i at blive overspillet eller slettet ved en fejltagelse skal tap pene a og b br kkes af billede 4 Ved k...

Страница 37: ...en der skal optages 5 Skift til optagestilling med RECORD knappen 25 p l bev rk 1 eller 2 Indstil indspilningsniveauet med REC LEVEL knappen 11 og balancen med BALANCE knappen 12 6 Sl optagestillingen...

Страница 38: ...o nummer Samtidig skifter optageren til optagestil ling 9 Optagelsen kan afbrydes med knappen p CD afspilleren efter nogle sekunder skifter opta geren til stand by og kan altid forts ttes igen Optage...

Страница 39: ...l Pare a grava o rode o controlo de n vel REC LEVEL 11 de forma a que as passagens de maior volume s acendam no indicador o seg mento 0 dB Renseb ndet skal blot il gges som en almindelig kassette Here...

Страница 40: ...undos Resposta de Frequ ncia Fita Normal 20 a 15 000 Hz 3 dB Fita de Cr mio 20 a 16 000 Hz 3 dB Fita Metal 20 a 16 000 Hz 3 dB Distor o 0 6 Rela o Sinal Ru do com Fita de Metal Com DOLBY C 71 dB Com D...

Страница 41: ...nt jen sijainnit Sis lt Sivu 1 Turvallisuusohjeet 41 2 Osat ja liit nn t 41 3 Kytkent 43 4 Soitto 43 4 1 Mitk kasetit ovat sopivia 43 4 2 Virran kytkeminen 43 4 3 Kasettien soitto 43 4 4 Kelaus eteenp...

Страница 42: ...und men risken f r h rselskada best r trots det Var d rf r f rsiktig vid lyssning med h rlurar kasetin molemmat puolet k ytet n per kk in yhden kerran soitossa nauhuri soittaa kasetin molem mat puolet...

Страница 43: ...ader dis comix och d rf r inte har pauser mellan sp ren 4 6 Repetering av spelat sp r Om ett sp r skall spelas flera g nger tryck p re spektive playknapp s m nga ggr som sp ret skall repeteras Max 8 g...

Страница 44: ...r att s kfunktionen Intro check resp spolning till n sta f reg ende sp r skall fungera Se ven tekniskt information i kapitlet v lja sp r Jos painat kelausn pp int kahdesti nauha kelau tuu koko matkan...

Страница 45: ...tista suojaliuskat a ja b kuva 4 Myynniss olevat nauhoitetut kasetit on yleens jo suojattu valmistajan toimesta Kuvassa 4 suojaliuska b suojaa puolta jonka etiketti on n kyviss t ss tapauksessa 1 puol...

Страница 46: ...avspelning som v ckning avses 9 St ll in nskad tid f r start p recivern alternativt den yttre timern St ng av recivern alt St ll timern till automatisk funktion N r inst lld tid n s startar in avspeln...

Страница 47: ...oitton pp int koska t ll in nitys alkaa v lit t m sti 6 Pys yt CD soitin soittimen omalla STOP n pp imell 7 Kytke nityksen valmiustila pois nauhurista n pp imell 29 ja paina RECORD n pp int 25 uudelle...

Страница 48: ...taan l pi jolloin kasetti puhdistaa nip n ja nauhanohjaimen automaattisesti 7 3 nip n demagnetointi nip tulee v ist m tt magneettiseksi jonkin ajan kuluttua T m my s heikent nenlaatua Siksi puhdistuks...

Страница 49: ...uhdistus 2 Nauha ei ole keloilla oikein Kirist nauha k nt m ll toisesta kelasta ja kelaa kasetti kertaalleen kokonaan eteen ja taakse 3 Nauha on vaurioitunut Vaihda kasetti 8 12 nitys tai soitto alkaa...

Страница 50: ...Copyright by INTER MERCADOR GMBH CO KG Bremen Germany All rights reserved 03 96 02...

Отзывы: