background image

10      Introduction 
---------------------------------------------------------------------------------------------------------------------------------------------------------------------


________________________________________________________________________________________________ 

MICROPLEX 

Operator’s Manual SOLID 166E 

Edition 1.1


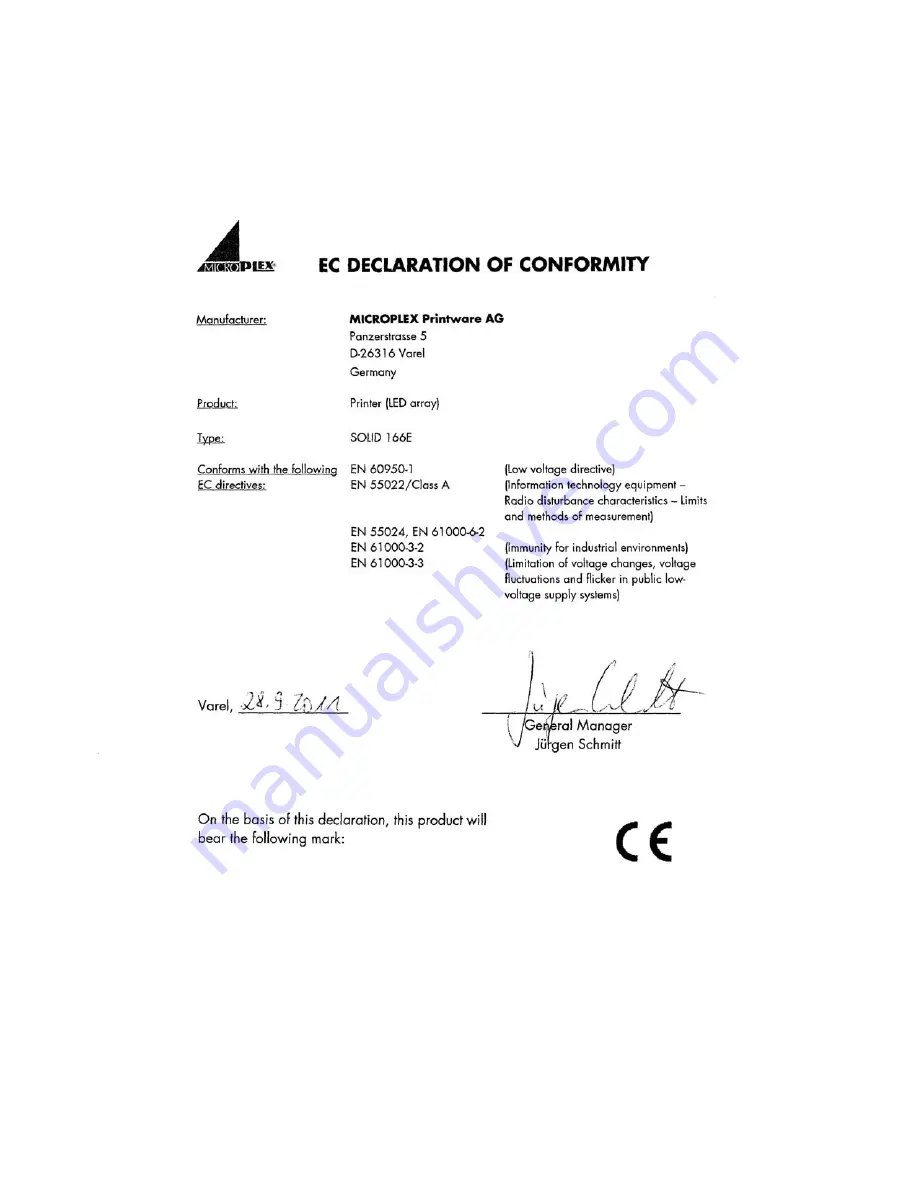
1.3.  CE Conformity 


Содержание SOLID 166E

Страница 1: ...________________________________________________________________________________________________ SOLID 166E Operator s Manual Edition 1 1M...

Страница 2: ...________________________________________________________________________________________________...

Страница 3: ...18 3 Paper Handling 21 3 1 Printer Engine 21 3 2 Stacker 25 3 2 1 Stacker Installation 25 3 2 2 Attaching the Stacker to the Printer 25 3 2 3 Stacker Settings 28 3 2 4 Stacker Panel Functions 30 3 2...

Страница 4: ...n 64 5 11 Stacker Selection 65 5 12 Selecting the Number of Printpages per Page Format Two Up Mode 66 5 13 Print Direction Selection 68 5 14 Data Interface Configuration 69 5 15 Emulation Selection 70...

Страница 5: ...inet 96 6 2 2 Cleaning the Printer Interior 97 6 3 Replacing the Toner Cartridge 103 6 4 Replacing the Waste Toner Bottle 109 7 Troubleshooting 113 7 1 Error during the Print Process 114 7 2 Reduced P...

Страница 6: ...6 Table of Contents ________________________________________________________________________________________________ MICROPLEX Operator s Manual SOLID 166E Edition 1 1...

Страница 7: ...ombination with the straight paper flow enables you to use the most different paper types and label materials with a weight from 64 209 g m 2 wood free paper respectively 64 105 g m 2 wood free labels...

Страница 8: ...tal information e g a text file is transferred from the computer into the printer memory The printer s electronic component the controller combined with the page description language defines the lette...

Страница 9: ...nction of the printer could be reduced or objects could be damaged This symbol refers to important hints and suggestions on using the printer Disregarding these hints might cause problems with the pri...

Страница 10: ...10 Introduction ________________________________________________________________________________________________ MICROPLEX Operator s Manual SOLID 166E Edition 1 1 1 3 CE Conformity...

Страница 11: ...are to be omitted This MICROPLEX product and its consumables are designed and tested according to strict safety standards By heeding the following instructions the user is ensured safe operations Plea...

Страница 12: ...personnel In order to disconnect the printer quickly from the main power in the event of an emergency please note the following For printers connected by a plug the power outlet should be installed ne...

Страница 13: ...e sure the following contents are included 1 MICROPLEX SOLID 166E printer 2 Developer Unit 3 Developer mix powder 4 Toner 5 Photoreceptor Drum 6 Stacker 7 CD containing Operator s Manual SOLID 166E Pr...

Страница 14: ...____ MICROPLEX Operator s Manual SOLID 166E Edition 1 1 2 2 Printer View External Views Exit cover Touch panel Frontend Paper input tractor Stacker Front cover A left Stand cover Front cover B right R...

Страница 15: ...r s Manual SOLID 166E Edition 1 1 Fig 2 2 b View from the paper input side of the printer Fig 2 2 c Stacker paper output side of the printer Paper near end sensor Tractor Upper cover Control Panel of...

Страница 16: ...s Manual SOLID 166E Edition 1 1 Interior of Front Cover Section Fig 2 2 d Components inside the printer front side Transfer transport unit Fuser unit Cleaning unit Main charger Toner cartridge Develop...

Страница 17: ...2 2 e Components inside the printer rear side Drum drive motor Transfer elevator motor No fuse breaker DC power supply Feed motor Toner supply motor Sleeve motor Fuser fin cooling fan MC PCB Mechanism...

Страница 18: ...vironment and Power Standards Fig 2 3 a SOLID 166E Required space plan view The printer s first installation has to be done by a trained service engineer Space required for maintenance service Space r...

Страница 19: ...printer without hindrance Do not expose the printer to shocks or vibrations There must be enough room on all sides of the printer to guarantee necessary ventilation Do not expose the printer to abrup...

Страница 20: ...noise e g generated by big machines Use the printer only within the allowed fluctuation range of 10 for the power voltage Conditional connection for the SOLID 166E Data about the maximum permissible...

Страница 21: ...ter configuration inclusive the settings regarding paper length etc by printing a status sheet see section 5 1 The tractor is located at the right side of the printer compare figure 2 2 a If a large q...

Страница 22: ...int in the direction of the printer Do not stretch the paper excessively and do not allow any slack to avoid incorrect filing By this you can secure that the paper will be positioned right in the opti...

Страница 23: ...tes 5 Place the paper on the tractor pins of the left tractor The paper perforation should be aligned over 4 or 5 tractor pins Now close the green tractor cover plate of this tractor 6 Spread out the...

Страница 24: ...or cover plate and tighten the paper gently by adjusting the width of the tractors To avoid paper jams the paper must not be inserted too lose or too tight 8 Lock the right tractor by using the black...

Страница 25: ...installing or removing the power paper stacker the printer must be adjusted to the proper height and be levelled Failure to do this will damage both the printer and the stacker and will prevent instal...

Страница 26: ...Operator s Manual SOLID 166E Edition 1 1 Figure 3 2 2 a Hooks of the stacker 2 Move the stacker along the side pads see following figure into the lower part of the printer engine Figure 3 2 2 b Schem...

Страница 27: ...____________________________________ ________________________________________________________________________________________________ MICROPLEX Operator s Manual SOLID 166E Edition 1 1 Figure 3 2 2 c...

Страница 28: ...3 2 3 Stacker Settings The stacker has to be adjusted to the right page length According to the paper size loaded to the printer The setting range is 7 up to 14 inches Figure 3 2 3 a Setting the page...

Страница 29: ..._____________________ ________________________________________________________________________________________________ MICROPLEX Operator s Manual SOLID 166E Edition 1 1 2 Raise the elevator table by...

Страница 30: ...the stacker offers the following keys Figure 3 2 4 a Control panel of the stacker FORM FEED Sends a form feed command to the printer EJECT Sends a cut command to the printer Use the EJECT Button to c...

Страница 31: ...section 5 11 2 Load the printer with the media to be printed see section 3 1 3 2 6 Printing and Stacking 1 Turn the printer to ONLINE and send your print job s to the printer The printer will transpo...

Страница 32: ...Figure 3 2 6 b Stacking The more the printer is transporting paper into the stacker the more the elevator table descends I e the table of the stacker is moving down little by little in correlation to...

Страница 33: ..._______ MICROPLEX Operator s Manual SOLID 166E Edition 1 1 3 2 7 Removing the Paper Stack 1 Press the EJECT key to cut the paper or use the FORM FEED key and detach the fanfold paper at its perforatio...

Страница 34: ...g Stacker To ensure proper stacking please note the following As the media exits the printer it has to pass through the two paper guide rollers located at the top rear side of the stacker This may occ...

Страница 35: ...erator s Manual SOLID 166E Edition 1 1 Clearing Paper Jam 1 Use the handle to open the front cover until it stops Now the sustainer hinders the cover to fall down Figure 3 2 8 a Opening the front cove...

Страница 36: ...cover 5 Check if there is any jammed paper inside the stacker compare next figure and remove it Figure 3 2 8 c Underside of the stacker If the paper jam could not be solved by the steps above 6 Check...

Страница 37: ...ition 1 1 Caution Take care of the interface cable between stacker and printer Don t move the stacker too far away from the printer 8 Remove any jammed paper 9 Move the stacker back into the lower par...

Страница 38: ...__________________________________________________________________________________ ________________________________________________________________________________________________ MICROPLEX Operator s...

Страница 39: ...nd any other attached devices are turned off 2 Use a proper interface line to connect the printer to the computer or to attach the printer to the network The printer SOLID 166E is provided with severa...

Страница 40: ...f the printer Fig 4 2 b Print engine power switch Please note In this manual it is presupposed that this print engine power switch is in the ON position As soon as the printer s warm up phase is finis...

Страница 41: ...equipped with a touch panel frontend The touch panel offers you information about the actual state of the device direct command input using the keys When a key is touched the selected item changes the...

Страница 42: ...one form length Bitmap memory remains unchanged A possibly prepared page will not be printed The last print job will be cut at its end and the paper will be moved to the park position The cutting devi...

Страница 43: ...Edition 1 1 PREVIOUS key PLUS key MINUS key NEXT key ENTER key ESCAPE key The Number Block is useful to enter new function values for example the IP address of the printer Touching the OFF button star...

Страница 44: ...r printer functions via the touch panel T e m p o r a r y changes in printer configuration are effective only as long as the printer stays turned on To select such changes temporarily the user must te...

Страница 45: ...as soon as the warm up phase is finished the printer goes into the ON LINE Mode Printer messages are displayed on the touch panel The first line shows the name of the printer The second line serves t...

Страница 46: ...FactoryDefault Page M enu Font N umber Orientation M argin Left fromRight Top fromBottom Engine ImageY Pos Y Direction Print Direct X Direction ONLINE M ode OFFLIN E inInch LineSpacing Symbol Code Tim...

Страница 47: ...LINE key You get automatically into first menu level if the printer is turned OFF LINE with this key These symbols show the ARROW keys By pressing the NEXT key or the PREVIOUS key you can move within...

Страница 48: ...of the selected digit of the function value By pressing the ENTER key the selected function is activated respectively the function values currently displayed are confirmed In case of a multi digit fun...

Страница 49: ...ctively the displayed function is activated The changes are saved temporary This means the changes are saved only until the next printer power off After this you have to decide if you want to save the...

Страница 50: ...____________________________________________________________________________ MICROPLEX Operator s Manual SOLID 166E Edition 1 1 Return to the menu level above Pressing the ESC key takes the user back...

Страница 51: ...how the course necessary in order to activate a certain function First the elements of the diagrams are explained The sequence on the left describes which keys have to be pressed briefly in succession...

Страница 52: ...Touch Panel Frontend Stacker Printer Main switch Fig 4 8 a Main view of the SOLID 166E Alternatively you can use the little OFF button on the touch panel Secondbest prefer the main switch Touching the...

Страница 53: ...ed in the following text the printer is presumed to be switched on and in the ON LINE mode 5 1 Printing the Status Sheet This function generates a status sheet The status sheet contains information ab...

Страница 54: ...itled SERVICE INFORMATION contain hexadecimal coded configuration parameters Printed in plain text Controller version memory serial number Firmware release Interface parameters of Parallel Serial USB...

Страница 55: ...h Digit4 12 00 Digit1 12 33 Save as Setup Notes Turn the printer OFF LINE with this key Press the NEXT or PREVIOUS key until Paper Menu is displayed Press the ENTER key to select the paper menu Press...

Страница 56: ...p Notes Turn the printer OFF LINE with this key Press the NEXT or PREVIOUS key until Paper Menu is displayed Press the ENTER key to select the paper menu Press the NEXT or PREVIOUS key until Paper Wid...

Страница 57: ...es a list of all fonts installed to the printer The font list shows demo prints of all fonts and in addition the concerning PCL selection commands These commands contain information on font width and...

Страница 58: ...ream indicates a different resolution e g via a WINDOWS print driver the second print resolution will be used only for that job Panel display SOLID 166E Menu Level 1 Engine Resolution 300 dpi 600 dpi...

Страница 59: ...____ MICROPLEX Operator s Manual SOLID 166E Edition 1 1 Remarks on choosing print resolution Fonts By selecting 300 dpi resolution the printing system will be compatible for all applications 300 dpi d...

Страница 60: ...n hexadecimal coded This mode helps with error diagnosis The Hexdump Mode can be activated only temporarily Panel display SOLID 166E Menu Level 1 Status Sheet Hexdump Hexdump Notes Turn the printer OF...

Страница 61: ...function Normal Print Mode Activation is used to produce a FORM FEED Panel display SOLID 166E Menu Level 1 Status Sheet Normal Print FF Normal Print FF Notes Turn the printer OFF LINE with this key M...

Страница 62: ...ancel Job This function permits the resumption of a print job at a particular page after a print interruption e g paper jam The data contained in the input buffer before the interruption are cleared P...

Страница 63: ...5 9 Printing the Menu Page This function prints a survey of the available panel functions Note When printing the menu page please use a large paper Panel display SOLID 166E Menu Level 1 Status Sheet...

Страница 64: ...ttern This function generates a series of test prints without sending data to the printer These test prints facilitate error analysis Panel display SOLID 166E Menu Level 1 Status Sheet Sliding Pattern...

Страница 65: ...ost processing machine Panel display SOLID 166E Menu Level 1 Paper Menu Page Length Stacker Select Upper Stacker Lower Stacker Save as Setup Notes Turn the printer OFF LINE with this key Press the NEX...

Страница 66: ...Turn the printer OFF LINE with this key Press the NEXT or PREVIOUS key until Paper Menu is displayed Press the ENTER key to select the paper menu Press the NEXT or PREVIOUS key until Two Up Mode is di...

Страница 67: ...n 1 1 Example The printer processes fanfold paper with a width of 17 When the Two Up mode is chosen each time 2 images of A4 are printed side by side Note All other page parameters have to be set opti...

Страница 68: ...Length Print Direct Print Direct 0 Print Direct 1 Save as Setup Notes Turn the printer OFF LINE with this key Press the NEXT or PREVIOUS key until Paper Menu is displayed Press the NEXT or PREVIOUS k...

Страница 69: ...EVIOUS key until Configuration is displayed The currently set value for he timeout is displayed here 30 seconds Pressing the PLUS or MINUS key changes the value of the current digit Digit 3 left posit...

Страница 70: ...tion will be activated Panel display SOLID 166E Menu Level 1 Configuration Interface Emulation SOLID Standard HP PCL 5 Save as Setup Notes Turn the printer OFF LINE with this key Press the NEXT or PRE...

Страница 71: ...OPLEX IDOL HP LaserJet PCL 5 Epson FX IBM Proprinter TIFF CCITT group 4 Postscript Optional Kyocera Prescribe Printronix IGP PGL Diablo 630 AGFA Reno S3000 Lineprinter HPGL 7475A DEC LN03 Tally MT 6xx...

Страница 72: ...isplay messages the status sheet and the font list Panel display SOLID 166E Menu Level 1 Configuration Interface Language German English Save as Setup Notes Turn the printer OFF LINE with this key Pre...

Страница 73: ...display SOLID 166E Menu Level 1 Configuration Interface Transparent Code Digit4 2625 Digit1 2626 Save as Setup Notes Turn the printer OFF LINE with this key Press the NEXT or PREVIOUS key until Config...

Страница 74: ...nd macro download memory Panel display SOLID 166E Menu Level 1 Configuration Interface Input Buffer 32 kB 100 kB Save as Setup Notes Turn the printer OFF LINE with this key Press the NEXT or PREVIOUS...

Страница 75: ...tory Default This function back outs all configurations to factory defaults Panel display SOLID 166E Menu Level 1 Configuration Interface Factory Default Save as Setup Notes Turn the printer OFF LINE...

Страница 76: ...e font Select a font number out of the list of available fonts Panel display SOLID 166E Menu Level 1 Page Menu Font Number Font 0600 Font 5507 Save as Setup Notes Turn the printer OFF LINE with this k...

Страница 77: ...alic 0610 12 10 1 Kurilen 1710 12 10 1 Kurilen Italic 4508 P 8 1 Helgoland 4510 P 10 Helgoland 4714 P 14 4 Helgoland Bold 5507 20 7 Langeoog 5508 16 6 7 9 Langeoog 5509 15 9 1 Langeoog 6610 10 10 1 Ju...

Страница 78: ...00 P SC Texel Italic 2300 P SC Texel Bold Italic 9800 P SC Neuwerk Italic 9500 P SC Neuwerk Bold Italic 9600 P SC Neuwerk Bold 0060 SC Plakatschrift 9501 P SC Neuwerk II Condensed Italic 9601 P SC Neu...

Страница 79: ...ientation 0 Orientation 1 Save as Setup Notes Turn the printer OFF LINE with this key Press the NEXT or PREVIOUS key until Page Menu is displayed Press the NEXT or PREVIOUS key until Orientation is di...

Страница 80: ...ymbol code Panel display SOLID 166E Menu Level 1 Page Menu Font Number Symbol Code 902 IBM PC II 901 IBM PC I Save as Setup Notes Turn the printer OFF LINE with this key Press the NEXT or PREVIOUS key...

Страница 81: ...4 0089 Digit1 0087 Save as Setup Notes Turn the printer OFF LINE with this key Press the NEXT or PREVIOUS key until Page Menu is displayed Press the NEXT or PREVIOUS key until Margin is displayed Pres...

Страница 82: ...the X coordinate zero to the left paper edge Panel display SOLID 166E Menu Level 1 Engine Resolution Image X Pos Image X Pos xxx Image X Pos 160 Save as Setup Notes Turn the printer OFF LINE with this...

Страница 83: ..._________________________ MICROPLEX Operator s Manual SOLID 166E Edition 1 1 Example for shifting the image to the X direction Feed direction print direction Printout after the image shifting to the X...

Страница 84: ...os Image Y Pos yyy Image Y Pos 190 Save as Setup Notes Turn the printer OFF LINE with this key Press the NEXT or PREVIOUS key until Engine is displayed Press the NEXT or PREVIOUS key until Image Y Pos...

Страница 85: ..._________________________ MICROPLEX Operator s Manual SOLID 166E Edition 1 1 Example for shifting the image to the Y direction Feed direction print direction Printout after the image shifting to the Y...

Страница 86: ...y SOLID 166E Menu Level 1 Page Menu Font Number Line Spacing Digit4 006 5 Digit1 010 0 Save as Setup Notes Turn the printer OFF LINE with this key Press the NEXT or PREVIOUS key until Page Menu is dis...

Страница 87: ...anel display SOLID 166E Menu Level 1 Page Menu Font Number Char Spacing Digit4 013 3 Digit1 012 0 Save as Setup Notes Turn the printer OFF LINE with this key Press the NEXT or PREVIOUS key until Page...

Страница 88: ...y help lower the cost of printing Panel display SOLID 166E Menu Level 1 Engine Resolution Print Density Print Density 96 Print Density 104 Save as Setup Notes Turn the printer OFF LINE with this key P...

Страница 89: ...192 168 010 123 Saved Notes Turn the printer OFF LINE with this key Press the NEXT or PREVIOUS key until Network is displayed Press the ENTER key to select the Network menu Press the NEXT or PREVIOUS...

Страница 90: ...our network is using DHCP an address can be automatically assigned select the item DHCP from the network submenu IP Assign The parameters Subnet Mask and Gateway are configured in the same way as desc...

Страница 91: ...utomatically adjusts itself to maximize link performance Autonegotiation is the recommended setting If you set the Duplex Speed parameters manually you may experience problems Wrong settings can slow...

Страница 92: ...___________________________________________________________________________________ ________________________________________________________________________________________________ MICROPLEX Operator...

Страница 93: ...of pages For every conversion you have to know the page length of the printjob and to consider the following One digit of the counter corresponds to a page length of 14 8 inch because this is the cir...

Страница 94: ...confirming that the transfer unit is in the down position Check whether or not paper dust has been stacked in the concave on the transport surface 4 Lower the transport surface of the transfer transpo...

Страница 95: ...e number of pages are valid see following pages For safety disconnect the printer from the main power first Make sure the components that are to be cleaned have cooled down Please be especially carefu...

Страница 96: ...OPLEX Operator s Manual SOLID 166E Edition 1 1 6 2 1 Cleaning the Printer Cabinet Please use a soft lint free cloth which has been moistured with water or a neutral detergent if necessary to remove du...

Страница 97: ...or electronic modules The following cleaning operations should always be performed before the installation of a new toner cartridge see also section 6 3 Replacing the Toner Cartridge If there are any...

Страница 98: ...ove the toner residues from the environment of the waste toner bottle unit with an anti static service vacuum cleaner 6 Clean the Main Charger a Find the green knob below the Main Charger b Pull the c...

Страница 99: ...e knob see figure below c Repeat this 5 times Caution Do not pull the cleaning rod too hard not to damage the transfer charger Fig 6 2 2 d Cleaning the transfer charger 8 Clean the Pre Charger a Find...

Страница 100: ..._____ MICROPLEX Operator s Manual SOLID 166E Edition 1 1 9 Remove the waste toner bottle Fig 6 2 2 f Waste toner bottle unit opened 10 Clean this area of the waste toner bottle unit too Fig 6 2 2 g Cl...

Страница 101: ...166E Edition 1 1 12 Using an anti static service vacuum cleaner pick up any dirt on the developer unit or toner cartridge Toner cartridge Developer unit Fig 6 2 2 h Cleaning the area of the developer...

Страница 102: ...____ MICROPLEX Operator s Manual SOLID 166E Edition 1 1 14 Also vacuum the fuser unit and the area around it Fig 6 2 2 j Cleaning the area of the fuser unit 15 Close the waste toner bottle unit Make s...

Страница 103: ...s that have been approved for use with this device To avoid soiling your hands please wear protective gloves during this operation Take care not to spill any toner inside the printer a Removing the ol...

Страница 104: ...ckwise until it stops Fig 6 3 b Rotating the toner cartridge 4 Slowly pull the used toner cartridge out of the printer and put it in the place you prepared for it Please use your second hand to hold t...

Страница 105: ...ut of the packing and hold it as shown in figure 6 3 c plastic sealing tape point upward 7 Shake the new cartridge gently 3 or 4 times by performing horizontal movements to distribute the toner Fig 6...

Страница 106: ...nto the device and pull off the plastic seal adhesive tape at the same time see arrows in the figure above Hint Roll or fold the sealing strip as you pull This avoids snapping the sealing strip when i...

Страница 107: ...Fig 6 3 e Aligning the new toner cartridge 13 Now you are able to slide the cartridge completely into the device until it stops d Dropping toner into the developer unit 14 Use the handle compare the...

Страница 108: ...ed into position compare figure 6 3 f Fig 6 3 g Toner cartridge locked into position 15 Close the two front covers of the printer Make sure the front covers are completely closed The announcement TONE...

Страница 109: ...Exchange the waste toner bottle immediately if the message Toner Waste is displayed Approximately 100 000 pages of 12 x17 with a print density of 4 can be printed until the waste toner bottle is fille...

Страница 110: ...Bottle unit opened 3 Close the filled waste toner bottle using the cap located at the center of the waste toner bottle compare figure 6 4 b and figure 6 4 c Fig 6 4 c Using the cap to close the filled...

Страница 111: ...toner bottle unit 6 Take a new waste toner bottle and insert this bottle into the waste toner bottle unit 7 Close the waste toner bottle unit Make sure the bar has engaged 8 Close the two front covers...

Страница 112: ...112 Operator Maintenance ________________________________________________________________________________________________ MICROPLEX Operator s Manual SOLID 166E Edition 1 1...

Страница 113: ...evice will heat up Take care that you do not burn your fingers when removing a paper jam Make sure all covers of the device are completely closed afterwards Any others but the troubles described in th...

Страница 114: ...ply switch on the device Make sure all covers of the device e g the front cover are completely closed Pay attention to the panel messages see section 7 3 Check if the paper has been inserted correctly...

Страница 115: ...ner cartridge see section 6 3 Replacing the Toner Cartridge Do not use damp paper If you want to print on special paper please choose a more appropriate paper type if necessary Check the environment c...

Страница 116: ...front cover has not been closed completely Please close it completely There is no more fanfold paper on the tractor Replace the fanfold paper see chapter 3 Paper jam in the fusing section Remove the...

Страница 117: ...move the paper compare section 7 4 Paper jam within the feeding unit Remove the jammed paper compare section 7 4 and press the key PARK FANFOLD The waste toner bottle is full Replace the bottle with a...

Страница 118: ...e fuser unit Paper jam behind the fuser unit Paper jam in the paper exit Paper Transport roller is free knob C or paper path is open Paper path is open Transport motor does not work normally Cut motor...

Страница 119: ...terruption TRAPV order interruption TRAP interruption is not used Auto vector interruption is not used Null task Monitor overrun Privileged command Spurious command Interruption during interruption ve...

Страница 120: ...next to it become very hot Because of this let the printer cool down first To avoid soiling your clothes please be especially careful with the components carrying toner Please regard the following in...

Страница 121: ...per Jam at the Tractor 1 Open the two green tractor cover plates by positioning them into the upright position Fig 7 4 1 a Opening the tractor cover plates 2 Remove the jammed paper Crushed sheets mus...

Страница 122: ...il they have cooled down Most of the working steps necessary to remove the paper from the printer s paper path are described in a order similar to the print direction from right to left 1 Open the two...

Страница 123: ...________ MICROPLEX Operator s Manual SOLID 166E Edition 1 1 3 Turn the lever green clockwise approx 90 to turn down the tractor unit Fig 7 4 2 c Swivelling the lever to lower the tractor unit 4 Push d...

Страница 124: ...countercklockwise compare the following figure The transport path will be shifted down Do not pull out the transport unit at this time Fig 7 4 2 e Swivelling the lever of the transport unit 6 Rotate k...

Страница 125: ...the printer i e at the paper input and at the paper output of the printer 9 Open the two green tractor cover plates by positioning them into the upright position Fig 7 4 2 g Opening the tractor cover...

Страница 126: ...ual SOLID 166E Edition 1 1 Fig 7 4 2 h Removing jammed paper from the printer s output side 12 Use the green lever to pull out the transport unit Fig 7 4 2 i Transport unit opened 13 Look for pieces o...

Страница 127: ...n lever still in down position compare figure above to push the transport unit back into the printer until it touches 15 Swivel the lever of the transport unit to the right approx 90 clockwise see nex...

Страница 128: ...erator s Manual SOLID 166E Edition 1 1 16 Rotate knob A approx 90 counterclockwise as shown in the next figure to lock the scuff roller Fig 7 4 2 k Locking the scuff roller 17 Close the waste toner bo...

Страница 129: ...EX Operator s Manual SOLID 166E Edition 1 1 19 Turn the lever green approx 90 counterclockwise to lift up the tractor unit Fig 7 4 2 m Swivelling the lever of the transport unit counterclockwise 20 Sl...

Страница 130: ..._________________________________________________________________________________________ MICROPLEX Operator s Manual SOLID 166E Edition 1 1 21 Close the printer s front covers Information about clear...

Страница 131: ...utomatic jam safety function to prevent a loss of data When an error occurs all the pages on the paper path will be printed again This ensures that no data will get lost The exact number of pages to r...

Страница 132: ...___________________________________________________________________________________ ________________________________________________________________________________________________ MICROPLEX Operator...

Страница 133: ...overview of the working steps necessary for repacking Pay attention to the notices located on the products and the hints given in the Service Manual as well If you are not familiar with any of the wo...

Страница 134: ..._____________________________________________________________________________________________ ________________________________________________________________________________________________ MICROPLEX...

Страница 135: ...m to 18 45 7 cm 17 printable length 7 17 8 cm to 20 50 8 cm Interfaces parallel IEEE 1284 Centronics MP BUS SPS Control optional LAN Ethernet 10 100 Mbit TCP IP Optional LAN Ethernet SPX IPX LAT Token...

Страница 136: ...panel Europe 230V Power admission maximum permissible system impedance Zmax Apparent power max 9 0 kVA Use 32A fuses 40A if necessary for the mains connection to enable the higher starting currents f...

Страница 137: ...can be done by the user in accordance with the manual without the usage of tools Consumables can be different depending on the printer type The most important consumable for example is toner Usually...

Страница 138: ...ime to exchange a component depends not only on the failure of a component but also on a possible loss of print quality in the printouts MNPSQ Mean Number of Prints with Specified Quality SQ This valu...

Страница 139: ...ge 137 COVER OPEN 116 CUT key 42 D danger 9 data interface 69 density 88 detergent 96 diagrams 51 display language 72 disposal 103 109 drum counter 93 E elevator table 29 32 33 emergency power off 12...

Страница 140: ...8 N network parameters 89 NEXT key 42 47 48 noise level 135 normal print mode 61 number block key 42 O OFF button 42 OFF LINE 46 ON OFF LINE switching 45 ON LINE key 42 47 50 operation 39 45 operator...

Страница 141: ...ng 133 size 135 Sliding Pattern 64 spare parts 138 specifications 135 stacker 14 25 65 STACKER SEL key 42 stacker specifications 136 STATUS PAGE key 42 status sheet 53 symbol code 80 T temperature 19...

Отзывы: