SECTION 2
INSTALLING THE PRINTER
17
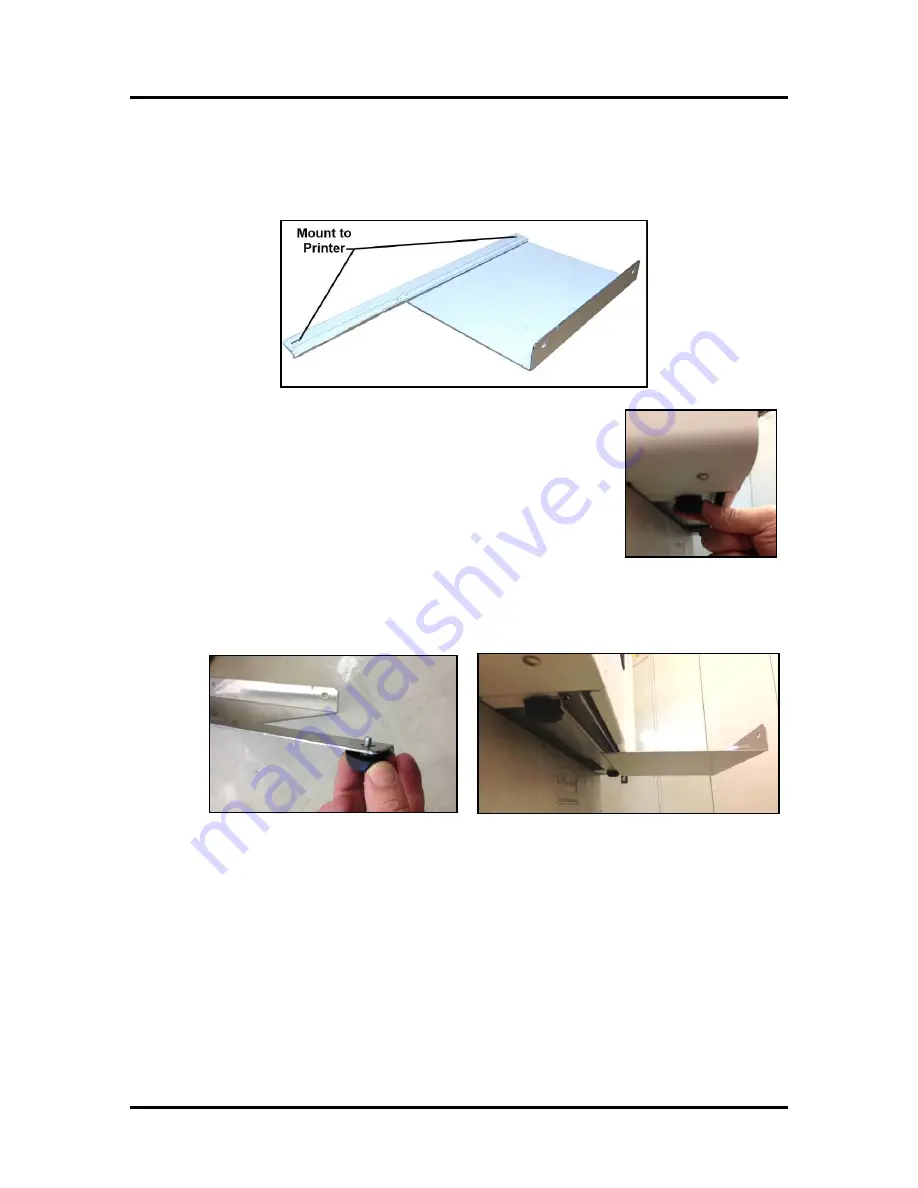
Install Printer/Winder Spacer Plate:
WARNING:
Do NOT tilt the printer or place it on its side to install/remove rubber feet and spacer
plate/spacers. Intead, move printer to edge of bench or table to remove feet and install spacer plate/spacers.
1.
Position the printer so the two Rubber Feet, at the Exit End of the
printer, are overhanging the table surface.
NOTE
: Two people should lift the printer to move it. If you slide it
across the table surface, the Rubber Feet may be torn off.
2.
Remove the two Rubber Feeet, from Exit End of printer.
Rubber Feet are removed by turning them counter-clockwise.
3.
Position the long edge of Spacer Plate under the Exit End of the printer; aligning the slotted holes
in the plate with the holes for the Rubber Feet (just removed).
4.
Reinstall the two rubber feet, through the slotted holes of the Winder Spacer Plate; to secure
Winder Spacer Plate to printer as shown below.
5.
Position the printer so the two Rubber Feet, at the Entrance End of the printer, are overhanging the
table surface.
6.
Remove the two Rubber Feeet, from Entrance End of printer.
7.
Install 1 washer (included with Winder Spacer Plate) on both of the Rubber Feet and then reinstall
the feet to the printer. This will insure that all four Rubber Feet are equal in height.
WARNING
: Threaded feet should not be used to change the level of the printer. Be sure all four
Rubber Feet are fuly installed (snug).
8.
Position the printer so all four Rubber Feet are on the table surface.
9.
See “Position the Winder” in the section titled
“Aligning the Unwinder and Winder”
.
Содержание MACH X
Страница 124: ......
Страница 125: ...Copyright 2015 NEOPOST USA...


