F5 3D Imaging System User Manual
64
Figure 55: Register with Next Option
2
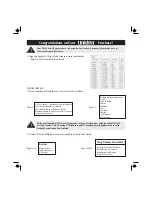
Use the toggle buttons to select the two overlapping segments.
Figure 45: Segment Registration Toggle Buttons
3
Now, align the chosen segments using either the Manual Alignment or
Three-point Alignment mode. For more details about Manual mode, you may
refer to the Manual Alignment section on page 65. For more details about
Three-point Alignment mode, you may refer to the Three-point Alignment
section on page 67.
Adjusting Point Filters
The adjustment of point filters is optional.
►
To discard unwanted or problematic points before starting
Segment Registration:
1
In the Stitching window, select the Point Filter tab.
2
Set the preferred values in the Distance (in millimeters) and Accuracy
Thresholds by either entering a number in the field or dragging the relevant
scroll bar.
NOTE
The Reference Segment point cloud is displayed in Blue.
The Selected Segment point cloud is displayed in Light Yellow.
Содержание F5-B
Страница 71: ...F5 3D Imaging System User Manual 71 Figure 58 Stitching Window and Side Panel Segment Tab ...
Страница 116: ...F5 3D Imaging System User Manual 116 Figure 109 KaplaVision Desktop Icon ...
Страница 119: ...F5 3D Imaging System User Manual 119 Figure 112 Calibration Camera Calibration Wall EPI Calibration page 123 ...
Страница 120: ...F5 3D Imaging System User Manual 120 Figure 113 Calibration EPI Calibration RIG Calibration page 123 ...
Страница 125: ...F5 3D Imaging System User Manual 125 Blank page for double sided printing ...