


F5 3D Imaging System User Manual
124
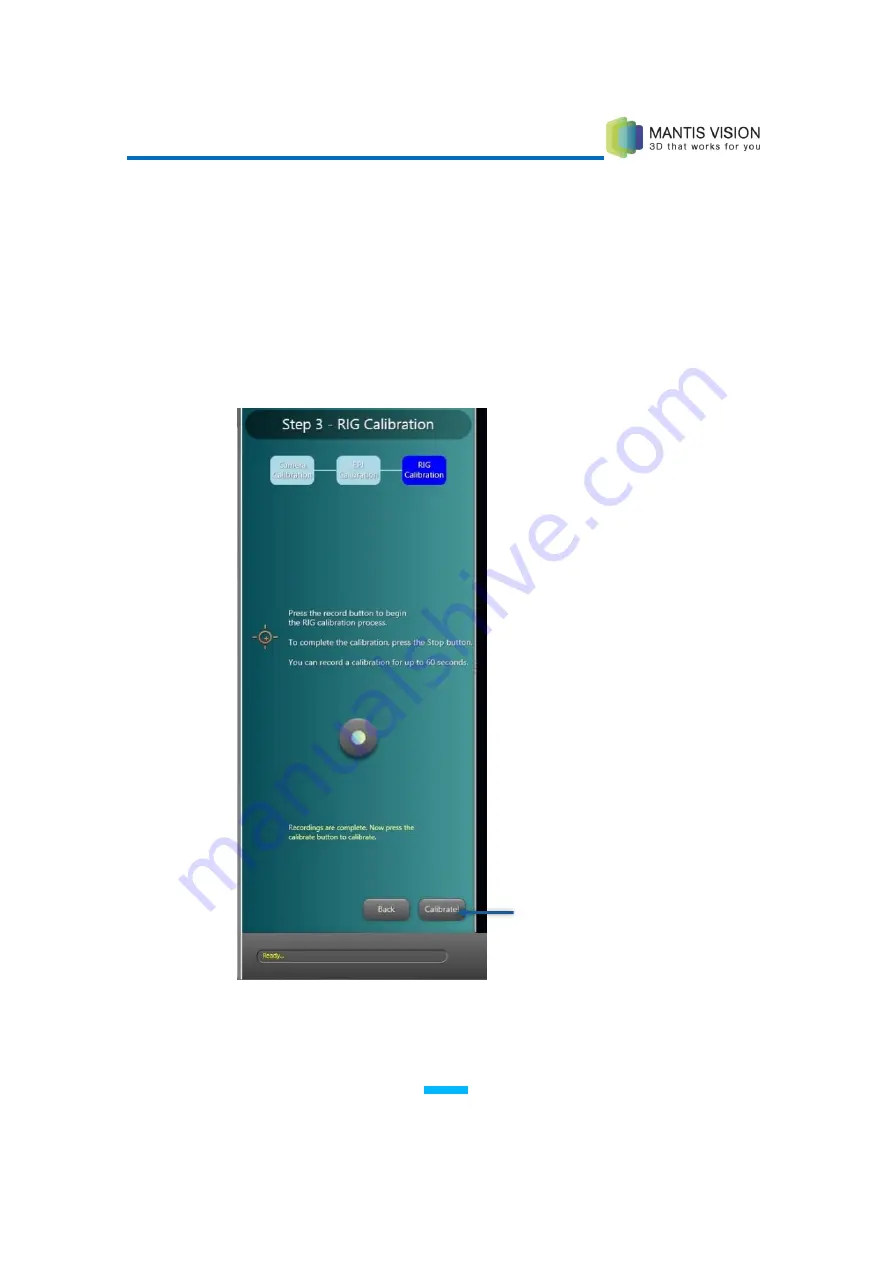
2
Aim the Imager almost perpendicular to the calibration board (10⁰ angle).
Cover the entire screen’s image with the board by moving the Imager. You
should start at 70 cm (27.5’) and move the Imager higher (up to 95 cm (37.4’)
until one minute has elapsed. You should first move to a distance of 70 cm
(27.6”), then to 95 cm (37.4”) and then to 120 cm (47.2”). Pay special
attention to cover the entire screen, including the corners.
3
After completing step
3
, click the Calibrate button, located at the lower right
of the window.
Figure 119: Standing at an Angle to the Board
Содержание F5-B
Страница 71: ...F5 3D Imaging System User Manual 71 Figure 58 Stitching Window and Side Panel Segment Tab ...
Страница 116: ...F5 3D Imaging System User Manual 116 Figure 109 KaplaVision Desktop Icon ...
Страница 119: ...F5 3D Imaging System User Manual 119 Figure 112 Calibration Camera Calibration Wall EPI Calibration page 123 ...
Страница 120: ...F5 3D Imaging System User Manual 120 Figure 113 Calibration EPI Calibration RIG Calibration page 123 ...
Страница 125: ...F5 3D Imaging System User Manual 125 Blank page for double sided printing ...


