background image


SmartDGA Hardware Manual 


Pre-Installation Verification  

  17 

3


Pre-Installation Verification 

This chapter involves verifying that you have all system components, confirming the installation 
locations are ready, and verifying power supply and communications setup. Also, please ensure all 
valves are properly shut with limited to no oil leakage. 

3.1


Unpacking and Verifying Contents 

When unpacking and inspecting your system components: 

1.


Check all materials in the container against the enclosed packing list.   

2.


Carefully unpack and inspect all components for visible damage.  

3.


Save all packing materials, including the carrier’s identification codes, until you have 
inspected all components and find that there is no obvious or hidden damage.  


Note: 

LumaSense Technologies cannot be responsible for shortages against the packing 

list unless a claim is immediately filed with the carrier. If you note any damage or suspect 
damage, immediately contact the carrier and LumaSense Technologies, Inc. Final claim 
and negotiations with the carrier must be completed by the customer.


3.2


Confirming Installation Locations 

Confirm that the mounting locations for the SmartDGA instrument and associated mounting 
requirements are complete and the site is ready for installation. Power supply should already be 
ready for connections and communication systems should be set up for installation. 

3.2.1


Confirm Mounting for SmartDGA Instrument 

Confirm that the dimensions of the instrument work for the selected installation location and that 
the valve kit included is suitable for installation.  

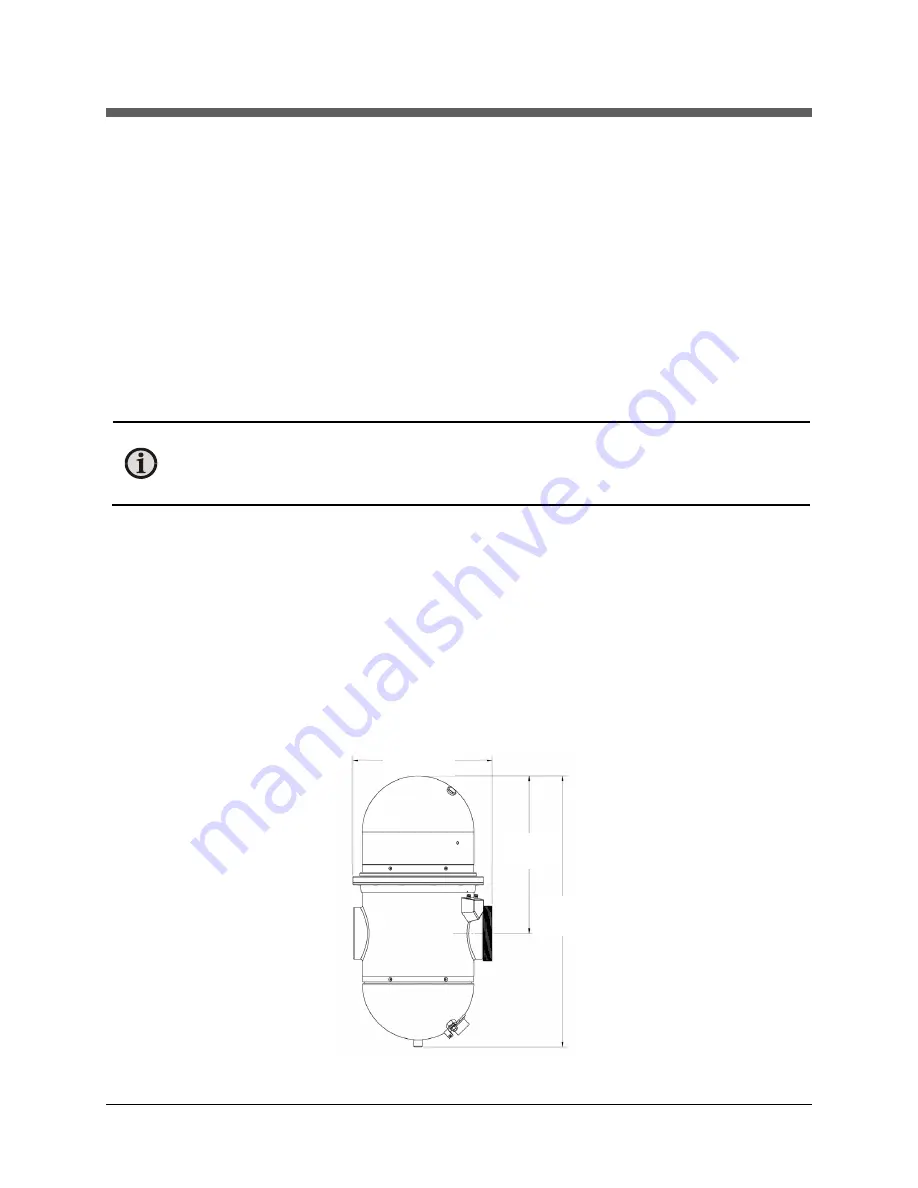
Instrument Dimensions 

Verify that the installation location is suitable for the dimensions of the SmartDGA instrument: 


20.918” 

531.32 mm 

10.765” 

273.43 mm


12.152” 

308.66 mm 

Содержание SmartDGA

Страница 1: ...HARDWARE MANUAL SmartDGA...

Страница 2: ...DGA Viewer and LumaSMART are trademarks of LumaSense Technologies Inc All other trademarks are trademarks registered trademarks and or service marks of their respective holders Service Centers LumaSen...

Страница 3: ...1 Non Dispersive Infrared NDIR Theory 14 2 2 2 Other Gas Measurements 15 2 2 3 Sampling Sequence 15 2 2 4 Oil Gas Separating Membrane 16 3 Pre Installation Verification 17 3 1 Unpacking and Verifying...

Страница 4: ...EZHub 52 5 2 3 Connecting the EZHub 54 5 3 iCore or External Computer 59 5 3 1 Parts and Tools for the iCore 59 5 3 2 Mounting the iCore 60 5 3 3 Connecting the iCore 63 6 SmartDGA Commissioning 67 6...

Страница 5: ...aSMART iCoreTM RS485 Connections 96 9 3 LumaSMART iCoreTM Ethernet Connections 97 9 4 Unistrut Stand 98 9 5 SmartDGA NEMA 4 Enclosure 99 9 6 Inline Mounting Plate 100 9 7 Wiring Connection 101 9 8 Ass...

Страница 6: ...SmartDGA Hardware Manual Contents vi To ensure consistent document formatting this page was intentionally left blank...

Страница 7: ...information in this manual All notes should be read to effectively operate the instrument Caution Denotes information critical to avoiding instrument damage or a severe impact to processing When this...

Страница 8: ...abnormal conditions 1 5 Malfunction or Service Request Contact LumaSense Technologies Technical Support in case of a malfunction or service request Provide clearly stated details of the problem as wel...

Страница 9: ...408 727 1600 1 800 631 0176 Email support LumaSenseInc com Frankfurt Germany LumaSense Technologies GmbH Kleyerstr 90 60326 Frankfurt Germany Telephone 49 69 97373 0 Email eusupport LumaSenseInc com 1...

Страница 10: ...SmartDGA Hardware Manual General 10 To ensure consistent document formatting this page was intentionally left blank...

Страница 11: ...urs 24 hours 48 hours and weekly When a measurement cycle starts the LumaSense SmartDGA instrument flushes the old oil within it and returns it to the transformer and or LTC The instrument then pulls...

Страница 12: ...are accomplished within hours less than 4 hours in most cases and require no carrier gases consumables or scheduled calibration The resulting online DGA information is made available with user friendl...

Страница 13: ...in the EZHub unit as well as internal memory and four 4 relays and bright LED indicators for Caution Warning and Alarm conditions The fourth relay is a system status relay to notify of a SmartDGA syst...

Страница 14: ...mes LumaSense is the industry leader in the use of Non Dispersive Infrared NDIR technologies and has redefined the way gases are measured The following sections provide a brief overview of the technol...

Страница 15: ...ement cycles If the pressure inside the instrument gets too far away from the oil tank pressure due to temperature changes the routine will open the oil valves and equalize the pressure 3 When the Rea...

Страница 16: ...ting oil are sampled by the SmartDGA instrument via an amorphous polymer membrane The non porous membrane absorbs gases dissolved in the oil and transfers them to a closed gas sample space while preve...

Страница 17: ...t be responsible for shortages against the packing list unless a claim is immediately filed with the carrier If you note any damage or suspect damage immediately contact the carrier and LumaSense Tech...

Страница 18: ...extension length and or diameter or additional mechanical support can be used to shift the harmonic frequency higher Alternatively the SmartDGA instrument can be mounted off transformer 3 2 2 Confirm...

Страница 19: ...VA 0 Inline or Off Transformer Description Clearance Distance Use this kit any time the SmartDGA instrument cannot be mounted directly on the transformer valve or when connecting the SmartDGA Gauge i...

Страница 20: ...MA 4X enclosure on a wall EZHub mounted in NEMA 4X enclosure on a Unistrut Stand Confirm EZHub Type Location 1 Confirm that the EZHub shipped for your system is correct by verifying that it has LTC Tr...

Страница 21: ...from the external computer or iCore installation location to the EZHub location to ensure the cable Ethernet or RS485 is long enough Note If using Ethernet with copper wire this distance should be les...

Страница 22: ...on location is recommended 2 Locate the mounting brackets for the type of mounting panel or wall planned both are included with your shipment iCore Location iCore Mounting Type Notes Transformer Contr...

Страница 23: ...martDGA Instrument must have a low impedance path to a trusted grounding source Ensure a grounding source is available for the EZHub at the mounting location External Computer Verify computer has powe...

Страница 24: ...SmartDGA Hardware Manual Pre Installation Verification 24 To ensure consistent document formatting this page was intentionally left blank...

Страница 25: ...ble and attach the valve kits tighten as you go but be careful not to overtighten Overtightening can cause the part to distort and not properly seal when retightened Visit Swagelok s website for more...

Страница 26: ...ve Tube DGA Drain Valve Side Adapter 115 0120 02 1 Assy Adapter Tube Single Valve DGA Instrument Side Adapter 915 0027 03 1 O ring Viton 3 1 8 ID Large O ring 99 10559 1 O ring Viton 1 3 16 ID Medium...

Страница 27: ...re is no oil leakage 2 If you need to preserve the ability to use this drain valve to sample oil directly from the transformer install a stainless steel tee and another valve with plug onto the drain...

Страница 28: ...ure to tape grease and tighten 4 Remove the 3 protective caps from the single valve adapter Save them for future use 5 Remove the 6 machine screws from the Drain Valve Side Adapter PN 115 0120 02 with...

Страница 29: ...rain Valve Side Adapter using the Phillips screwdriver Save the screw you will reattach it during the commissioning process Note Instead of removing both screws you may instead remove one screw and le...

Страница 30: ...teel pipe SSP needed using a measuring tape The SSP has to reach from the inside wall of the transformer tank to the outside of the Drain Valve Side Adapter to make sure that the SmartDGA instrument g...

Страница 31: ...t may have fallen into the adapter Caution Any sharp edges or shavings left on the SSP will damage sealing O rings when the SSP is used in later steps This will cause oil to leak from the transformer...

Страница 32: ...nstrument side adapter by removing the two screws with a Phillips screwdriver Save the plate cover and the two screws for use during the commissioning process Note Instead of removing both screws you...

Страница 33: ...to the port on the Instrument Side Adapter Use an adjustable wrench to fully tighten Verify that the Bleed Valve is closed and pointing away from the mounting ring 21 Carefully insert the SSP pipe wi...

Страница 34: ...ded but a standard Allen Wrench will also work 25 Check for leaks If you encounter leaks remove the 6 machine screws from the previous step to pull out the SSP just past the gate and close the valve F...

Страница 35: ...Conn Male 3 8 Tube 1 8 Male NPT 3 8 Male Connector 99 10159 PROVIDED BY CUSTOMER or ordered separately Part QTY Description 1 NPT Reducer to 1 ID optional from LumaSense 2 to 1 NPT Reducer 1 5 to 1 NP...

Страница 36: ...there is not excessive oil leakage or obstructions to prevent installation 2 If you need to preserve the ability to use this drain valve to sample oil directly from the transformer install a stainles...

Страница 37: ...appropriate NPT reducer to the drain valve or tee Be sure to tape grease and tighten 4 Remove the 2 protective caps from the dual valve adapter Save them for future use 5 Clean the grooves for the thr...

Страница 38: ...lace the mounting ring PN 115 0044 01 over the Dual Valve Adapter as shown below Note The mounting ring is shipped with the SmartDGA instrument packaging 8 Install a 3 8 Male Connector PN 99 10159 to...

Страница 39: ...he top fill valve Attach the 3 8 Female Branch Tee to the stainless steel tubing Caution When the oil level is above the top fill valve install the 3 8 Female Branch Tee and 1 4 Bleed Valve as close a...

Страница 40: ...oil filtration system should not be necessary however this should be confirmed before installing a DGA instrument on an LTC Connection to LTC Filter Systems The interface between the SmartDGA and LTC...

Страница 41: ...4 1 4 Shut Off Plug Valve 99 10219 2 Tube Fitting Reducer 3 8 x 1 4 3 8 Tube Reducer 99 10220 PROVIDED BY CUSTOMER or ordered separately QTY Description 1 NPT Reducer to 1 ID optional from LumaSense...

Страница 42: ...The location chosen must be appropriate for the support and allow for oil lines to and from the transformer or LTC filter If installing in a cold climate where the oil will reach a temperature of 10 C...

Страница 43: ...late and secure the plate using the included screws and the 3 16 hex wrench Note The mounting plate has 8 holes for installation flexibility Use at least 4 of the screws for installation 3 Remove the...

Страница 44: ...n Note To prevent leaks use tape and grease on all NPT threads Starting from the bottom wrap the tape in the opposite direction as the threads so that when attaching the tape is not torn off Once tape...

Страница 45: ...ther end of the 1 4 Male Connector Tighten with wrench c Attach 1 4 Shut Off Plug Valve PN 99 10219 to the 1 4 Straight Tubing Connector Tighten with wrench Note Make sure this is attached facing the...

Страница 46: ...end of the 1 4 Shut Off Plug Valve Tighten with wrench 8 Install outlet port using the following steps a Install a 1 4 Male Connector PN 90 2403 into the OUT port tape grease and tighten b Slide 1 4 E...

Страница 47: ...raight Tubing Connector Tighten with wrench Note Make sure Shut Off Plug Valve is facing the correct direction The arrow should be pointing away from the adapter and in the direction of the oil flow d...

Страница 48: ...ream of the LTC to the female tee Tighten with wrench Caution When the oil level is above the return point install the 1 4 Female Branch Tee and 1 8 Bleed Valve as close as possible to the where the o...

Страница 49: ...ace spanner wrench Available from LumaSense SPN 01 5 1 2 Mounting the SmartDGA Instrument Now that the valve installation is complete you are ready to install the SmartDGA instrument 1 Remove the prot...

Страница 50: ...409 1 Connector Unit Power 47 1410 1 Connector EZHub Power 47 1411 1 Adapter Male Micro B to Female A 57 0045 1 Lug Ring Blue for power to the EZHub 95 1970 1 Lug Ring Red shield ground for cable to i...

Страница 51: ...8 Screw Pan Head 6 32X 50 4 for wall mount or 8 for panel mount 02615 08SS1 8 Washer 6 Flat 4 for wall mount or 8 for panel mount 99 10000 8 Washer 6 Split 4 for wall mount or 8 for panel mount 99 399...

Страница 52: ...types of brackets and hardware are sent with each order Example of wall mount in NEMA enclosure EZHub Wall Mount 1 Remove 4 screws on the back of the EZHub with a Phillips screw driver Save the screws...

Страница 53: ...nting holes to be drilled into the vertical mounting surface 5 Drill the four holes and attach the EZHub to the wall with customer provided hardware 10 or M5 screws EZHub Panel Mount 1 Remove 8 screws...

Страница 54: ...nd drill 5 Install customer provided fasteners 10 or M5 screws to secure the SmartDGA EZHub to the front panel 5 2 3 Connecting the EZHub Communications Cable The SmartDGA system requires a power comm...

Страница 55: ...ommunications Note In order to better protect the SmartDGA power communications cable you can run the cable through a 1 flexible conduit from the SmartDGA Instrument to the EZHub location Be sure to s...

Страница 56: ...ngth and terminate per the following table diagram We recommend cutting at least 0 5 m 1 6 longer than needed to ensure there is enough cable when completing the connection Trim as needed SmartDGA Con...

Страница 57: ...EZHub a Connect the 6 pin Phoenix connector into the Transformer Power slot located on the bottom right of the EZHub Tighten the 2 connector screws with a small Flathead screwdriver b Connect the 4 p...

Страница 58: ...he EZHub power cable to the SmartDGA EZHub location 2 Once the cable has been routed cut the cable to the appropriate length and connect The AC DC pin connections are as follows Pin Use DC Polarity N...

Страница 59: ...iCore Ensure you have the following items on hand prior to starting installation PROVIDED BY LUMASENSE Qty Description Part 1 iCore Assembly IC 0012 015 0002 01 1 Kit Wall Mount LumaSMART 01 15246 01...

Страница 60: ...ble AC IN Conduit to insulate the shield drain wire 1 Ethernet Cable optional for iCore or PC 1 Serial Cable RS485 optional for iCore 5 3 2 Mounting the iCore The iCore is mounted either on a flat sur...

Страница 61: ...e location of the four mounting holes to be drilled into the vertical mounting surface Mark the holes for drilling 4 Drill the four holes and attach the iCore to the wall with customer provided hardwa...

Страница 62: ...are flush with the sides and back of the iCore 3 Use the 8 screws saved from Step 1 and the 4 screws provided to fasten the brackets 4 Determine location for and drill 4 holes into panel 5 Install cus...

Страница 63: ...address for the Ethernet connection can be supplied statically or by a DHCP server Note For an EZHub using a static IP you could change the IP address using the Commissioning Tool via RS485 or Ethern...

Страница 64: ...ound Phoenix 5 pin connector for iCore connector Pin 1 is RS485 TXD Pin 2 is RS485 TXD Pin 5 is ground To connect RS485 to the iCore 1 Locate the 3 pin connector PN 47 1408 shipped with the EZHub and...

Страница 65: ...o 264 Volts AC 127 VDC to 370 VDC 47 63 Hz 2 5 A max Use size 18 AWG wire for the included crimps and connectors to bring power to the EZHub We recommend a power cable with the following characteristi...

Страница 66: ...or DC negative Middle Not used L Input line voltage AC or DC voltage positive Ground wire goes to grounding terminal on the side Note Color convention for line power wiring varies by country 4 Wire th...

Страница 67: ...o 45 psig 3 1 bar gauge of pressure on the oil outlet to return the oil to the transformer or LTC Caution Do not turn off power to the SmartDGA instrument unless it has been prepared for storage The i...

Страница 68: ...nstaller 4 Acknowledge the warning and click Next to continue with installation 5 If desired click Browse to change the folder for software installation Click Next Note If you would like everyone on y...

Страница 69: ...SmartDGA Hardware Manual SmartDGA Commissioning 69 6 Click Next 7 Once installed the installer will display a success message Click Close...

Страница 70: ...F Guard or Guide 65 67 69 71 N A for DGA Viewer software Com Port for RS 485 N A N A N A N A COM2 for iCore per PC Notes Use Commissioning Tool to set values Enter Board ID s and Device ID s used into...

Страница 71: ...uccessfully installed a DGA Commissioning Tool icon should appear on your desktop Double click the icon to start the software Note We recommend using the DGA Commissioning Tool on a laptop due to the...

Страница 72: ...rect COM If using Ethernet select the appropriate IP address for the EZHub The default EZHub IP Address is 192 168 0 8 and EZHub ID is 48 Note If using Ethernet and a personal computer in a docking st...

Страница 73: ...hould be changed to the next value i e start at 48 then use 49 50 51 The Transformer ID or LTC ID should be unique for each unit connected 5 The software will then search for SmartDGA instruments loca...

Страница 74: ...e are not selectable for commissioning since only a Guide instrument is connected to the EZHub Indicate your selection by clicking on the grayscale icon Guide Note You can only commission one SmartDGA...

Страница 75: ...trument Single Dual or Inline Off Transformer and click Next to continue 10 Acknowledge the information about the icons and click OK to continue 6 3 2 Preparation 1 Confirm that you have completed the...

Страница 76: ...uarts for bleeding the valves Single Dual Inline Note Ensure the soft polymer bleed tubes are clear enough so that you can see the oil bubbles in a later step 3 Open bleed valves and valve plugs Singl...

Страница 77: ...NOT change the flow rate Click Next to continue If for some reason you feel the flow rate needs to be adjusted contact LumaSense 2 When ready click Next to continue The oil pump will turn on and begin...

Страница 78: ...mmissioning 78 6 3 4 Priming The system instrument will automatically prime the SmartDGA instrument When finished click Next to continue 6 3 5 Final Test 1 Close bleed valve and plugs valves and click...

Страница 79: ...bing on bleed valves Once you complete commissioning of all SmartDGA instruments your SmartDGA system will be ready for use Refer to the SmartDGA Software manual for more information on obtaining gas...

Страница 80: ...SmartDGA Hardware Manual SmartDGA Commissioning 80 To ensure consistent document formatting this page was intentionally left blank...

Страница 81: ...OVIDED BY CUSTOMER Qty Description 1 New Replacement Battery 1 Small Phillips Head Screwdriver 1 Medium Phillips Head Screwdriver 1 Small Flat Head Screwdriver The battery life span will be approximat...

Страница 82: ...sing a small Phillips head screwdriver Save these screws and washers 3 Using a medium Phillips head screwdriver remove one screw on the front side one screw on the top and two screws on the back side...

Страница 83: ...the clip up slightly with a small Flat head screwdriver and sliding the battery up and out Note Try not to over bend the clip If you bend it too far up you may need to bend it back down slightly befor...

Страница 84: ...T iCore uses a standard non rechargeable CR2032 coin type lithium battery The battery holder is accessed from the bottom of the iCore Caution Battery replacement should only be performed by authorized...

Страница 85: ...ery by pushing down on the retention tab and then sliding the battery straight out Caution Use rubber gloves or other protection when handling the new battery as finger prints can reduce the battery s...

Страница 86: ...to the gas manifold 1 After powering down the EZHub remove the the power communications cable with multi pin connector from the bottom dome of the SmartDGA instrument 2 Remove the twelve screws using...

Страница 87: ...ated under the fan 7 3 1 Replacing the H2 Sensor To replace the H2 sensor 1 Remove the hydrogen sensor plug from the PCB socket labeled J36 Hydrogen Sensor Plug and PCB Socket J36 Hydrogen sensor plug...

Страница 88: ...en Holding Nut 3 Screw the replacement hydrogen sensor assembly into the gas manifold hand tighten 4 Insert the hydrogen sensor plug into the PCB socket labeled J36 5 Reattach the top dome 7 3 2 Repla...

Страница 89: ...ackaging and attach the included O ring O Ring 4 Screw the replacement oxygen sensor into the gas manifold hand tight 5 Insert the oxygen sensor plug into the PCB socket labeled J24 6 Reattach the top...

Страница 90: ...SmartDGA Hardware Manual Maintenance 90 To ensure consistent document formatting this page was intentionally left blank...

Страница 91: ...three indication cycles on the SmartDGA instrument The LED indication light on the EZHub will be the same as on the instrument except it will not flash and will be a solid indication The color indicat...

Страница 92: ...dition clears or is reset Yellow Green Flashing 5 seconds green followed by 5 seconds yellow repeated until condition clears or is reset Indicates Loss of Communication On the EZHub the LED indication...

Страница 93: ...Error indication Lights only activated when Error setting is exceeded Yellow Solid Caution indicating exceeding caution level limits set for the gas level rate of change or ratio Blue Solid Warning i...

Страница 94: ...SmartDGA Hardware Manual Troubleshooting 94 To ensure consistent document formatting this page was intentionally left blank...

Страница 95: ...Diagrams Drawings 95 9 Diagrams Drawings 9 1 Multiple SmartDGA EZHubTM Setup with Ethernet Hub or Switch Note The preferred implementation is a switch especially if the LumaSMART iCore is connected t...

Страница 96: ...m Note An Ethernet switch at the LumaSmart iCore is required to connect to both the EZHub and SCADA system using Ethernet Use of RS485 with IEC61850 protocol will not be supported due to bandwidth res...

Страница 97: ...SmartDGA Hardware Manual Diagrams Drawings 97 9 3 LumaSMART iCoreTM Ethernet Connections Note The LumaSMART iCore is optional and is not required for the SmartDGA system...

Страница 98: ...sponsible for verifying design meets local facility requirements and safety requirements Note The NEMA4 enclosure will heat up significantly when exposed to direct sunlight The installation location s...

Страница 99: ...SmartDGA Hardware Manual Diagrams Drawings 99 9 5 SmartDGA NEMA 4 Enclosure...

Страница 100: ...SmartDGA Hardware Manual Diagrams Drawings 100 9 6 Inline Mounting Plate...

Страница 101: ...01 9 7 Wiring Connection SmartDGA Connector Pin Wire Color EZHub RS 485 pin 1 4 from left to right EZHub Power Pin 1 6 from left to right A Brown 6 C Yellow 5 E Black 2 G Green 3 J White 4 M Purple Vi...

Страница 102: ...SmartDGA Hardware Manual Diagrams Drawings 102 9 8 Assy Wall Mount SmartDGA EZHubTM...

Страница 103: ...SmartDGA Hardware Manual Diagrams Drawings 103...

Страница 104: ...SmartDGA Hardware Manual Diagrams Drawings 104 9 9 Assy Panel Mount SmartDGA EZHubTM...

Страница 105: ...SmartDGA Hardware Manual Diagrams Drawings 105...

Страница 106: ...SmartDGA Hardware Manual Diagrams Drawings 106 9 10 Assy Wall Mount LumaSMART iCoreTM...

Страница 107: ...SmartDGA Hardware Manual Diagrams Drawings 107...

Страница 108: ...SmartDGA Hardware Manual Diagrams Drawings 108 9 11 Assy Panel Mount LumaSMART iCoreTM...

Страница 109: ...SmartDGA Hardware Manual Diagrams Drawings 109...

Страница 110: ...SmartDGA Hardware Manual Diagrams Drawings 110 9 12 SmartDGA Instrument Sun Shade...

Страница 111: ...SmartDGA Hardware Manual Diagrams Drawings 111...

Страница 112: ...SmartDGA Hardware Manual Diagrams Drawings 112 9 13 SmartDGA Instrument Dimensions 20 918 531 32 10 765 273 43 12 152 308 66 mm...

Страница 113: ...l Mount 53 Power Pin 56 Power Wiring 58 65 Relay Outputs 58 RS485 pin 56 Wall Mount 52 F Field Replaceable Unit 81 Filter Systems 40 G Gauge 12 57 Grounding terminal 57 Guard 12 57 Guide 12 57 I iCore...

Страница 114: ...s 58 Repair 8 RS485 23 64 EZHub pin 56 iCore 64 RS485 converter 23 RS485 to USB 23 65 S Sampling Sequence 15 Sensor Replacement 86 Serial RS485 Connection 64 Service 8 Single Valve 26 SmartDGA Instrum...

Отзывы: