Warning—Potential Damage:
To avoid loss of data or printer malfunction, do not touch the USB cable, any
wireless network adapter, or the printer in the areas shown while actively printing.
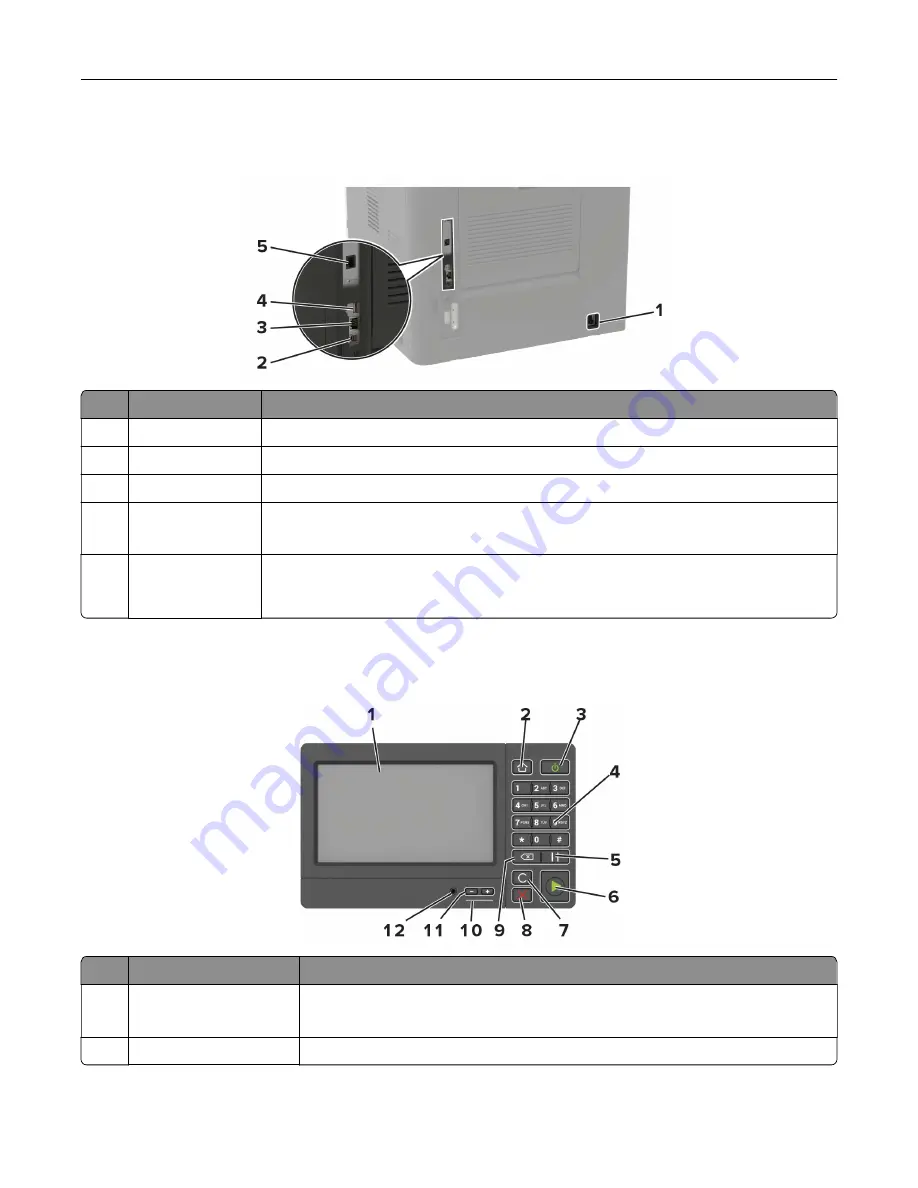
Use the
To
1
Power cord socket Connect the printer to a properly grounded electrical outlet.
2
USB printer port
Connect the printer to a computer.
3
Ethernet port
Connect the printer to a network.
4
USB port
Attach a keyboard or any compatible option.
Note:
This port is available only in some printer models.
5
LINE port
Connect the printer to an active telephone line through a standard wall jack (RJ
‑
11), DSL
filter, or VoIP adapter, or any other adapter that allows you to access the telephone line
to send and receive faxes.
Using the control panel
Use the
To
1
Display
•
View the printer messages and supply status.
•
Set up and operate the printer.
2
Home button
Go to the home screen.
Learning about the printer
15
Содержание XM5365
Страница 48: ...3 From the Shortcut Type menu select Copy and then configure the settings 4 Apply the changes Copying 48 ...
Страница 159: ...5 Insert the new fuser until it clicks into place 6 Lock the fuser 7 Close the door Maintaining the printer 159 ...
Страница 167: ...2 Remove the used pick roller 3 Unpack the new pick roller Maintaining the printer 167 ...
Страница 173: ...6 Insert the new ADF feed roller until it clicks into place Maintaining the printer 173 ...


