16
5
Using the operator panel
This section contains information about understanding the operator panel, changing printer settings,
and understanding operator panel menus.
You can change most printer settings from your software application or printer driver. Settings you
change from the application or printer driver apply only to the job you are preparing to send to the
printer.
Changes made to printer settings from a software application override changes made from the
operator panel.
If you cannot change a setting from your application, use the operator panel or the remote operator
panel available from MarkVision. Changing a printer setting from the operator panel or from
MarkVision makes that setting the user default. Refer to the drivers CD for information about
MarkVision.
Understanding the operator panel
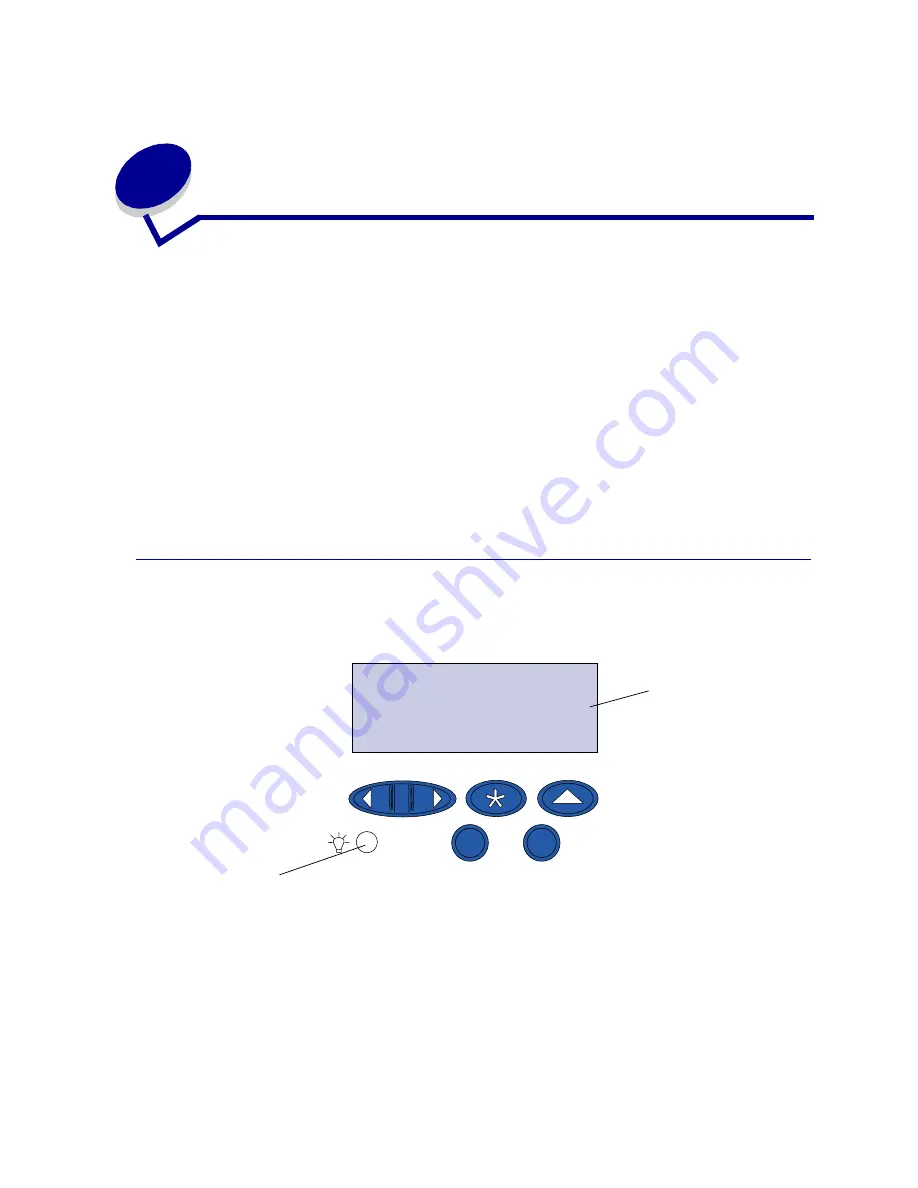
The printer operator panel has a 2-line by 16-character liquid crystal display (LCD), five buttons, and
one indicator light.
Indicator light
The indicator light gives information about the status of your printer. If the light is:
•
Off, the printer is off
•
On, the printer is on, but idle
•
Blinking, the printer is on and is busy
LCD
Light
Ready
1
Menu
2
Select
3
Go
5
Return
4
Stop
6
Содержание 12N0003 - C 910 Color Laser Printer
Страница 1: ...www lexmark com User s Reference October 2001 Lexmark C910 ...
Страница 2: ......
Страница 10: ...viii ...
Страница 53: ...51 4 Close the multipurpose feeder door ...
Страница 99: ...97 5 Loosen the thumbscrews on each side of the transfer belt cover 6 Lift and remove the transfer belt cover ...
Страница 100: ...98 7 Loosen the thumbscrews on each side of the transfer belt 8 Pull the transfer belt out ...
Страница 102: ...100 3 Slide the transfer belt in until it is fully seated 4 Tighten the transfer belt thumbscrews ...
Страница 127: ...125 5 Lift the optional drawer ...
Страница 128: ...126 36 Removing the duplex unit 1 Turn the printer off 2 Open the duplex unit door ...
Страница 129: ...127 3 Loosen the thumbscrews securing the duplex unit 4 Slide the duplex unit out ...
Страница 130: ...128 5 Close the duplex unit door ...
Страница 158: ...156 3 Loosen the two screws shown 4 Pull out the duplex unit far enough to see the duplex unit inlet ...
Страница 169: ...167 3 Close the top cover 4 Press Go ...


