164
5
Press
Go
.
24<x> Paper Jam
Check Tray <x>
Jams in five areas result in a
24<x> Paper Jam
message, where
x
represents the tray number where
the jam has occurred. Paper jam messages
241–244
indicate a jam has occurred in one of the paper
trays. A
249 Paper Jam Check Tray <x>
message indicates a jam has occurred in the high capacity
feeder. See
Identifying paper jam areas
for tray numbering.
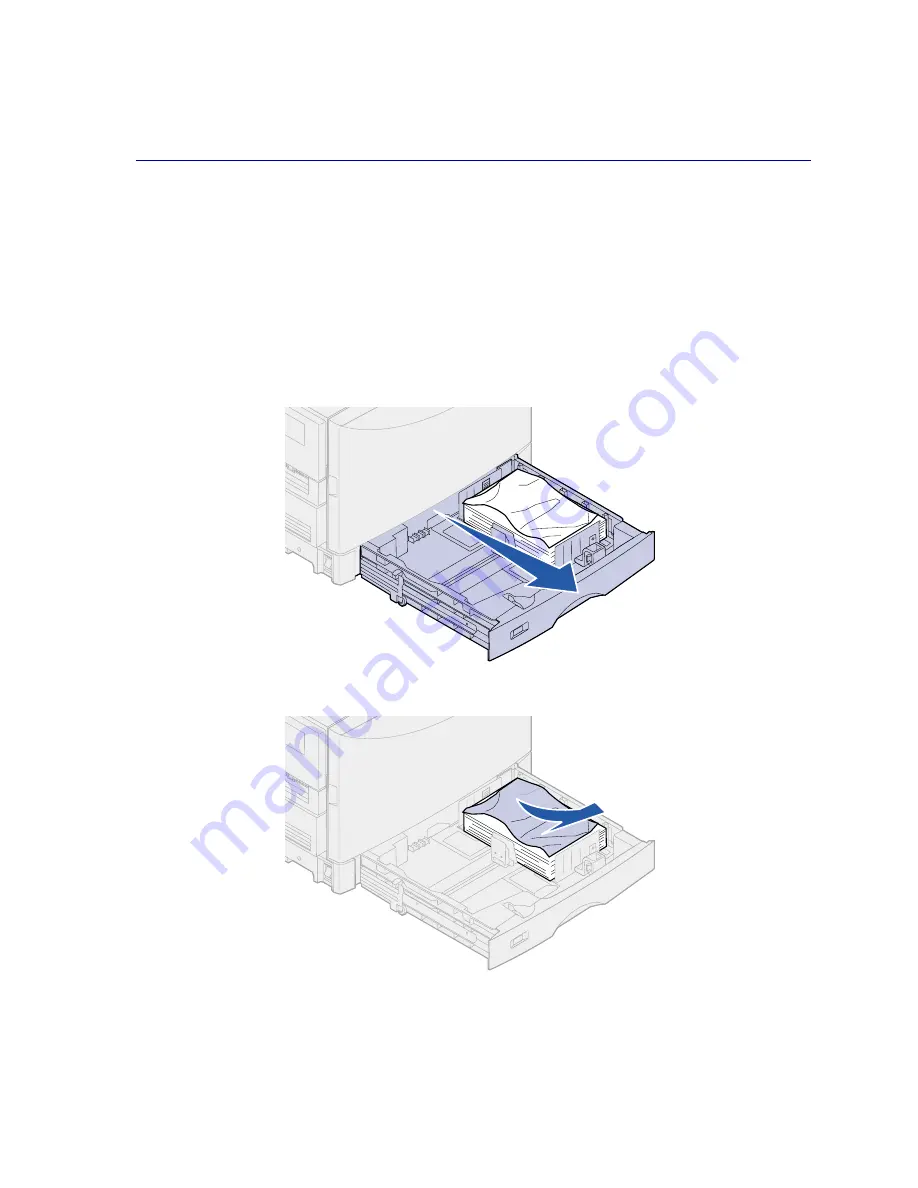
241-244 Paper Jam
1
Pull out the tray indicated on the display.
2
Remove any wrinkled or creased paper.
Содержание 12N0003 - C 910 Color Laser Printer
Страница 1: ...www lexmark com User s Reference October 2001 Lexmark C910 ...
Страница 2: ......
Страница 10: ...viii ...
Страница 53: ...51 4 Close the multipurpose feeder door ...
Страница 99: ...97 5 Loosen the thumbscrews on each side of the transfer belt cover 6 Lift and remove the transfer belt cover ...
Страница 100: ...98 7 Loosen the thumbscrews on each side of the transfer belt 8 Pull the transfer belt out ...
Страница 102: ...100 3 Slide the transfer belt in until it is fully seated 4 Tighten the transfer belt thumbscrews ...
Страница 127: ...125 5 Lift the optional drawer ...
Страница 128: ...126 36 Removing the duplex unit 1 Turn the printer off 2 Open the duplex unit door ...
Страница 129: ...127 3 Loosen the thumbscrews securing the duplex unit 4 Slide the duplex unit out ...
Страница 130: ...128 5 Close the duplex unit door ...
Страница 158: ...156 3 Loosen the two screws shown 4 Pull out the duplex unit far enough to see the duplex unit inlet ...
Страница 169: ...167 3 Close the top cover 4 Press Go ...


