SECTION 4 - BASE COMPONENTS
4-36
– JLG Lift –
3121222
Motor Cover/Motor Installation
Disconnect the batteries before performing these procedures.
This procedure requires removing the pump to frame
mounting bolts and nuts and rotating the pump assembly
horizontally far enough to allow removal of the pump
motor cover. No pump connections, hyraulic or electrical
need be disconnected.
Preventative Maintenance - Brush Wear - Dust
Removal Procedure
Due to a possible build-up of dust from brush wear inside
the pump motor cover around the brushes and armature
under heavy usage. It is recommended per the Preventa-
tive Maintenance and Inspection Schedule - Section-2
(Table 2-2), to perform this dust cleaning task on an
annual basis.
Follow the procedure show above for motor cover
removal. Once the motor cover is removed, blow any accu-
mulated brush dust from inside the cover and around the
brushes, and armature commutator. Check brushes for
wear, replace if necessary. Once complete, reassemble for
operation,
do not overtighten the motor cover bolts
into the aluminum valve body, 8 Nm (70 in. lb.)
.
Motor Brush Installation
Once pump motor cover has been removed, inspect the
rotor commutator for excessive wear before installing a
new brush set.
After final assembly of the brushes check that all brush ter-
minal screws are tight and the brush springs are posi-
tioned properly before installing the motor cover and
motor to the pump valve body.
DO NOT OVERTIGHTEN THE PUMP MOTOR ASSEMBLY SCREWS INTO
THE ALUMINUM VALVE BODY. (8 NM OR 70 IN. LB.)
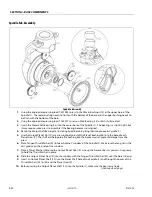
Motor Cover/Motor Installation
1.
Motor Assembly
3.
Motor Assembly Screws (a)
2.
Motor Cover
4.
Disassembly Marks (b)
NOTE:
(a) When reassembling, DO NOT OVERTIGHTEN motor assembly screws (3),
torque is 8 Nm (70 in. lb.).
(b) Place marks on body to help with reassembly alignment.
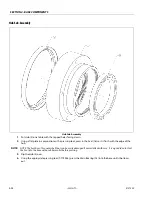
Brush Installation
1.
Brush Holder
4.
Brush Tension Spring
2.
Brush
5.
Commutator on Armature
3.
Brush Terminal Screw
6.
Motor Cover Bearing
Installation the same for all four (4) brush assemblies.
Note:
Clean the rotor commutator and brushes with a non-conductive electrical
cleaner before assembly.
Attach the brush terminal end to the terminal post using the terminal screw (3), then
push the brush (2) down into it’s holder (1), slide the tension spring (4) onto the top of
the brush.
Содержание 1230ES
Страница 1: ...AS NZS Service and Maintenance Manual Model s 1230ES P N 3121222 June 22 2017 ...
Страница 2: ...NOTES ...
Страница 24: ...SECTION 1 MACHINE SPECIFICATIONS 1 12 JLG Lift 3121222 NOTES ...
Страница 32: ...SECTION 2 GENERAL SERVICE INFORMATION 2 8 JLG Lift 3121222 NOTES ...
Страница 78: ...SECTION 4 BASE COMPONENTS 4 40 JLG Lift 3121222 NOTES ...
Страница 104: ...SECTION 5 CONTROL COMPONENTS 5 26 JLG Lift 3121222 NOTES ...
Страница 158: ...SECTION 8 DIAGNOSTIC TROUBLE CODES 8 22 JLG Lift 3121222 NOTES ...
Страница 169: ...SECTION 9 GENERAL ELECTRICAL INFORMATION SCHEMATICS 3121222 JLG Lift 9 11 Figure 9 5 Connector Installation ...
Страница 198: ...SECTION 9 GENERAL ELECTRICAL INFORMATION SCHEMATICS 9 40 JLG Lift 3121222 ...
Страница 199: ...SECTION 9 GENERAL ELECTRICAL INFORMATION SCHEMATICS 3121222 JLG Lift 9 41 ...
Страница 200: ...SECTION 9 GENERAL ELECTRICAL INFORMATION SCHEMATICS 9 42 JLG Lift 3121222 ...
Страница 202: ...SECTION 9 GENERAL ELECTRICAL INFORMATION SCHEMATICS 9 44 JLG Lift 3121222 NOTES ...


