Page 6
ENGLISH
Jandy
®
Pro Series, Hi-E2
®
and Hi-E2R Gas-Fired Heater
|
Installation & Operation Manual
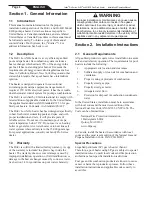
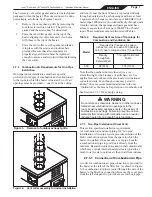
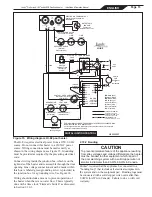
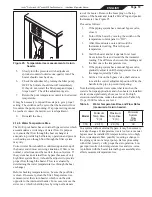
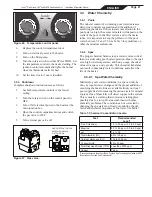
Figure 1. Outdoor heater location.
1/4” X 2-1/4”
GALVANIZED OR PLATED
CONCRETE SCREWS
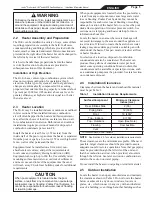
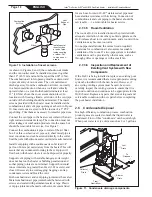
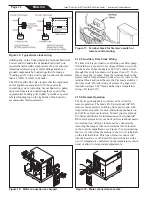
Figure 2. Anchor heater to equipment pad.
a garage or utility room, see Figure 1. Do not locate the
heater below an outdoor deck, unless treated as an indoor
installation with adequate clearances and proper venting
to a location away from the deck.
If the heater is installed close to a structure, protect it from
rain water runoff by means of gutters, roof water diverters
or similar measures. Do not locate the heater close to
irrigation sprinklers. Water from sprinklers may damage
controls and electronic components.
Because the Hi-E
2
is very efficient, combustion system
exhaust gases are moist. Do not locate the heater such
that this exhaust will impinge on structures or vegetation
which may be damaged by combustion condensate.
WARNING
United States
Do not install the heater with the top of the vent
assembly within 4 feet (1.22 m) horizontally, 4 feet
(1.22 m) below or less than 1 ft (300 mm) above of any
opening into a building.
Canada
Do not install the heater with the top of the vent
assembly within 10 feet (3.05 m) of any opening into a
building.
In Florida it is required that the heater be securely
fastened to the equipment pad. Use a size 1/4” x 2-1/4”
long galvanized or plated concrete screws and washers
at each of the four (4) tabs located at the base of the
heater. Mounting the appliance in this manner meets the
applicable requirements of the Florida Building Code.
Mounting screws are not provided with this heater. After
placing the heater on the equipment pad, drill a hole in
the concrete at each of the four (4) tabs on the feet of the
heater. (The correct size drill bit is usually provided with
the concrete screws when purchased). Place a screw in
each of the holes and fasten the heater to the equipment
pad, see Figure 2.
Do not over torque the screws
.
2.6 Outdoor Shelter Installation (Canada)
An outdoor shelter is an unoccupied enclosure which
does not communicate directly with occupied areas.
The Hi-E
2
may be installed in such a shelter only when
the installation is in accordance with local codes and
the most recent edition of the Natural Gas and Propane
Installation Code (CAN/CSA B-149.1). These codes and
standards and Zodiac
®
require that the heater be properly
vented as outlined in this manual. Other requirements also
apply, such as provision of ample uncontaminated air for
combustion and ventilation.
2.7 Indoor Installation
The Hi-E
2
can be located indoors when provided with
“one-pipe” or “two-pipe” systems for combustion air
and combustion product venting. A one-pipe installation
has only a vent pipe, and air for combustion must be
provided to the room the heater is located in. A two-pipe
system (sometimes referred to as “direct vent” or “sealed
combustion”) has a vent pipe
plus
a pipe bringing air
directly to the heater's combustion system.
Section 2.7.2 specifies requirements for provision of
combustion and ventilation air for one-pipe installations.
Section 2.7.3 covers two-pipe installation.
An important consideration in selecting one (1) or two
(2) pipe installation is the quality of the combustion
air. Indoor air is sometimes contaminated with various
household or pool sanitation chemicals which can cause
corrosion in the heater combustion system. Unless the
indoor air is known to be free of these materials, two (2)
pipe installation is strongly recommended.
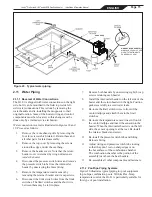
2.7.1 Preparation of Heater For Indoor Installation
If the Hi-E
2
is to be installed indoors, its exhaust discharge
grille must be converted to an exhaust pipe configuration.
Содержание HI-E2
Страница 2: ......
Страница 37: ...Page 37 ENGLISH Jandy Pro Series Hi E2 and Hi E2R Gas Fired Heater Installation Operation Manual NOTES...
Страница 38: ...Page 38 ENGLISH Jandy Pro Series Hi E2 and Hi E2R Gas Fired Heater Installation Operation Manual NOTES...
Страница 39: ...Page 39 ENGLISH Jandy Pro Series Hi E2 and Hi E2R Gas Fired Heater Installation Operation Manual NOTES...


