Page 18
ENGLISH
Jandy
®
Pro Series, Hi-E2
®
and Hi-E2R Gas-Fired Heater
|
Installation & Operation Manual
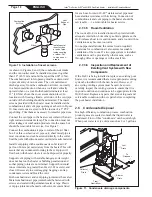
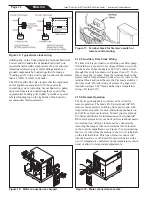
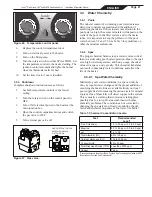
Figure 24. Adjustment of pressure switch.
SLOWLY TURN ADJUSTMENT
SPROCKET CLOCKWISE
UNTIL HEATER GOES OFF.
When the heater starts, immediately feel the outlet header
of the heater to confirm that there is adequate water
flow. The header should not be hot. Normally, water
temperature will rise only a few degrees as it passes
through the heater, and a “hot” header or pipe indicates
low water flow.
WARNING
When the heater is fired for the first time, the
combustion chamber refractory binder material is
driven out by the heat of the flame. White smoke and/
or sharp odors may be emitted from the vent during
this period. Do not inhale combustion product fumes
at any time, and especially when these fumes are
being emitted. This “burn-in” period will last only a few
minutes.
2.12.3 Condensate
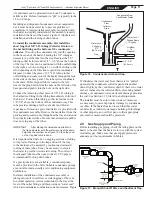
If there is no water in the condensate trap, the heater’s
combustion blower will pull air into the lower drain hose
and normal drainage of combustion condensate will
not occur. This water will accumulate to blower inlet
level and will (temporarily) be blown out of the vent.
Eventually it will drain back to the tray and will "prime"
the trap. To avoid this "wet" start-up, simply pour water
into the tray before starting the heater.
2.12.4 Gas Pressure
Model Hi-E
2
pool heaters include a step-down regulator to
reduce the pressure of gas entering the combination gas valve.
This regulator is factory set between 1.25” and 3.0” WC
regardless of whether natural or LP gas is used by the heater.
Confirm that gas supply is of adequate size per Section
2.9 of this manual. Confirm that the step-down regulator
is properly set by verifying that the pressure at the port on
the inlet side of the gas valve is 1.25 - 3.0 inches WC with
the heater operating (fired).
Checking of gas pressure at the outlet of the gas valve
requires knowledge of the venturi system of the Hi-E
2
pool heater. Do not attempt to adjust this pressure without
thorough understanding of its operation and settings, as
outlined in the maintenance section of this manual.
2.12.4.1 Step-down Gas Pressure Regulator
The step-down regulator does not change requirements
for gas supply piping or pressure as stated in Table 4 and
measurements must be taken before the step-down gas
pressure regulator. In addition, it will not change any
of the servicing procedures for the venturi/combination
flow system. Gas supply must be as stated in the
installation and operation manual and on the heater
rating plate. Servicing procedures for the venturi/
combustion flow system must be as specified in the
installation and operation manual. Incorrect adjustment
of the combination gas control can cause improper heater
operation and hazardous combustion emissions.
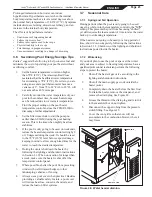
To order this regulator as a separate part, please order kit
number R0337300, shown in Figure 23.
2.12.5 Adjustment of Water Pressure Switch
The pressure switch is pre-set at the factory for normal
pool installations. Do not adjust it unless the heater water
connections are more than three feet above or below the
pool surface. If they are not in this range, the pressure
switch must be adjusted. This can be done in the field if
the water connections are no more than six feet above the
pool surface and no more than ten feet below it. For other
situations, contact a Jandy Pro Series representative.
CAUTION
The water pressure switch should be adjusted to turn
the heater off when the pump is off. Setting the switch
to close at too low of a flow can damage the appliance.
Adjust the switch to turn the heater off, not on.
To adjust the pressure switch, proceed as follows. See
Figure 24.
The pool filter must be clean before making this
adjustment. The heater does not have to be firing.
1.
Turn the switch to OFF, and make sure the
pressure switch is at its lowest setting. This is
done by rotating the adjuster counterclockwise as
far as it will go.
2.
Start the filter pump and confirm by means of
an ohmmeter that the pressure switch closes (if
the switch fails to close, replace it with a switch
which has a lower minimum setting).
3.
Turn switch to ON. Heater should start.
4.
With your fingers, turn the adjustment sprocket
very slowly clockwise until the heater goes off.
Содержание HI-E2
Страница 2: ......
Страница 37: ...Page 37 ENGLISH Jandy Pro Series Hi E2 and Hi E2R Gas Fired Heater Installation Operation Manual NOTES...
Страница 38: ...Page 38 ENGLISH Jandy Pro Series Hi E2 and Hi E2R Gas Fired Heater Installation Operation Manual NOTES...
Страница 39: ...Page 39 ENGLISH Jandy Pro Series Hi E2 and Hi E2R Gas Fired Heater Installation Operation Manual NOTES...

