background image

Subject to technical changes | Valid from July 2021    

Subject to technical changes | Valid from July 2021

21

REFRIGERATED DISPLAY CASES

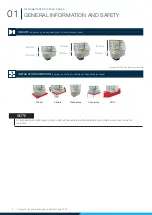
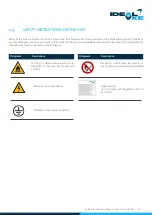
Risk tripping hazard int the entire area of the unit

Pay attention to possible tripping hazards from cables / lines laid on the floor. The operator must ensure, that all lines and 
cables are laid / installed safely.

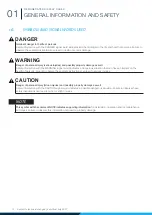
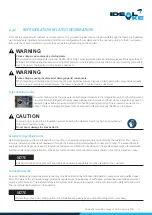
CAUTION

Danger of crushing/cutting when moving the sliding or hinged doors

When opening and closing the sliding doors, use the handles provided for this. When closing the sliding doors, do not 
reach between the side sections of the sliding door and the unit. Do not reach into the area between the underside of the 
angle trim and the top edge of the sliding door. Ensure that the angle trim is properly attached and screwed together. This 
also applies to hinged doors. Be very careful when handling glass.

WARNING

Danger of crushing/cutting when moving the glass cover or front glass

When lifting the glass cover, use the small handle strip provided for this. At least two persons are needed to open the glass 
cover or front glass. Close the glass cover and front glass carefully and watch out for dangers of crushing by the glass 
cover and front glass. Be very careful when handling glass.

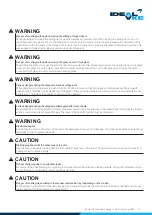
WARNING

Various dangers during the disposal of various refrigerants

When disposing of refrigerants (propane, R404A, R134A etc.) wear protective gloves and safety glasses. Working with 
open flames is forbidden while disposing of refrigerant. Dispose of the refrigerant properly and in an environmentally com

-

patible way. The laws of the specific country must be observed.

WARNING

Various dangers during the disposal of damaged parts/components

When disposing of damaged parts/components, wear protective gloves. Dispose of damaged parts/components properly 
and in an environmentally compatible way. The laws of the specific country must be observed.

WARNING

Electrical dangers

Ensure that the mains connection of the unit is not damaged. In the event of damage, it must be replaced by an authorised 
specialist in order to prevent hazards.

WARNING

Danger of slipping due to condensate leaks

Be aware of the possible danger of slipping in the area around the unit due to leaking liquids. During the installation, ensu

-

re that the siphon is installed properly and does not leak.

CAUTION

Danger of crushing when sliding in the manual condensate tray (depending on the model)

When sliding in the manual condensate tray use the handle strip provided for this. Ensure that the condensate tray is com

-

pletely pushed into the compressor compartment.

CAUTION

Содержание AKV 116

Страница 1: ...Betriebsanleitung KÜHLVITRINEN Original 21A ...

Страница 2: ...Technische Änderungen vorbehalten Gültig ab Juli 2021 2 ...

Страница 3: ...ngt durch Sonderbau sind noch viele andere Ausführungen unserer Produkte möglich Betriebsanleitung Einbauanleitung Copyright 2021 AKE Ausseer Kälte und Edelstahltechnik GmbH Alle Rechte vorbehalten Bei dieser Dokumentation handelt es sich um die Originaldokumentation Kein Teil dieser Publikation darf in irgendeiner Weise reproduziert gespeichert oder in irgendeiner Form oder mit irgendwelchen Mitt...

Страница 4: ...KATIONEN 28 2 3 SICHERHEITSHINWEISE AM GERÄT 29 2 3 1 ELEKTRISCHE HINWEISE 30 2 3 2 KÄLTETECHNISCHE HINWEISE 31 2 4 MONTAGE UND EINBAUANLEITUNG 32 2 4 1 ERSTE SCHRITTE 32 2 4 2 MONTAGE DES GERÄTS ÜBER 2000 m SEEHÖHE 33 2 5 INSTALLATION STEUERGEHÄUSE 34 2 5 1 STEUERUNG STÖRK ST501 ST200F 34 2 5 2 STEUERUNG CAREL PJ EZ PJS2C 34 2 6 TAUWASSERENTSORGUNG KONDENSAT 35 2 7 BE UND ENTLÜFTUNG 36 2 8 ABTAUM...

Страница 5: ...KÜHLUNTERBAUS 70 4 1 8 REINIGUNG DER LADE TORTENAUSZUG INKL VERDAMPFEREINHEIT 71 4 1 9 REINIGUNG DES SCHNEIDBRETTS 72 4 1 10 REINIGUNG DES BOTTLE SLIDER FLEXROLLER 73 4 1 11 REINIGUNG ABKLAPPBARE HEISSGAS TAUWASSER VERDUNSTUNG 74 4 1 12 REINIGUNG ELEKTRISCHE TAUWASSERSCHALE OPTIONALES ZUBEHÖR 76 4 1 13 REINIGUNG ABLAUFLEITUNG INKL SIPHON 77 4 2 WARTUNGSHINWEISE 78 4 3 WARTUNGS INSTANDHALTUNGSINTER...

Страница 6: ...age Inbetriebnahme Bedienung und Pflege Die Nichteinhaltung der vorher genannten Punkte kann zu Garantie Gewährleistungs und Produkthaftungsausschlüssen aber auch zu Schäden und Sicherheitsmängeln führen Halten Sie dieses Dokument stets komplett und in einwandfrei lesbarem Zustand Bei Bedarf fordern Sie dieses umgehend bei Ihrem Lieferanten oder Betreiber an oder downloaden Sie dieses von der Home...

Страница 7: ...el für geschlossene Vitrinen GN GASTRO NORM EN BACKNORM EURONORM Gastronorm 2 bis 5 Schalen bis max 150 mm Euronorm 1 bis 4 Bleche DIE GRÖSSEN IM EINSATZ rund eckig schräg PRO eckig PRO rund bei Isolierglasvitrinen auf Anfrage Ausführung KALT Kühlvitrinen mit ESG Einscheiben Sicherheitsglas Aufbau Ausführung GREEN Kühlvitrinen mit ISOLIER ESG Aufbau ...

Страница 8: ...räte mit Fußgestellen in der Höhe variabler Stellfüße bauseitig vollständig verkleidet werden HINWEIS 530 mm 370 mm 700 mm 370 mm 870 mm 370 mm optional flache Innenwannen mit 195 mm möglich DIE HÖHEN Gerätefotos als Beispiel für geschlossene Vitrinen MONTAGEVARIANTEN Gerätefotos als Beispiel für geschlossene Vitrinen Drop in Slide in Auftisch PRO Stand ...

Страница 9: ...a leer oder HC high capacity b G kundenseitig geschlossen oder O offen oder A Auftisch c E eckig oder S schräg 10 oder R rund ddd Nummer zwischen 50 und 400 Gerätebreite ee leer oder Nummer zwischen 45 und 99 Höhe Glasaufbau f E eigengekühlt oder Z zentralgekühlt ggg Nummer zwischen 50 und 200 Gerätehöhe h EN Euronorm oder GN Gastronorm i S Maschine seitlich und U Maschine unterhalb k Größenangabe...

Страница 10: ...tung bezüglich der richtigen Installation In betriebnahme Betrieb Wartung und Montage des Gerätes nicht autorisierte mechanische oder technische Änderungen am Gerät unzureichende Wartung der Nutz und Verschleißteile nicht autorisierte Reparaturen Verwendung von aggressiven oder ätzenden Reinigungsmitteln Naturgewalt oder höhere Gewalt Zudem von der Haftung ausgeschlossen sind Glasbruch Bruch von K...

Страница 11: ...teile E Mail webshop ake at Webshop Ersatzteile Onlinekatalog https shop ideal ake at ersatzteilshop Verfügbarkeit der Ersatzteile 8 Jahre nach Inverkehrbringung des letzten Stückes der Modellgruppe Garantiemindestdauer Siehe Vertragsvereinbarung AGB AKE Informationen über das Modell Eprel Datenbank https ec europa eu 1 5 HERSTELLER SUPPORT 1 5 1 WEITERE KONTAKTDATEN FÜR ANFRAGEN REPARATUR Bei Kon...

Страница 12: ...t dem Signalwort WARNUNG weist auf eine gefährliche Situation hin die eine Auswirkung auf die Gesundheit von Personen haben kann Das Nichtbeachten dieser Sicherheitshinweise kann zu schweren Verletzungen führen GEFAHR WARNUNG Dieses Symbol mit dem Vermerk Hinweis weist auf unterstützende Informationen für Installation Betrieb bzw Wartung und Instandsetzung hin Das Nichtbeachten dieser Hinweise kan...

Страница 13: ...an der Abdeckung der Steuerung oder im Unterbau nahe des Steuerkastens Das Gerät ist zusätzlich durch das AKE Prüfzeichen gekenn zeichnet Das AKE Prüfzeichen befindet sich am Unterbau oder an der Steuereinheit modellabhängig Allgemeine technische Spezifikationen sind im Kapitel 2 2 zu finden Aufgrund der Modellvielfalt sind weitere technische Daten am Typenschild angeführt HINWEIS ...

Страница 14: ...ren oder explosiven Produkte im Gerät oder in deren Nähe Das Gerät muss bei der Montage bzw beim Einbau ausreichend verkleidet werden damit kein Kontakt mit spannungsführenden Teilen möglich ist Die Einbauumgebung muss stabil ausgeführt sein um den täglichen Belastungen standzuhalten Jegliche Verkleidungen die beim Einbau montiert werden dürfen nicht ohne Werkzeug entfernbar sein Nach Reinigung Wa...

Страница 15: ... an der Vorder und Rückseite der Geräte sind frei zu halten Die Mindestabstände zu anderen Geräten müssen eingehalten werden Es ist Sorge zu leisten dass die Luftzirkulation ungehindert erfolgt Bei einer Leckage des Kältesystems kann bei Behinderung der Luftzirkulation eine unbeabsichtigte exotherme Reaktion des zündfähigen Gas Luft Gemisches zur Folge haben Laut DIN EN 378 1 ist das Kältemittel P...

Страница 16: ...d zwingend einzuhalten Diese Spezifikationen sind unter anderem Umgebungs temperatur Beschaffenheit der Einbauumgebung sowie zu verwendende Anschlüsse HINWEIS Die Geräte sind speziell für den Einbau in Lebensmittel und Ausgabetheken sowie als Einzelgerät oder Multi Geräte Montage z B Geräte Insel bestimmt Sie sind für die Kühlung und Präsentation von Lebensmittelerzeugnissen und Getränken bei rege...

Страница 17: ...alten Nur unterwiesenes Personal darf das Gerät bedienen und reinigen Nur vom Hersteller autorisiertes fachkundiges Personal darf Wartungs und Reparaturarbeiten durchführen Beachten Sie unbedingt die bei Ihnen vor Ort gültigen gewerberechtlichen und sicherheitstechnischen Bestimmungen Zum Erlangen der Kenntnisse die zum Bedienen des Gerätes erforderlich sind sind folgende Maßnahmen durch den Betre...

Страница 18: ...llt oder zugedeckt werden Lebensmittel dürfen die Wände des Gerätes nicht berühren oder den Luftstrom blockieren Das Gerät darf nicht außerhalb von Gebäuden betrieben werden Schützen Sie das Gerät vor direkter Sonneneinstrahlung Geräte für Lebensmittel wie Meeresfrüchte Fisch und Muscheln oder Ähnlichem müssen mit höherwertiger Edelstahl güte V4A oder AISI 316 ausgeführt oder mit geeigneten GN Sch...

Страница 19: ...lung können zum Verderben der eingebrachten Ware führen c Nichtzutreffend d Nichtzutreffend e Siehe Kapitel 2 4 Siehe Kapitel 4 f Wird die Verflüssigerspirale nicht 1x pro Jahr gereinigt führt dies zu einer erheblichen Verringerung der Effizienz des Gerätes g Siehe Kapitel 1 5 1 h Siehe Kapitel 1 5 1 i Siehe Kapitel 1 5 1 j Siehe Kapitel 1 5 1 k Siehe Kapitel 1 5 1 Angeführte Angaben dienen der In...

Страница 20: ...errücken der Geräte ist nicht zulässig Ziehen Sie gegebenenfalls eine weitere Person zur Einweisung hinzu Tragen Sie bei Montage und Verladetätigkeiten Schutzhandschuhe und Sicherheitsschuhe WARNUNG Quetschgefahr sowie Gefahr durch herabfallende Gegenstände beim Hantieren Justieren Positionieren mit schweren Einzelkomponenten Achten Sie beim Hantieren mit schweren Gegenständen auf mögliche Quetsch...

Страница 21: ...Sie mit Glas hantieren WARNUNG Diverse Gefahren beim Entsorgen diverser Kältemittel Tragen Sie beim Entsorgen von Kältemittel Propan R404A R134A etc Schutzhandschuhe und Schutzbrille Beim Entsorgen des Kältemittels ist das Hantieren mit offenem Feuer verboten Entsorgen Sie das Kältemittel ordnungsgemäß und umweltgerecht Länderspezifische Gesetze sind zu beachten WARNUNG Diverse Gefahren beim Entso...

Страница 22: ...ten und Sicherheitsschuhe Tragen Sie bei Montage und Verladetätigkeiten und bei Tätigkeiten mit Kältemittel laut EN 378 3 Sicherheitshandschuhe Tragen Sie beim Entsorgen des Kältemittels und von be schädigten Bauteilen Komponenten eine Schutzbrille Tragen Sie beim Reinigen des Gerätes die entsprechende Schutzausrüstung die vom Hersteller des verwendeten Reinigungsmittels vorgeschrieben wird HINWEI...

Страница 23: ...auteilen Wände andere Maschinen bei Positionierung der Geräte sowie Quetschgefahr zwischen Palette und Untergrund beim Absetzen Halten Sie sich und andere Personen von der Gefahrenstelle fern Ziehen Sie gegebenenfalls eine weitere Person zur Einweisung hinzu Achten Sie beim Absetzen der Geräte auf Quetschgefahr für Dritte Tragen Sie bei Montage und Verladetätigkeiten Schutzhandschuhe Sicherheitssc...

Страница 24: ...ze sind zu beachten WARNUNG Diverse Gefahren beim Entsorgen von beschädigten Bauteilen Komponenten Tragen Sie beim Entsorgen von beschädigten Bauteilen Komponenten Schutzhandschuhe Entsorgen Sie beschädigte Bauteile Komponenten ordnungsgemäß und umweltgerecht Länderspezifische Gesetze sind zu beachten WARNUNG Bitte beachten Sie dass es sich bei einigen Komponenten des Gerätes um elektronische Teil...

Страница 25: ...Technische Änderungen vorbehalten Gültig ab Juli 2021 25 NOTIZEN ...

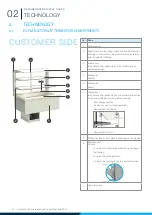
Страница 26: ...6 Frontglas mit Griffleiste modellabhängig mit Gasdruckdämpfer unterschiedliche Ausführungen möglich Easy Change Funktion wahlweise offener oder geschlossener Betrieb Entnahmeklappe SoftClose Entnahmeklappe Acrylglas 7 Kippprofil für Frontglas modellabhängig 8 Bordträger Optionen wahlweise schräge gerade Position durch Einhängen der oberen Lasche wahlweise Höhenverstellung 25 mm durch Einhängen de...

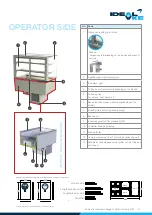
Страница 27: ...N E R S E I T E 2 Zentralgekühlt nicht vorhanden Waterloop unterschiedliche Ausführung NR Benennung 1 Schiebetüren mit Griff und Verriegelung 2 Beleuchtungsträger inkl Leuchtmittel 3 Seitenglas rechts 4 Schneidbrett abnehmbar modellabhängig 5 Tauwasserschale Möglichkeiten siehe Kapitel 2 2 6 Unterbau mit Tortenauszug oder Lade modellabhängig 7 Luftleitblech inkl Einhängeleisten 8 Einlegeböden1 9 S...

Страница 28: ...reiber Empfohlen IEC 61770 2008 ÖNORMEN 1717 2008 04 01 Kondensat über Siphon direkt in das bauseitige Abwassersystem DN32 über die Heißgasverdunstung über die Tauwasserschale manuelle Entleerung elektrische Tauwasserheizung Materialien Edelstahl 1 4301 Wanne Aufbau 1 4016 Maschinenfach Außenmantel 1 4404 Sonderbau Kupferrohre Kältekreislauf Zulieferkomponente Kälteaggregat Kompressor Verflüssiger...

Страница 29: ...züglich durch neue Aufkleber zu ersetzen Die Lesbarkeit und die Vollständigkeit müssen in regelmäßigen Abständen kontrolliert werden 2 3 SICHERHEITSHINWEISE AM GERÄT Piktogramme Beschreibungen Piktogramme Beschreibungen Warnung vor feuergefährlichen Stoffen Kältemittel der Klasse A2L A2 A3 B2L B2 und B3 Gefahr Keine offene Flamme Feuer of fene Zündquelle und Rauchen verboten Warnung vor elektrisch...

Страница 30: ...Geräte werden standardmäßig mit einem 1 5 Meter langen Anschlusskabel mit Schutzkontaktstecker geliefert Der Anschluss erfolgt an ein Wechselstromnetz mit einer Nennwechselspannung und Frequenz von 230 Volt 50 Hz länderabhängig mit 115 V 60 Hz 120 V 60 Hz 220 240 V 50 60 Hz Die elektrische Zuleitung ist mit 16 A Auslösecharakteristik C abzusichern Wenn eine Steckerverbindung zum Netzanschluss verw...

Страница 31: ...r Kälte kreislauf mit Kältemittel gefüllt Vitrinen mit Expansionsventil und solche ab einer be stimmten Größe ver fügen über ein Schauglas mit Feuchteindikator zur Kontrolle im Servicefall dieses befindet sich seitlich am Kondensator Bei steckerfertigen Geräten mit Kältemittel Propan R290 ist kein Schauglas vorhanden Steckerfertige Geräte Zentralgekühlte Geräte sind für den bauseitigen Anschluss a...

Страница 32: ...anten ist ratsam Zum Entfernen der Transportverpackung benötigen Sie Folgendes mindestens zwei Personen Werkzeug Akkuschrauber oder Kreuzschraubendreher Schneidewerkzeug Schere oder Messer Kippgefahr des Gerätes auf unebenen und instabilen Untergrund Achten Sie darauf das Gerät ausschließlich auf ebenen und ausreichend stabilen Untergrund aufzustellen Das Gerät könnte ansonsten kippen oder Teile d...

Страница 33: ...rch autorisierte Kältefachbetriebe und Fachpersonal ausge führt werden Elektrische Installationen dürfen nur von einem autorisiertem Fachpersonal durchgeführt werden Sie müssen sicher gehen dass geeignetes Personal und Werkzeug vorhanden sind um Schäden und Verletzungen zu vermeiden Das Gerät ist für einen Einsatz bis 2000 m Seehöhe bestimmt Bei Einsatz über 1500 Hm über Meeresspiegel ist bei Isol...

Страница 34: ...gselektronik verbunden Das Bedienteil ist abnehmbar und kann in der Möbelfront montiert werden Mögliche Ausführungen ST501 Das Bedienteil ist standardmäßig mit einem 1 5 m langen Datenkabel mit der Leistungselektronik verbunden 2 m Daten übertragung fehlerhaft ST200F Bedienteil ist standardmäßig mit einem 1 5 m langen CAT5 Kabel mit der Leistungselektronik verbunden bis max 100 Meter Manche Geräte...

Страница 35: ...Geruchsverschlüssen Siphon ausgestattet sodass lediglich die Abwasserverbindungen oder externe Tauwasserschalen entsprechend den örtlichen Gegebenheiten installiert werden müssen Es muss sichergestellt werden dass Abwasser nicht zurück in die Kühlstelle gelangen kann Über Siphon direkt in das Abwassersystem Steckerfertige Geräte modellabhängig sind mit vollautomatischer Tauwasserverdunstung ausges...

Страница 36: ...itionieren und Luftzirkulation zu vermeiden Begriffserklärung Luftleitblech Zuluft Abluft 2 7 BE UND ENTLÜFTUNG Standardmäßig werden die Geräte mit Belüftung an der Bedienseite und Abluft an der Kundenseite ausgeliefert Es wird em pf ohlen die Abluftöffnung kundenseitig siehe Variante 1 auszuführen Falls eine Abluftöffnung kundenseitig nicht möglich ist muss die Abluft seitlich oder an der Bediens...

Страница 37: ...te Vermeiden Sie dass die warme Abluft vom Aggregat wieder angesaugt wird Die Luftöffnung der Verkleidung muss weniger als 5 mm vom Kondensator entfernt sein HINWEIS Schmaler Spalt zwischen Kondensatorgehäuse und Verkleidung ca 5 mm Verschließen Sie den Spalt mit einem Dichtband ...

Страница 38: ...erk für das jeweilige Modell eingestellt Während dieser Zeit leuchtet auf dem Display links die mittlere LED Anzeige Abtauung Nach erfolgter Abtauung startet der Kühlmodus automatisch Abtauautomatik 2 8 ABTAUMÖGLICHKEITEN Durch Drücken der AUF Taste Steuerung Tastenbelegung siehe Kapitel 3 2 kann jederzeit eine Abtauung eingeleitet werden Wenn nach Drücken der AUF Taste die LED zu blinken beginnt ...

Страница 39: ...Technische Änderungen vorbehalten Gültig ab Juli 2021 39 NOTIZEN ...

Страница 40: ...liche Öl welches sich beim Transport verlagert haben könnte wieder zum Verdichter zurücklaufen kann gilt für steckerfertige Geräte Das Gerät wird vor Auslieferung vorgereinigt Es wird jedoch empfohlen das Gerät vor Inbetriebnahme mit einem geeigneten Reinigungsmittel bzw Desinfektionsmittel siehe Kapitel 4 1 2 gründlich zu reinigen um eventuelle Verunreinigungen zu entfernen 3 1 ERSTE INBETRIEBNAH...

Страница 41: ...gt Bevor Sie das Gerät mit Ware bestücken warten Sie bis die gewünschte eingestellte Temperatur erreicht ist HINWEIS TASTE BEZEICHNUNG FUNKTION 1 Kühlung Anzeige rot aktiv 2 Abtauung Anzeige rot aktiv 3 Lüfter Verdampfer Lüfter Anzeige rot aktiv 4 AUF Wert erhöhen Abtauung starten ca 3 Sekunden halten 5 AB Wert reduzieren Alarm quittieren 6 LICHT EIN AUS Beleuchtung modellabhängig optional 7 SET A...

Страница 42: ...fsausgang Licht 5 RTC Uhr Anzeige 6 Alarm 7 Ziffern TASTE BEZEICHNUNG FUNKTION 1 EIN AUS Taste Einschalten des Gerätes 2 Programmiertaste Anzeige Einstellung von Parametern etc 3 Lichttaste Abtautaste Einschalten Licht Abtaudeaktierung Dem Gerät liegt eine eigene Betriebsanleitung für den Kühlstellenregler mit detaillierten Informationen zur Bedienung bei Den darin beschriebenen Anweisungen ist Fo...

Страница 43: ...larm quittieren Sollwerteinstellung ca 2 Sekunden halten 4 MENÜ EXIT Geräteeinstellungen Menüpunkt schließen 5 LICHT Licht an aktiv Licht aus inaktiv je nach Modell dimmbar ca 4 Sekunden halten 6 STAND BY Ein Aus Stand By Gerät ca 4 Sekunden halten Gerät an grün Gerät aus Stand By rot 7 EIN AUS Hauptschalter Gerät I Ein 0 Aus 1 2 5 6 7 3 4 Dem Gerät liegt eine eigene Betriebsanleitung für den Kühl...

Страница 44: ...ion durch den Lieferanten oder Fachhändler erfolgen Achten Sie bei der Wahl der Innentemperatur auf die Umgebungsbedingungen Eine große Temperaturdifferenz zwischen Innen und Außentemperatur in Verbindung mit hoher Luftfeuchtigkeit kann zu starker Eisbildung und Kondensat führen Dies vermindert die Kälteleistung und verhindert die ordnungs gemäße Funktion der Abtauautomatik Der werkseitig eingeste...

Страница 45: ... Erreichen der Sollwert Temperatur möglich Dies wird einige Zeit erfordern Der Kühlstellenregler ist korrekt eingestellt und betriebsbereit Kontrollieren Sie nach erfolgter Installation den Parameter H11 Kalibrierung Fühler Rückluft Die Kalibrierung darf nur von autorisiertem Fachpersonal nach der für das Gerät gültigen Programmieranleitung durchgeführt werden HINWEIS ...

Страница 46: ...e maximale Tragkraft der Einlegeböden und Borde Beladung Borde siehe Stapelgrenze Umrissskizze der dazugehörigen Modellgruppe Beladung Einlegeboden siehe Stapelgrenze Umrissskizze der dazugehörigen Modellgruppe Beachten Sie dass Sie keine Fässer und keine Flaschen auf den Glasfächern lagern ACHTUNG Die Stapelgrenze kann je nach Bauhöhe des Geräts variieren Nehmen Sie hierzu mit dem Hersteller Kont...

Страница 47: ...st dieser Aufkleber beim Hersteller nachzuordern und am Gerät wieder anzubringen 3 3 1 STAPELGRENZEN UMRISSSKIZZEN Die angeführten Umrissskizzen mit festgelegten Stapelgrenzen Beladungsgrenzen beziehen sich auf Standard ausführungen des jeweiligen Kühlgerätes Bedingt durch Sonderbauten und kundenspezifischen Anfertigungen haben angeführte Stapelgrenzen womöglich nur bedingt und oder keine Gültigke...

Страница 48: ... 70 Gastro G 70 KL BAK G 70 KGW G 70 KGU G 70 30 300 115 115 85 30 300 115 115 85 30 300 115 115 85 30 300 115 115 85 30 300 115 115 85 30 300 115 115 85 30 300 115 115 85 30 300 115 115 85 EK014324 max 30 kg max 50 kg max 120 kg Gastro G 53 Gastro G 53 KL BAK G 53 EK014325 max 50 kg max 120 kg Gastro A Green A EK014326 max 50 kg max 120 kg Green G 88 Green FSV EK014327 max 120 kg max 50 kg max 30...

Страница 49: ...KSL EK014339 max 30 kg max 50 kg max 80 kg EK015027 max 30 kg max 30 kg max 120 kg AKV S 147 Kl EK015028 max 30 kg max 120 kg AKV U KL AKV S 96 116 146 KL Quetschgefahr beim Hantieren Justieren Positionieren mit schweren Einzelkomponenten Achten Sie beim Hantieren mit schweren Gegenständen auf mögliche Quetschgefahren auch für Dritte Verwenden Sie wenn möglich beide Hände wenn Sie mit schweren Geg...

Страница 50: ...e Kapitel 2 1 bestens für die Präsentation großer Torten oder ähnlicher Produkte geeignet Sämtliche Inhalte wie unter Kapitel 3 3 sind auch hier zutreffend und Folge zu leisten Tortenauszug BAK GREEN Tortenauszug FLANTASTIC Achten Sie bei der Bestückung der Laden bzw der Tortenauszüge auf festgelegte Stapelgrenzen des jeweiligen Kühlmöbels Alle Stapelgrenzen sind unter Kapitel 3 3 1 zu finden Soll...

Страница 51: ...tem Kontakt sind Beschädigungen der Edelstahloberflächen durch Korrosion nicht auszuschließen Eine höherwertige Edelstahlgüte V4A oder AISI 316 ist in diesem Fall mindestens erforderlich Achten Sie besonders darauf dass die eingebrachte Ware nicht zu nahe am Verdampfer steht und die Luftöffnungen verdeckt Zirkulationsöffnungen der Ladenkörbe dürfen nicht vollständig mit Waren verschlossen werden D...

Страница 52: ...icher dass die Sicherheitslaschen beim Wiedereinsetzen der Gläser wieder angebracht werden HINWEIS Bevor Sie die Träger verstellen können entfernen Sie die Glasborde siehe Kapitel 2 1 Heben Sie dazu das Glasbord an der Vorderkante an bis die Sicherheitslasche 1 das Glasbord freigibt und dieses nach vorne herausgezogen werden kann Achten Sie darauf dass der Warenstopper an der Bedienerseite 2 nach ...

Страница 53: ...usgeliefert Backnorm Bleche mit 600 x 400 mm Achten Sie bei der Verstellung der Einlegeböden auf festgelegte Stapelgrenzen des jeweiligen Kühlmöbels Alle Stapelgrenzen sind unter Kapitel 3 3 1 zu finden Sollte die Stapelgrenze erreicht bzw überschritten werden kann eine optimale Kühlung der eingebrachten Ware nicht mehr gewährleistet werden Für daraus entstandene Warenverluste ist der Hersteller n...

Страница 54: ...herstellen Falls notwendig einen autorisierte Servicefachkraft Support kontaktieren Temperatur am Display weicht von gemessener Temperatur ab Autorisierte Servicefachkraft Support kontaktieren Fühlerabgleich notwendig Kapitel 3 2 3 Zu viele zu warme Lebensmittel Ware vorkühlen siehe Kapitel 1 8 Luftöffnungen freilegen siehe Kapitel 2 7 Soll Temperatur zu hoch Einstellen Soll Temperaturwert siehe K...

Страница 55: ... Taste an der Steuerung für zir ka eine Sekunde siehe Kapitel 3 2 Falls keine Abhilfe autorisierte Servicefachkraft Support kontaktieren Gesamte Beleuchtung eine LED ist ausgefallen Autorisierte Servicefachkraft Support kontaktieren Defekt Mögliche Ursache Abhilfe Kondensation an den Gläsern Zu niedrige Temperatur im Gerät Anzeige Sollwert SET Taste drücken Geräte ohne Isolierglas 4 bis 5 C siehe ...

Страница 56: ...lers F1 Rückluft F2L Fehler am Fühler F2 Kurzschluss Kontrolle des Fühlers F2 Abtau Verdampferfühler F2H Fehler am Fühler F2 Bruch Kontrolle des Fühlers F2 Abtau Verdampferfühler Interner Fehler Steuerteil Reparatur Steuerteil Fehler im Parameterspeicher Alle Parameter überprüfen Fehler im Datenspeicher Reparatur Steuerteil F90 F90 Datenübertragungsfehler Regler nicht gefunden Verkabelung der Schn...

Страница 57: ...Technische Änderungen vorbehalten Gültig ab Juli 2021 57 NOTIZEN ...

Страница 58: ...ungsführenden Komponenten Vor allen Reinigungs und Servicearbeiten ist die Stromzufuhr zu unterbrechen Dazu das Kühlgerät ausstecken oder allpolig vom Netz trennen Stoßgefahr am Kühlgerät bei Montage Reinigungs und Instandhaltungstätigkeiten Achten Sie auf mögliche Stoßgefahren am Gerät GEFAHR Schalten Sie das Gerät vor Reinigungsarbeiten aus Es wird empfohlen die tägliche Reinigung am Ende des Ar...

Страница 59: ...elstahlteile des Gerätes in einwandfreiem Zustand zu halten sind folgende Punkte wichtig Halten Sie die Edelstahloberflächen stets sauber Gewährleisten Sie ausreichend Luftzirkulation an den Oberflächen Berühren Sie Bauteile des Gerätes niemals mit rostigem Material Personen die Reinigungsarbeiten durchführen müssen zusätzlich die vorgeschriebenen Maßnahmen für die entspre chenden Reinigungsmittel...

Страница 60: ...uglich ist Einlegeböden und GN Behälter Geschirrspülmittel und Bürste Einlegeböden und GN Behälter sind leicht herausnehmbar siehe Kapitel 2 1 Verwenden Sie nur Bürsten mit Kunststoff oder Naturborsten Pulverbeschichtete Oberflächen Weiches Tuch lauwar mes Seifenwasser Verwenden Sie keine scheuernden oder rauen Putzutensilien Glasreiniger Lösungsmittel Acrylglas Klappen Weiches Tuch lauwarmes Seif...

Страница 61: ... WARNUNG Tragen Sie beim Reinigen des Gerätes die entsprechende Schutzausrüstung welche vom Hersteller des verwendeten Reinigungsmittels siehe Kapitel 4 1 2 vorgeschrieben wird Prüfen Sie vor der Reinigung ob das zur Reinigung ver wendete Wasser auch abgeleitet werden kann Ist das Gerät bauseitig nicht direkt an das Kanalsystem angeschlossen muss ein Gefäß in entsprechender Größe unter den Abfluss...

Страница 62: ...erstopfen Zur Reinigung des Verdampfers gehen Sie wie folgt vor 1 Entfernen der Einlegeböden bzw GN Schalen 2 Entfernen der Einhängeleisten sowie der Luftleitbleche nach oben aus dem Gerät Achtung Die Einhängeleisten könnten vom dem Luftleitblech fallen Beschädigung des Verdampfers möglich Heben Sie die Einlegetasse nach oben aus dem Gerät Verwenden Sie dazu die runde Ausprägung an der Einlegetass...

Страница 63: ...Die Verdampferabdeckung schließen 5 Die Einlegetasse wieder korrekt einsetzen 6 Seitliche Luftleitbleche mit den Einhängeleisten positionieren 7 Einlegeböden bzw GN Behälter wieder einsetzen Die Außen und Unterseite der Kühlwanne darf nicht mit einem Wasserschlauch oder der Waschbürste gereinigt werden Fließwasser ist in diesem Bereich auf jeden Fall zu vermeiden HINWEIS Alle Oberflächen können mi...

Страница 64: ...er Unterseite der Winkelleiste und der Oberkante der Schiebetür Achten Sie darauf dass die Winkelleiste ordnungsgemäß angebracht und verschraubt ist Das hier Erwähnte gilt auch für Flügeltüren Achten Sie auf sorgsamen Umgang wenn Sie mit Glas hantieren WARNUNG 4 1 4 REINIGUNG DER GLÄSER Gefahr durch herabfallende Gegenstände Halten Sie die Gläser während des Reinigens fest und lassen Sie die Front...

Страница 65: ...ür links 5 Laufschiene nicht sichtbar 6 Tür rechts 7 Führungsschiene 5 6 7 Bei Geräten ab Größen von 4 1 müssen die Schiebetüren von mindestens 2 Personen manipuliert und gereinigt werden Das Gewicht der Schiebetüren darf nicht unterschätzt werden Dies gilt auch für Flügeltüren Achten Sie auf sorgsamen Umgang wenn Sie mit Glas hantieren HINWEIS HINWEIS ...

Страница 66: ...ie diese leicht nach oben und drücken diese nach hinten 8 Kippen Sie die Tür vorne hoch und heben diese aus dem Gerät 9 Lagern Sie die Tür auf einer sauberen und weichen Unterlage Achten Sie darauf dass sich der Griff an der Oberseite befindet 10 Reinigen Sie die Türen und die Überlappungszone Prüfen Sie die Rollen an den Schiebetüren auf Freigängigkeit Freilauf Diese müssen frei von Verunreinigun...

Страница 67: ...währleistet werden HINWEIS Einige Geräte sind mit Luftführungen an den Flügeltüren oder Rückwänden ausgestattet Diese können zur leichteren Reinigung ausgehängt werden Heben Sie die Luftführungen nach oben aus der Flügeltür Rückwand und reinigen Sie diese nach Intervallen laut Kapitel 4 1 1 unter Verwendung der vorgeschriebenen Reinigungsmittel laut Kapitel 4 1 2 Setzen Sie diese nach beendeter Re...

Страница 68: ...tels Staubsauger Achten Sie darauf dass die Lamellen nicht verbogen werden 3 Anbringen des Lüftungsgitters Anleitung zur Reinigung des Kondensators Die Zu und Abluftöffnungen des Kondensators dürfen nicht verschlossen oder durch Gegenstände zugestellt werden da ansonsten die Kühlleistung beeinträchtigt oder im schlimmsten Fall der Kompressor zerstört wird Tragen Sie während der Reinigung Schutzhan...

Страница 69: ...einigungsmittel zulässig Je nach Modell ist die Ausführung eines mechanischen oder elektrischen Nachtrollos siehe Kapitel 2 1 möglich Zur Bedienung bei Geräten mit Kühlunterbau siehe Kapitel 3 2 1 Technische Veränderungen am Gerät dürfen nur durch autorisiertes Fachpersonal vorgenommen werden Dies gilt im Besonderen für Arbeiten an Kältetechnik Elektroinstallation und Mechanik Jede Änderung muss d...

Страница 70: ... Anschlag herausziehen Verriegelung an den Führungsschienen lösen Lade zirka 5 cm anheben damit diese ausgehängt werden kann Reinigung der Bodenwanne Auffangtasse unterhalb des Verdampfers 1 3 2 4 1 Lade in Führungsschienen einhängen Lade komplett einschieben siehe Bild 3 2 Auszug anheben und wieder einhängen siehe Bild 2 3 Den Auszug einschieben und schließen Nach der erfolgten Reinigung Ein einf...

Страница 71: ...s 4 1 8 REINIGUNG DER LADE TORTENAUSZUG INKL VERDAMPFEREINHEIT Zur Reinigung der Kühlwanne inkl der Verdampfereinheit entfernen Sie den Tortenauszug aus dem Gerät Gehen Sie wie folgt vor 3 4 2 1 1 Den Verdampfer anheben Lösen der Verriegelungsstifte an beiden Seiten siehe Bild 3 2 Auszug anheben und wieder einhängen siehe Bild 2 3 Den Auszug einschieben und schließen Nach der erfolgten Reinigung Z...

Страница 72: ...ung heben Das Schneidbrett besteht aus einer abnehmbaren CNS Tasse mit einer oder mehreren Polyhygien Einlagen Die Polyhygien Einlagen können zum Reinigen aus der CNS Tasse genommen werden Bei ausgehängten Flügeltüren kann das gesamte Schneidbrett inklusive CNS Tasse seitlich angehoben und aus der Führung geho ben werden Schneidbrettauflage entfernen 4 1 9 REINIGUNG DES SCHNEIDBRETTS 1 2 3 ...

Страница 73: ...ür Dritte Verwenden Sie wenn möglich beide Hände wenn Sie mit Gegenständen hantieren Beim Hantieren Justieren Positionieren mit schweren Einzelkomponenten sind Schutzhandschuhe und Sicherheitsschuhe zu tragen WARNUNG 4 1 10 REINIGUNG DES BOTTLE SLIDER FLEXROLLER Zur Reinigung des Gerätes sind nur die in Kapitel 4 1 2 genannten Reinigungsmittel zulässig Nach dem Reinigen müssen alle Teile mit klare...

Страница 74: ...GAS TAUWASSER VERDUNSTUNG Vorsicht beim Öffnen der Tauwasser Verdunstung vor heißen Oberflächen Schalten Sie das Gerät vor Reinigungsarbeiten aus Bei Berührung der Heißgas Leitung im eingeschalteten Zustand kann es zu Verbrennungen kommen Warten Sie einige Zeit bis die Leitungen abgekühlt sind VORSICHT Gefahr durch elektrische Spannung an spannungsführenden Komponenten Vor allen Reinigungs und Ser...

Страница 75: ...d ziehen den Netzstecker ordnungsgemäß aus der Steckdose bzw trennen Sie das Gerät allpolig vom Netz 2 Verriegelung Nr 1 mit einer Hand nach oben drücken Mit einer Hand am Führungsgriff nach vorne herausziehen Die Tauwasser Verdunsterschale klappt nach unten 3 Tauwasser Verdunsterschale entnehmen entleeren und reinigen Bitte verwenden Sie dazu ausschließlich die in Kapitel 4 1 2 genannten Reinigun...

Страница 76: ...CHT 4 1 12 REINIGUNG ELEKTRISCHE TAUWASSERSCHALE OPTIONALES ZUBEHÖR Weitere Reinigungshinweise sind in der beiliegenden Betriebsanleitung der Tauwasserschale angeführt und müssen auch eingehalten werden HINWEIS Die Punkte 1 3 4 7 der Heißgas Verdunsterschale gelten zusätzlich zu folgenden Schritten a Entfernen Sie jegliche Verschmutzungen aus der Tauwasserschale und reinigen diese gründlich inkl d...

Страница 77: ...unstung Heißgas oder elektrisch verfügen entfernen Sie die Ablaufleitung von der Tauwasserschale und spülen diese mit heißem Wasser durch Leiten Sie das Reinigungswasser in ein geeignetes Gefäß um Ablaufschlauch an Tauwasserschale befestigen Achten Sie darauf dass nach Reinigung der Wanne inkl Siphon und Ablaufleitungen diese wieder an der Tauwasserschale ordnungsgemäß befestigt werden Wasser kann...

Страница 78: ...e und Reparatur abgeschlossen ist Ein unbeabsichtigtes Einschalten muss verhindert werden Die Durchführung der Wartungstätigkeiten durch das Bedienpersonal oder Betreiber gilt ausschließlich für die im Kapitel 4 3 angeführten Tätigkeiten Technische Veränderungen am Gerät dürfen nur durch autorisiertes Fachpersonal vorgenommen werden Dies gilt im Besonderen für Arbeiten an Kältetechnik Elektroinsta...

Страница 79: ...he Tauwasserschale modellabhängig x Gasdruckfedern modellabhängig Deckglas und Verdampfer x Kondensator Verflüssiger Verunreinigungen Schäden x Laden bzw Tortenauszug modellabhängig x Kühlunterbau modellabhängig x Nachtrollo LED modellabhängig x Sämtliche Gläser inkl Schiebe und Flügeltüren x Mechanische Schäden aller restlichen Komponenten des Geräts x 4 4 PRÜFUNG GASDRUCKDÄMPFER Gefahr durch def...

Страница 80: ...rekten Ersatzteile für Ihr Gerät geben Sie die angeführten Gerätedaten Ihrem Lieferanten Fachhändler bekannt oder ordern Sie benötigte Ersatzteile direkt über den Online Produktkatalog des Herstellers Die Angabe der Type der Seriennummer sowie das Herstelldatum sind für die Zuordnung erforderlich Ob eine zeitlich abhängige Überprüfung des Kältekreislaufes vorschriftsmäßig durchgeführt werden muss ...

Страница 81: ...Technische Änderungen vorbehalten Gültig ab Juli 2021 81 NOTIZEN ...

Страница 82: ...ausgebrauch und ähnliche Zwecke Teil1 Allgemeine Anforderungen EN 60335 1 2012 AC 2014 A11 2014 A13 2017 IEC 60335 1 2010 modifiziert EN 60335 2 89 2010 Sicherheit elektrischer Geräte für den Hausgebrauch und ähnliche Zwecke Teil 2 89 Besondere Anforder ungen für gewerbliche Kühl Gefriergeräte mit eingebautem oder getrenntem Verflüssigersatz oder Motorverdichter EN 60335 2 89 2010 A1 2016 A2 2017 ...

Страница 83: ......

Страница 84: ...echnik GmbH In der Schörihub 28 4810 Gmunden AT À 43 7612 660 61 à office ideal ake at AKE Ausseer Kälte und Edelstahltechnik GmbH Pichl 66 8984 Bad Mitterndorf AT À 43 3624 211 00 à office ake at www ideal ake at ...

Страница 85: ...Operating Manual REFRIGERATED DISPLAY CASES Translation of the original 21A ...

Страница 86: ...Subject to technical changes Valid from July 2021 2 ...

Страница 87: ...ating Manual show the majority of configurations Due to custom designs many other configura tions of our products are also possible Operating Manual and installation instructions Copyright 2021 AKE Ausseer Kälte und Edelstahltechnik GmbH All rights reserved This document is a translated version of original documentation No part of this publication may be reproduced stored or transmitted in any for...

Страница 88: ... UNIT 29 2 3 1 ELECTRICAL INFORMATION 30 2 3 2 REFRIGERATION RELATED INFORMATION 31 2 4 ASSEMBLY AND INSTALLATION GUIDE 32 2 4 1 FIRST STEPS 32 2 4 2 INSTALLATION OF THE UNIT ABOVE 2000 M ABOVE SEA LEVEL 33 2 5 INSTALLATION OF CONTROLLER HOUSING 34 2 5 1 STÖRK CONTROLLER ST501 ST200F 34 2 5 2 CAREL CONTROLLER PJ EZ PJS2C 34 2 6 CONDENSATE DISPOSAL 35 2 7 VENTILATION AND DISCHARGE 36 2 8 DEFROSTING...

Страница 89: ...EANING THE EXTENDABLE DRAWER CAKE DRAWER INCLUDING EVAPORATOR UNIT 71 4 1 9 CLEANING THE CUTTING BOARD 72 4 1 10 CLEANING THE BOTTLE SLIDER FLEXROLLER 73 4 1 11 CLEANING HINGED HOT GAS CONDENSATE EVAPORATION 74 4 1 12 CLEANING THE ELECTRIC CONDENSATE TRAY OPTIONAL ACCESSORY 76 4 1 13 CLEANING THE DRAIN PIPE INCLUDING SIPHON 77 4 2 MAINTENANCE INFORMATION 78 4 3 MAINTENANCE AND SERVICE INTERVALS 79...

Страница 90: ...s correct installation start up operation and care Non compliance with the points mentioned above can lead to warranty guarantee and product liability exclusions but also to damage and safety hazards Always keep this document complete and in a perfectly legible condition If necessary request this document immediately from your supplier or operator or download it from the manufacturer s website at ...

Страница 91: ...BACKNORM EURONORM Gastronorm 2 to 5 trays up to a maximum of 150 mm Euronorm 1 to 4 baking trays SIZES IN USE Curved Square Inclined PRO square PRO curved for insulated glass display cases on request COLD configuration Refrigerated display cases with tempered single pane safety glass enclosure GREEN configuration Refrigerated display case with insulating tempered safety glass enclosure ...

Страница 92: ... units with pedestals height adjustable feet must be fully covered by the customer NOTE 530 mm 370 mm 700 mm 370 mm 870 mm 370 mm optional flat 195 mm inner well possible HEIGHTS appliance photos as examples of closed display cases INSTALLATION VARIATIONS appliance photos as examples of closed display cases Drop in Slide in Countertop PRO Stand alone ...

Страница 93: ... ddd f Abbreviations aa Empty or HC high capacity b G closed on customer side or O open or A countertop c E square or S 10 inclined or R curved ddd Number between 50 and 400 unit width ee Empty or number between 45 and 99 height of glass enclosure f E self contained or Z remote refrigeration ggg Number between 50 and 200 unit height h EN Euronorm or GN Gastronorm i S compressor on the side and U c...

Страница 94: ...tructions IN this Operating Manual with regard to the correct installation start up operation maintenance and assembly of the unit Unauthorised mechanical or technical changes to the unit Inadequate maintenance of used and wearing parts Unauthorised repairs Use of aggressive or caustic cleaning agents Forces of nature or force majeure Also excluded from liability are breakage of glass breakage of ...

Страница 95: ...ebshop spare parts online catalogue https shop ideal ake at en spare parts shop Availability of spare parts 8 years after the last piece of the particular model group was placed on the market Minimum warranty period See contract agreement General Terms and Conditions of Business of AKE Information about the model EPREL database https ec europa eu 1 5 MANUFACTURER SUPPORT 1 5 1 FURTHER CONTACT DETA...

Страница 96: ...y information with the WARNING signal word indicates a dangerous situation that can have an impact on the health of persons Failure to observe these safety instructions can lead to serious injuries DANGER WARNING This symbol with the comment NOTE indicates supporting information for installation operation and or maintenance and repair Failure to observe this information can lead to property damage...

Страница 97: ... cover of the controller or on the base close to the control box The unit is also identified by the AKE mark of conformity The AKE mark of conformity is located on the base or control unit depending on the model General technical specifications can be found in Chapter 2 2 Due to the large variety of models additional technical details are provided on the rating plate NOTE ...

Страница 98: ...roducts in the unit or close to it During the assembly and or installation the unit must be covered adequately so that no contact with live parts is possible The installation environment must be robustly constructed in order to withstand the strains of everyday operation It must not be possible to remove any coverings that are mounted during the installation without tools After cleaning service or...

Страница 99: ...ept free The minimum distances to other units must be complied with Ensure that the air circulation is unobstructed In the event of a leak in the refrigera tion system a blockage of the air circulation can lead to an unintended exothermic reaction of the ignitable gas air mix According to DIN EN 3787 1 the refrigerant propane R290 is combustible and explosive refrigerant group A3 The refrigerant p...

Страница 100: ...be complied with Among others these specifications are the ambient temperature the quality of the installation environment and the connections that must be used NOTE The units are specifically designed for installation in food counters and serving counters as well as for single unit or multi unit in stallation e g unit island They are suitable for the refrigeration and presentation of food product...

Страница 101: ...tional safety and accident prevention must be complied with Only instructed personnel may operate and clean the appliance Only qualified personnel who have been authorised by the manufacturer may perform maintenance and repair work The locally applicable commercial and safety regulations must be followed without fail The following measures must be carried out by the operator so that the knowledge ...

Страница 102: ...te No ventilation slits may be blocked or covered Food must not touch the walls of the appliance or block the air flow The unit must not be operated outside of buildings Protect the unit against direct sunlight Units for food such as seafood fish and muscles etc must be designed with a higher grade of stainless steel V4A or AISI 316 or be upgraded with suitable GN trays Glass covers and shelves mu...

Страница 103: ...poilage of the products placed in the unit c Not applicable d Not applicable e See Chapter 2 4 See Chapter 4 f If the condenser coil is not cleaned once a year this will lead to a considerable reduction in the efficiency of the unit g See Chapter 1 5 1 h See Chapter 1 5 1 i See Chapter 1 5 1 j See Chapter 1 5 1 k See Chapter 1 5 1 The information provided serves to meet the information requirement...

Страница 104: ...ns These persons must be strong enough to be able to carry the units Pushing or mo ving the units is not permitted Call in another person for spotting if necessary Wear protective gloves and safety shoes for installation and loading work WARNING Danger of crushing and danger from falling objects when handling aligning positioning heavy individual components When handling heavy objects be aware of ...

Страница 105: ...ng glass WARNING Various dangers during the disposal of various refrigerants When disposing of refrigerants propane R404A R134A etc wear protective gloves and safety glasses Working with open flames is forbidden while disposing of refrigerant Dispose of the refrigerant properly and in an environmentally com patible way The laws of the specific country must be observed WARNING Various dangers durin...

Страница 106: ...e work Wear safety shoes for installation and loading work Wear safety gloves in accordance with EN 378 3 during assembly loading and activities involving refrigerant Wear safety glasses when disposing of the refrigerant and damaged parts components When cleaning the unit wear the corresponding protective equipment stipulated by the manufacturer of the cleaning agent being used NOTE Wear a hardhat...

Страница 107: ...lls other machines when positioning the units as well as danger of crushing between the pallet and ground when putting the unit down Keep yourself and other persons away from the hazardous area Call in another person for spotting if necessary When putting units down be aware of the danger of crushing for third parties Wear protective gloves safety shoes and a hardhat for installation and loading w...

Страница 108: ...mpatible way The laws of the specific country must be observed WARNING Various dangers during the disposal of damaged parts components When disposing of damaged parts components wear protective gloves Dispose of damaged parts components properly and in an environmentally compatible way The laws of the specific country must be observed WARNING Please note that some components of the unit are electr...

Страница 109: ...Subject to technical changes Valid from July 2021 25 NOTES ...

Страница 110: ...s shelf level 1 6 Front glass with handle strip depending on the model with gas pres sure damper different configurations possible Easy change function choice of open or closed operation Removal flap soft close Removal flap acrylic 7 Tilting structure for front glass depending on the model 8 Shelf support Options choice of inclined straight position by hooking in the top tab choice of height adjus...

Страница 111: ...ndensing unit 13 Evaporator including evaporator plate can be folded up and rinsed Einlegeboden UKW 323 531 535 GN GASTRO NORM Einlegeboden UKW 323 531 980 GN 1 2 GN 1 2 GN 1 1 535 EN BACKNORM EURONORM 400 600 Längssteg Längssteg seitlich Einhängeleiste Quersteg GN 1 3 980 GN 1 6 GN 1 6 GN 1 6 GN 1 6 GN 1 2 GN 1 2 GN 1 1 535 Auflagestege Mitte Hook in strip Lengthwise bar middle Lengthwise bar sid...

Страница 112: ... IEC 61770 2008 ÖNORMEN 1717 2008 04 01 Condensate via siphon directly into the onsite wastewater system DN32 via the hot gas evaporation via the condensate tray manual emptying electric condensate heater Materials Stainless steel 1 4301 well body 1 4016 compressor compartment outer shell 1 4404 custom design Copper tubes refrigeration circuit Supplier components Refrigeration unit compressor con ...

Страница 113: ... be replaced with new stickers The legibility and completeness must be checked at regular intervals 2 3 SAFETY INSTRUCTIONS ON THE UNIT Pictograms Descriptions Pictograms Descriptions Warning of inflammable substances re frigerants of class A2L A2 A3 B2L B2 and B3 Danger No open flames fire open sour ces of ignition and smoking are prohibited Warning of electrical hazard Protection class I earth c...

Страница 114: ...ER Self contained units are delivered with a 1 5 meter long power cord with an earthing contact plug as a standard feature They must connected to an AC power grid with a nominal AC voltage and frequency of 230 volts and 50 Hz depending on the country with 115 V 60 Hz 120 V 60 Hz 220 240 V 50 60 Hz The electrical supply line must be protected with a 16 A fuse trip characteri stic C If a plug connec...

Страница 115: ...igeration unit and the refrigeration circuit is filled with refrigerant Display cases with expansion valves and those above a specific size have an inspection glass with a moisture indicator for checking during servicing This is located beside the con denser There is no inspection glass for self contained units with propane R290 as a refrigerant Self contained units Remote refrigeration units are ...

Страница 116: ...ove the transport packaging you require At least two persons Tools cordless screwdriver or Philips screwdriver cutting tool scissors or knife Danger of the unit tipping over on an uneven and unstable subsurface Ensure that the unit is installed exclusively on a level and adequately stable subsurface otherwise the unit could tip over or parts of the unit could fall off or open accidentally drawers ...

Страница 117: ...liveries and services may only be carried out by authorised refrigeration companies and qualified specialists Electrical installations may only be carried out by an authorised specialist You must ensure that suitable personnel and tools are available to prevent damage and injuries The unit is intended for use up to 2000 m above sea level When used above 1500 m above sea level pressure relief must ...

Страница 118: ...ected to the power electronics internally by a cable The control panel is removable and can be mounted on the front of the appliance Possible configurations ST501 The control panel is by default connected to the power electronics by a 1 5 metre data cable 2 m data transmission incorrect ST200F The control panel is by default connected to the power electronics with a 1 5 m CAT5 cable up to a maximu...

Страница 119: ...quipped at the factory with odour traps siphon so that only the wastewater connections or external condensate trays have to be installed in accordance with the local conditions It must be ensured that was tewater cannot get back into the refrigeration point Via siphon directly into the wastewater system Self contained units depending on the model are equipped with fully automatic condensate evapor...

Страница 120: ...t and preventing air circulation Definition of Terms Air baffle Supply air Exhaust air 2 7 VENTILATION AND DISCHARGE By default the units are delivered with incoming air on the operator side and exhaust air on the customer side We recommend having the exhaust air outlet on the customer side see variant 1 If an exhaust air outlet on the customer side is not possible then the exhaust air must discha...

Страница 121: ... the compressor compartment The air opening of the covering must be less than 5 mm away from the condenser NOTE Narrow gap between condenser housing and covering approx 5 mm Seal the gap with sealing tape air inlet for cool air air outlet for hot air CORRECT front side of the condenser housing removeable air grill panel of counter ...

Страница 122: ...t at the factory for the respective model During this time the centre LED display defrosting is illuminated on the left of the display Cooling mode starts automatically when defrosting is completed Automatic defrosting 2 8 DEFROSTING OPTIONS Defrosting can be initiated at any time by pressing the UP button controller button assignment see Chapter 3 2 If the LED starts flashing after the UP button ...

Страница 123: ...Subject to technical changes Valid from July 2021 39 NOTES ...

Страница 124: ...ssor capsule which might have become displaced during transport can drain back to the compressor applies to self cont ained cooling appliances The unit is pre cleaned before delivery Nevertheless we still recommend cleaning the unit thoroughly with a suitable cleaning agent or disinfectant see Chapter 4 1 2 before start up in order to remove any dirtying 3 1 INITIAL START UP Danger from electrical...

Страница 125: ... desired set temperature is reached before stocking the unit with products NOTE BUTTON DESIGNATION FUNCTION 1 Cooling Display red active 2 Defrosting Display red active 3 Fan Evaporator fan display red active 4 UP Increase value start defrosting hold for approx 3 seconds 5 DOWN Decrease value acknowledge alarm 6 LIGHT ON OFF lighting depending on the model optional 7 SET Displays set value and set...

Страница 126: ...4 Auxiliary output light 5 RTC clock display 6 Alarm 7 Numbers BUTTON DESIGNATION FUNCTION 1 ON OFF button Switches on the device 2 Programming button Display setting parameters etc 3 Light button defrost button Switches on light deactivates defrosting The unit comes with its own operating manual for the cooling zone controller with detailed information on its use The instructions contained in thi...

Страница 127: ...alues acknowledge alarm To set desired value hold for approx 2 seconds 4 MENU EXIT Unit settings close menu item 5 LIGHT Light on active Light off inactive dimmable depending on model hold for approx 4 seconds 6 STAND BY Unit on off stand by hold for approx 4 seconds unit on green unit off stand by red 7 ON OFF Main switch unit I On 0 Off 1 2 5 6 7 3 4 The unit comes with its own operating manual ...

Страница 128: ... be set by the supplier or specialist dealer du ring the installation When selecting the inside temperature take account of the ambient conditions A large temperature difference between the inside and outside temperature combined with high air humidity can lead to heavy ice formation and condensate This reduces the refrigeration capacity and prevents the automatic defrosting from working properly ...

Страница 129: ... the target value temperature has been reached This will take some time The cooling controller is set correctly and ready for operation After completion of the installation check parameter H11 calibration of return air sensor Calibration may only be carried out by an authorised specialist in accordance with the programming instructions which are valid for the unit NOTE ...

Страница 130: ... maximum carrying capacity of the base decks and shelves Loading shelves see stacking limit outline drawing of the corresponding model group Loading the base deck see stacking limit outline drawing of the corresponding model group Ensure that you do not store any kegs or bottles on the glass shelves ATTENTION The stacking limit can vary depending on the overall height of the unit Please contact th...

Страница 131: ...er is illegible a new sticker must be ordered from the manufacturer and attached to the appliance 3 3 1 STACKING LIMITS OUTLINE DRAWINGS The outline drawings shown with defined stacking loading limits refer to standard configurations of the respective cooling appliance Due to special constructions and customised designs the stacking limits provided may only be valid to a limited extent and or not ...

Страница 132: ...stro G 70 Gastro G 70 KL BAK G 70 KGW G 70 KGU G 70 30 300 115 115 85 30 300 115 115 85 30 300 115 115 85 30 300 115 115 85 30 300 115 115 85 30 300 115 115 85 30 300 115 115 85 30 300 115 115 85 EK014324 max 30 kg max 50 kg max 120 kg Gastro G 53 Gastro G 53 KL BAK G 53 EK014325 max 50 kg max 120 kg Gastro A Green A EK014326 max 50 kg max 120 kg Green G 88 Green FSV EK014327 max 120 kg max 50 kg ...

Страница 133: ... L G 68 KSL Green L G 52 L G 69 KSL EK014339 max 30 kg max 50 kg max 80 kg EK015027 max 30 kg max 30 kg max 120 kg AKV S 147 Kl EK015028 max 30 kg max 120 kg AKV U KL AKV S 96 116 146 KL Danger of crushing when handling aligning positioning heavy individual components When handling heavy objects be aware of possible crushing dangers including for third parties If possible use both hands when handl...

Страница 134: ...y are easy to stock by means of the extendable drawers and cake drawers see Chapter 2 1 All the content found in Chapter 3 3 is also applicable here and must be followed Cake Drawer BAK GREEN Cake Drawer FLANTASTIC When stocking the extendable drawers or cake drawers observe the stacking limits specified for the respective refrige ration appliance All stacking limits can be found in Chapter 3 3 1 ...

Страница 135: ... the stainless steel surfaces due to corrosion cannot be ruled out A higher grade of stainless steel V4A or AISI 316 is required as a minimum in this case Ensure in particular that the products placed in the unit are not too close to the evaporator and do not cover the air openings Circulation openings of the drawer baskets must not be completely closed by products as this would prevent the optima...

Страница 136: ...ty tabs must be unhooked for this Ensure that the safety tabs are reattached when the glass is reinserted NOTE Before you can adjust the supports remove the glass shelves see Chapter 2 1 To do this lift the front edge of the glass shelf until the safety tab releases the 1 glass shelf and it can be pulled out towards the front Ensure that the product stopper on the opera tor side 2 faces upwards 1 ...

Страница 137: ...ng sheets 600 x 400 mm When adjusting the base decks observe the stacking limits specified for the respective refrigeration appliance All sta cking limits can be found in Chapter 3 3 1 If the stacking limits are reached or exceeded optimum cooling of the products placed in the unit can no longer be guaranteed The manufacturer is not liable for any resulting product loss If you have any other quest...

Страница 138: ...ontact an authorised service specialist support Temperature on the display differs from the measured temperature Contact authorised service specialist sup port sensor calibration necessary chapter 3 2 3 Too much or too warm food Pre cool the products see Chapter 1 8 uncover the air openings see Chapter 2 7 The target temperature is too high Set the target temperature value see Chapter 3 2 2 The am...

Страница 139: ...switched on Press the LIGHT button on the controller for around one second see Chapter 3 2 If this does not help contact an authorised service specialist support The entire lighting one LED has failed Contact authorised service specialist support Fault Possible cause Remedy Condensation on the glass Too low temperature in the unit Display target value Press the SET button units without insulating ...

Страница 140: ...eck sensor F1 return air F2L Error on sensor F2 short circuit Check sensor F2 defrost evaporator sensor F2H Error on sensor F2 break Check sensor F2 defrost evaporator sensor Internal error control unit Repair control unit Error in parameter memory Check all parameters Error in data memory Repair control unit F90 F90 Data transfer error controller not found Check wiring of the interfa ce check add...

Страница 141: ...Subject to technical changes Valid from July 2021 57 NOTES ...

Страница 142: ... power supply must be disconnected before all cleaning and service work To do this unplug the cooling appliance or disconnect all poles from the power mains Danger of collision with the cooling appliance during installation cleaning and maintenance work Be aware of possible dangers of colliding with the unit DANGER Switch the unit off before any cleaning work We recommend performing the daily clea...

Страница 143: ...ts of the unit in perfect condition the following points are important Always keep stainless steel surfaces clean Ensure adequate air circulation on the surfaces Never touch components of the unit with rusty material Persons who undertake cleaning work must also comply with the measures specified for the respective cleaning agents e g wearing gloves when cleaning wearing safety glasses etc NOTE AC...

Страница 144: ...ss steel cleaner you use is food safe Base decks and GN containers Washing up liquid and brush Base decks and GN containers are easy to remove see Chapter 2 1 Only use brushes with plastic or natural bristles Powder coated surfaces Soft cloth lukewarm soapy water Do not use any abrasive or coarse cleaning utensils glass cleaner solvents Acrylic glass flaps Soft cloth lukewarm soapy water Do not us...

Страница 145: ...irmly or in position before unlocking WARNING When cleaning the unit wear the respective protective equipment stipulated by the manufacturer of the cleaning agent being used see Chapter 4 1 2 Before cleaning the unit with water please check that the water can run off If the unit is not connected directly to the wastewater system onsite then a suitably sized container must be placed under the drain...

Страница 146: ...se dirt so that the drain does not become clogged To clean the evaporator proceed as follows Attention The hook in strips might fall off the air baffle plate Damage to the evaporator is possible 1 Remove the base decks or GN trays 2 Remove the hook in strips and air baffles upwards from the unit Lift the insertion tray up and out of the unit To do this use the round embossing on the insertion tray...

Страница 147: ...et it fall depending on the model 4 Close the evaporator cover 5 Replace the insertion tray correctly 6 Position the side air baffle with the support strips 7 Replace the base decks or GN containers The outside and underside of the refrigerated well must not be cleaned with a water hose or washing brush Running water must be avoided in this area in all events NOTE All surfaces can be cleaned with ...

Страница 148: ...o the area between the underside of the angle trim and the top edge of the sliding door Ensure that the angle trim is attached and screwed together properly The same thing applies to hinged doors Be very careful when handling glass WARNING 4 1 4 CLEANING THE GLASS Danger from falling objects Hold on to the glass firmly when cleaning and never let the front glass fall forwards WARNING The front gla...

Страница 149: ...ocking lever 4 Left door 5 Running rail not visible 6 Right door 7 Guide rail 5 6 7 On units of size 4 1 or more the sliding doors must be manipulated and cleaned by at least 2 people Do not unde restimate the weight of the sliding doors This also applies to the hinged doors Be very careful when handling glass NOTE NOTE ...

Страница 150: ...on the running rail for the rollers To remove the door from the guide rail lift it up slightly and push it backwards 8 Tip the door up at the front and lift it out of the unit 9 Store the door on a clean and soft underlay Ensure that the grip is on the top side 10 Clean the doors and overlapping zone Check the rollers on the sliding doors to make sure they move freely They must be free of any dirt...

Страница 151: ...mum cooling of the food cannot be guaranteed NOTE Some units are equipped with air ducts on the hinged doors or back walls These can be unhooked for easier cleaning Lift the air ducts upwards out of the hinged door back wall and clean them at intervals according to Chapter 4 1 1 using the pre scribed cleaning agents according to Chapter 4 1 2 After cleaning is complete reinsert them correctly into...

Страница 152: ...denser protector 2 Remove dirt using a vacuum cleaner Ensure that the fins do not become bent 3 Install the air grille Guide to cleaning the condenser The ingoing and outgoing air openings of the condenser must not be closed or blocked by objects otherwise the coo ling capacity will be hampered or in the worst case the compressor will be destroyed Wear protective gloves during cleaning NOTE NOTE D...

Страница 153: ...are permissible for cleaning the unit Depending on the model it is possible to have a mechani cal or electric night roller blind see Chapter 2 1 For operation on units with a refrigerated base see Chapter 3 2 1 Technical changes to the unit may only be carried out by authorised specialists This applies in particular to work on the refrigeration system electrical installation and mechanics Any chan...

Страница 154: ...as far as it goes Release the lock on the guide tracks Lift the drawer up by around 5 cm so that it can be unhooked Clean the bottom tray collecting tray below the evaporator 1 3 2 4 1 Hook the drawer into the guide tracks Slide the drawer in completely see Figure 3 2 Lift up the extendable drawer and then hook it in again see Figure 2 3 Push the extendable drawer in and close it After cleaning Ea...

Страница 155: ... 4 1 8 CLEANING THE EXTENDABLE DRAWER CAKE DRAWER INCLUDING EVAPORATOR UNIT To clean the refrigerated well including the evaporator unit remove the cake drawer from the unit Proceed as follows 3 4 2 1 1 Lift up the evaporator Remove the locking pins on both sides see Figure 3 2 Lift up the drawer and then hook it in again see Figure 2 3 Push the drawer in and close it After cleaning Only the clean...

Страница 156: ...t of the anchoring The cutting board consists of a removable CNS tray with one or more Poly Hygiene inserts The Poly Hygiene inserts can be removed from the CNS holder for cleaning When the hinged doors are unhooked the entire cutting board including the CNS tray can be lifted to the side and then lifted out of the guide Remove the cutting board support 4 1 9 CLEANING THE CUTTING BOARD 1 2 3 ...

Страница 157: ...ible crushing dangers including for third parties If possible use both hands when handling objects When handling aligning positioning heavy individual components protective gloves and safety shoes must be worn WARNING 4 1 10 CLEANING THE BOTTLE SLIDER FLEXROLLER Only the cleaning agents mentioned in Chapter 4 1 2 are permissible for cleaning the unit After cleaning all parts must be rinsed with cl...

Страница 158: ...EANING HINGED HOT GAS CONDENSATE EVAPORATION Beware of hot surfaces when opening the condensate evaporation Switch the unit off before any cleaning work Touching the hot gas line when it is switched on can cause burns Wait for some time until the lines have cooled down CAUTION Danger from electrical voltage on live components The power supply must be disconnected before all cleaning and service wo...

Страница 159: ...roller and pull the mains plug properly out of the socket or disconnect the unit from the mains at all poles 2 Push the lock no 1 upwards with one hand Pull it out forwards with one hand by means of the guide handle The condensate evaporation tray folds down 3 Remove the condensate evaporation tray empty it and clean it Please use only the cleaning agents mentioned in Chapter 4 1 2 4 Replace the e...

Страница 160: ... poles from the power mains CAUTION 4 1 12 CLEANING THE ELECTRIC CONDENSATE TRAY OPTIONAL ACCESSORY Further cleaning instructions are provided in the operating manual accompanying the condensate tray and these must also be complied with NOTE Items 1 3 4 and 7 of the hot gas evaporation tray apply in addition to the following steps a Remove any dirt from the condensate tray and clean it thoroughly ...

Страница 161: ...sate evaporation hot gas or electric remove the drain pipe from the condensate tray and flush it with hot water Transfer the cleaning water into a suitable container Attaching the drain hose to the condensate tray Ensure that after cleaning the well including the siphon and drain pipes they are properly reattached to the condensation tray Water can leak out There is a possible risk of slipping CAU...

Страница 162: ...ain switch or all pole disconnection until the maintenance in spection and repair are completed Unintentional switching on must be prevented The execution of the maintenance activities by the operating personnel or operator applies exclusively to the activities listed in Chapter 4 3 Technical modifications to the unit may only be carried out by authorised specialists This applies in particular to ...

Страница 163: ...n the model x Gas damper depending on the model glass cover and evaporator x Condenser dirtying damage x Extendable drawer or cake dra wer depending on the model x Refrigerated base depending on the model x Night roller blind LED depending on the model x All glass including windows and hinged doors x Mechanical damage to all remaining components of the unit x 4 4 CHECKING THE GAS DAMPERS Danger fr...

Страница 164: ...ct spare parts for your unit provide the unit data lis ted on the rating plate to your supplier or specialist dealer or order the required spare parts directly from the manufacturer s online product catalogue The type serial number and date of manufacture are required for correct allocation of parts Whether the refrigeration circuit must be inspected at a particular time in accordance with regulat...

Страница 165: ...Subject to technical changes Valid from July 2021 81 NOTES ...

Страница 166: ...2 Household and similar electrical appliances Safety Part 1 General Requirements EN 60335 1 2012 AC 2014 A11 2014 A13 2017 IEC 60335 1 2010 modified EN 60335 2 89 2010 Household and similar electrical appliances Safety Part 2 89 Particular requirements for commercial refrigerating appliances with an incorporated or remote refrigerant condensing unit or compressor EN 60335 2 89 2010 A1 2016 A2 2017...

Страница 167: ......
Страница 168: ...echnik GmbH In der Schörihub 28 4810 Gmunden AT À 43 7612 660 61 à office ideal ake at AKE Ausseer Kälte und Edelstahltechnik GmbH Pichl 66 8984 Bad Mitterndorf AT À 43 3624 211 00 à office ake at www ideal ake at ...

Отзывы: