3.
Disconnect
the
power
cord,
and
disconnect
all
external
cables.
4.
Remove
the
cover
(see
“Removing
the
cover”
on
page
18).
5.
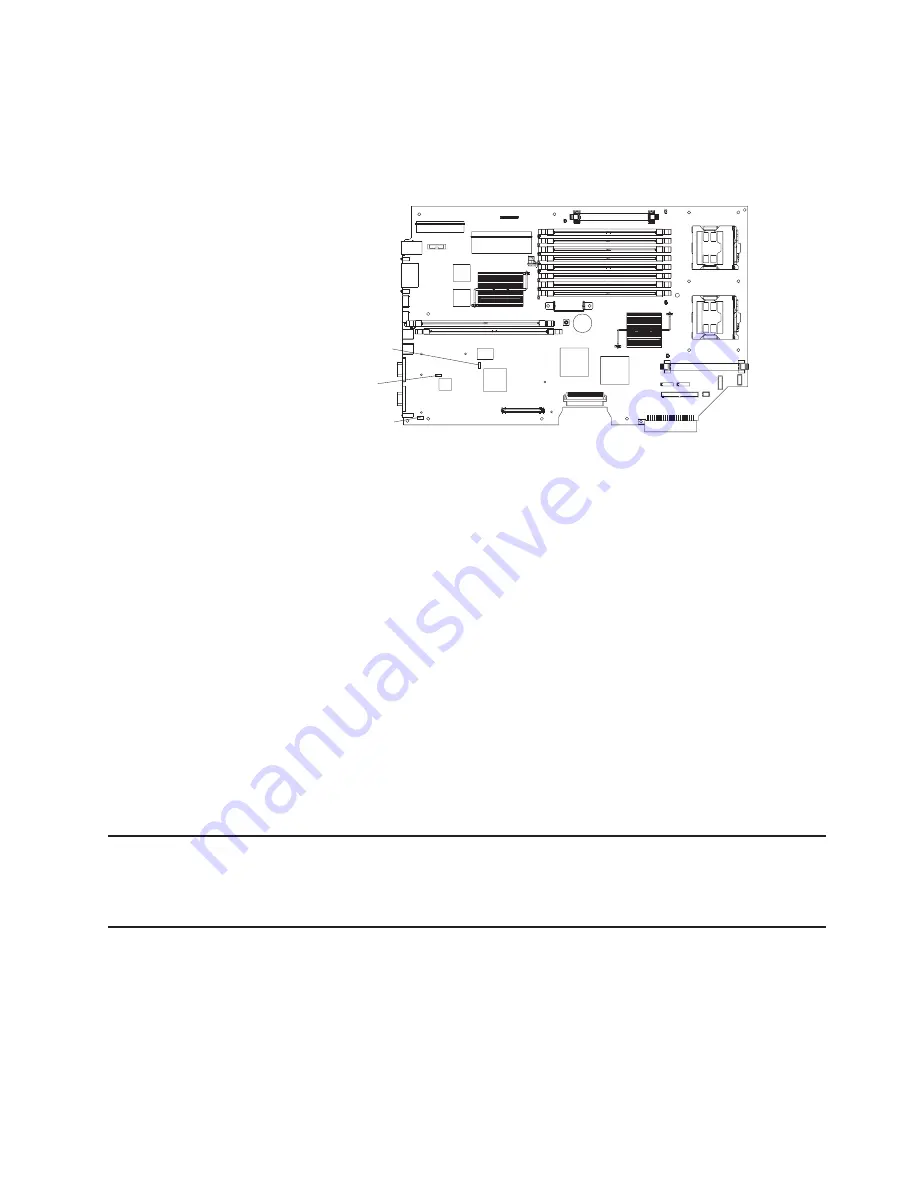
Locate
the
password
reset
jumper
(J22)
on
the
system
board,
removing
any
components
that
impede
access
to
the
jumper.
6.
Remove
the
password
reset
jumper
from
pins
1
and
2,
and
place
it
on
pins
2
and
3.
7.
Replace
any
components
that
were
removed.
8.
Replace
the
cover.
You
will
be
able
to
start
the
server
one
time,
without
having
to
use
the
power-on
password,
and
start
the
Configuration/Setup
Utility
program.
You
can
either
delete
the
old
password
or
set
a
new
power-on
password.
If
you
do
not
change
or
delete
the
password,
the
next
time
you
start
the
server
the
original
power-on
password
will
be
reinstated.
9.
Connect
the
server
to
a
power
source,
keyboard,
monitor,
and
mouse.
10.
Turn
on
the
server.
The
Configuration/Setup
Utility
program
starts.
11.
Follow
the
instructions
to
erase
the
existing
password
or
create
a
new
password.
12.
Select
Save
Settings
and
press
Enter.
When
the
password
reset
is
completed,
it
is
not
necessary
to
return
the
jumper
to
pins
1
and
2.
Updating
Remote
Supervisor
Adapter
II
SlimLine
firmware
Information
about
updating
the
firmware
of
the
Remote
Supervisor
Adapter
II
SlimLine
can
be
found
in
the
Remote
Supervisor
Adapter
II
User’s
Guide
.
Power
checkout
Power
problems
can
be
difficult
to
solve.
For
example,
a
short
circuit
can
exist
anywhere
on
any
of
the
power
distribution
buses.
Usually
a
short
circuit
will
cause
the
power
subsystem
to
shut
down
because
of
an
overcurrent
condition.
A
general
procedure
for
troubleshooting
power
problems
is
as
follows:
1.
Turn
off
the
server
and
disconnect
all
ac
power
cords.
BIOS boot backup (J21)
Password reset (J22)
Force update BMC (J48)
Figure
66.
Password
reset
jumper
location
Chapter
5.
Diagnostics
79
Содержание 88371RU
Страница 1: ...xSeries 336 Type 1879 and Type 8837 Hardware Maintenance Manual and Troubleshooting Guide...
Страница 2: ......
Страница 3: ...xSeries 336 Type 1879 and Type 8837 Hardware Maintenance Manual and Troubleshooting Guide...
Страница 15: ...Server on off 8 to 80 Shipment 5 to 100 Chapter 1 General information 5...
Страница 22: ...12 xSeries 336 Type 1879 and Type 8837 Hardware Maintenance Manual and Troubleshooting Guide...
Страница 24: ...14 xSeries 336 Type 1879 and Type 8837 Hardware Maintenance Manual and Troubleshooting Guide...
Страница 92: ...82 xSeries 336 Type 1879 and Type 8837 Hardware Maintenance Manual and Troubleshooting Guide...
Страница 149: ...Appendix B Safety information 139...
Страница 150: ...140 xSeries 336 Type 1879 and Type 8837 Hardware Maintenance Manual and Troubleshooting Guide...
Страница 151: ...Appendix B Safety information 141...
Страница 152: ...142 xSeries 336 Type 1879 and Type 8837 Hardware Maintenance Manual and Troubleshooting Guide...
Страница 153: ...Appendix B Safety information 143...
Страница 154: ...144 xSeries 336 Type 1879 and Type 8837 Hardware Maintenance Manual and Troubleshooting Guide...
Страница 155: ...Appendix B Safety information 145...
Страница 165: ...Appendix B Safety information 155...
Страница 166: ...156 xSeries 336 Type 1879 and Type 8837 Hardware Maintenance Manual and Troubleshooting Guide...
Страница 167: ...Appendix B Safety information 157...
Страница 168: ...158 xSeries 336 Type 1879 and Type 8837 Hardware Maintenance Manual and Troubleshooting Guide...
Страница 172: ...162 xSeries 336 Type 1879 and Type 8837 Hardware Maintenance Manual and Troubleshooting Guide...
Страница 185: ......
Страница 186: ...Part Number 25K8109 1P P N 25K8109...


