28
ADH-Series | Version 1.02
Care, maintenance and repair
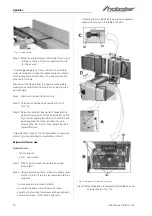
Avoiding snipe
Snipe refers to a depression at either end of the board
caused by an uneven force on the cutter head when the
work is entering or leaving the planer.
Snipe will occur when the boards are not supported pro-
perly or when only one feed roller is in contact with the
work at the beginning or end of the cut.
Precautions for avoiding snipe:
Push the board up while feeding the work until the out-
feed roller starts advancing it.
Move to the rear and receive the planed board by pus-
hing it up when the infeed roller looses contact with the
board.
When planning more than one board of the same thick-
ness, butt the boards together to avoid snipe.
Make shallow cuts. Snipe is more apparent when
deeper cuts are taken.
Feed the work in the direction of the grain. Work fed
against the grain will have chipped, splintered edges.
9
Care, maintenance and repair
The following safety instructions should be observed:
- Read the maintenance instructions carefully and
completely.
- Keep your fingers away from belts and pulleys when
cleaning.
- When replacing electrical parts, turn the machine
off at the main switch and unplug it from the wall
outlet. Defective parts should only be replaced with
original spare parts.
- Safety devices such as covers, limit switches
should not be removed or otherwise obstructed or
blocked by each other.
- Do not switch on the machine until all covers that
have been removed for maintenance have been re-
turned to their original positions.
- Always keep the maintenance area, including the
workplace, clean.
- Maintenance work must be carried out by qualified
personnel in accordance with the instructions is-
sued by the machine manufacturer.
- Only use original spare parts to replace parts or
tools.
- Use only specified types or lubricating oils and
greases or those that comply with them.
- If a belt in the belt kit is longer than specified, re-
place the entire kit completely.
- Do not use compressed air to clean the machine or
remove chips.
9.1 Blade care
The condition of the blades will affect the precision of the
cut. Observe the quality of the cut that the planer pro-
duces to check the condition of the blades.
Dull blades will tear, rather than cut the wood fibers and
produce a fuzzy appearance.
Raised grain will occur when dull blades pound on wood
that has varying density. A raised edge will also be pro-
duced where the blades have been nicked. When gum
and pitch collect on the blades, carefully remove with a
strong solvent. Failure to remove gum and pitch build up
may result in excessive friction, blade wear and overhea-
ting. When blades become dull, touch up blades..
9.2 Sharpening the knives
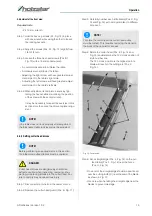
Step 1: Disconnect the machine from the power source.
Step 2: Remove the blade guard and belt cover.
Step 3: To protect the infeed table from scratches, parti-
ally cover the sharpening stone with paper (Fi-
gure 25).
DANGER!
Risk of fatal injury due to electric shock!
Contact with live components may result in fatal
injury. Switched-on electrical components can make
uncontrolled movements and lead to serious injuries.
- Before starting cleaning and maintenance work,
switch off the machine and pull out the mains plug.
- Connections and repairs to the electrical equip-
ment may only be carried out by a qualified electri-
cian.
WARNING!
Blades are extremely sharp! Use caution when
cleaning or changing. Failure to comply may cause
serious injury!
WARNING!
Blades are extremely sharp! Use caution when
cleaning or changing. Failure to comply may cause
serious injury!
Содержание 5904026
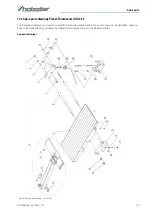
Страница 36: ...36 ADH Series Version 1 02 Spare parts Spare parts drawing 2 Fig 27 Spare parts drawing 2 ADH 26 C ...
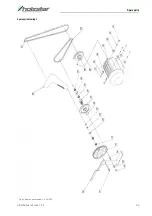
Страница 37: ...Spare parts ADH Series Version 1 02 37 Spare parts drawing 3 Fig 28 Spare parts drawing 3 ADH 26 C ...
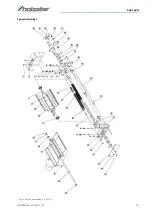
Страница 38: ...38 ADH Series Version 1 02 Spare parts Spare parts drawing 4 Fig 29 Spare parts drawing 4 ADH 26 C ...
Страница 39: ...Spare parts ADH Series Version 1 02 39 Spare parts drawing 5 Fig 30 Spare parts drawing 5 ADH 26 C ...
Страница 40: ...40 ADH Series Version 1 02 Spare parts Spare parts drawing 6 Fig 31 Spare parts drawing 6 ADH 26 C ...
Страница 41: ...Spare parts ADH Series Version 1 02 41 Spare parts drawing 7 Fig 32 Spare parts drawing 7 ADH 26 C ...
Страница 43: ...Spare parts ADH Series Version 1 02 43 Spare parts drawing 2 Fig 34 Spare parts drawing 2 ADH 31 C ...
Страница 44: ...44 ADH Series Version 1 02 Spare parts Spare parts drawing 3 Fig 35 Spare parts drawing 3 ADH 31 C ...
Страница 45: ...Spare parts ADH Series Version 1 02 45 Spare parts drawing 4 Fig 36 Spare parts drawing 4 ADH 31 C ...
Страница 46: ...46 ADH Series Version 1 02 Spare parts Spare parts drawing 5 Fig 37 Spare parts drawing 5 ADH 31 C ...
Страница 47: ...Spare parts ADH Series Version 1 02 47 Spare parts drawing 6 Fig 38 Spare parts drawing 6 ADH 31 C ...
Страница 49: ...Spare parts ADH Series Version 1 02 49 Spare parts drawing 2 Fig 40 Spare parts drawing 2 ADH 41 C ...
Страница 50: ...50 ADH Series Version 1 02 Spare parts Spare parts drawing 3 Fig 41 Spare parts drawing 3 ADH 41 C ...
Страница 51: ...Spare parts ADH Series Version 1 02 51 Spare parts drawing 4 Fig 42 Spare parts drawing 4 ADH 41 C ...
Страница 52: ...52 ADH Series Version 1 02 Spare parts Spare parts drawing 5 Fig 43 Spare parts drawing 5 ADH 41 C ...
Страница 53: ...Spare parts ADH Series Version 1 02 53 Spare parts drawing 6 Fig 44 Spare parts drawing 6 ADH 41 C ...
Страница 54: ...54 ADH Series Version 1 02 Spare parts Spare parts drawing 7 Fig 45 Spare parts drawing 7 ADH 41 C ...
Страница 57: ...Notes ADH Series Version 1 02 57 15 Notes ...
Страница 58: ...www holzstar de ...


