Section 2
♦
Installation
12
CMN-41 Series Installation and Operation Handbook
Copyright © 2009, Harris Corporation
•
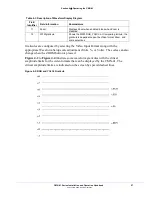
For a network connection, connect the network hub to the back panel of the
CMN-41 using a CAT5 network cable (not included). See
Figure 2-4
.
Figure 2-4. CMN-41 Network PC Connection
4. Set up an Ethernet configuration as follows:
a)
Press the SETUP button on the CMN-41 front panel.
b)
Press the Up/Down arrow button to highlight the Unit Configuration Setup
menu, and then press the ENTER button to enter the submenu.
c)
Press the Up/Down arrow button until the IP CONFIGURATION selection
option is highlighted.
d)
Press the ENTER button or Left/Right arrow button to enter the Ethernet
Config selection option.
e)
If using DHCP:
•
Press the Left/Right arrow button to highlight DHCP.
•
Press the Up/Down arrow button to toggle the state to ON.
•
Press the Left/Right arrow button to highlight ACCEPT, and then press the
ENTER button.
The IP Address is retrieved from the DHCP server and placed under the
appropriate submenu.
f)
If not using DHCP:
•
Press the Left/Right arrow button to select IP ADDRESS.
•
Press the Up/Down arrow button to change the value selected, and then
press the Left/Right arrow button to highlight the next value.


