Operation
4–6
Operator Controls and Indicators
User Interface
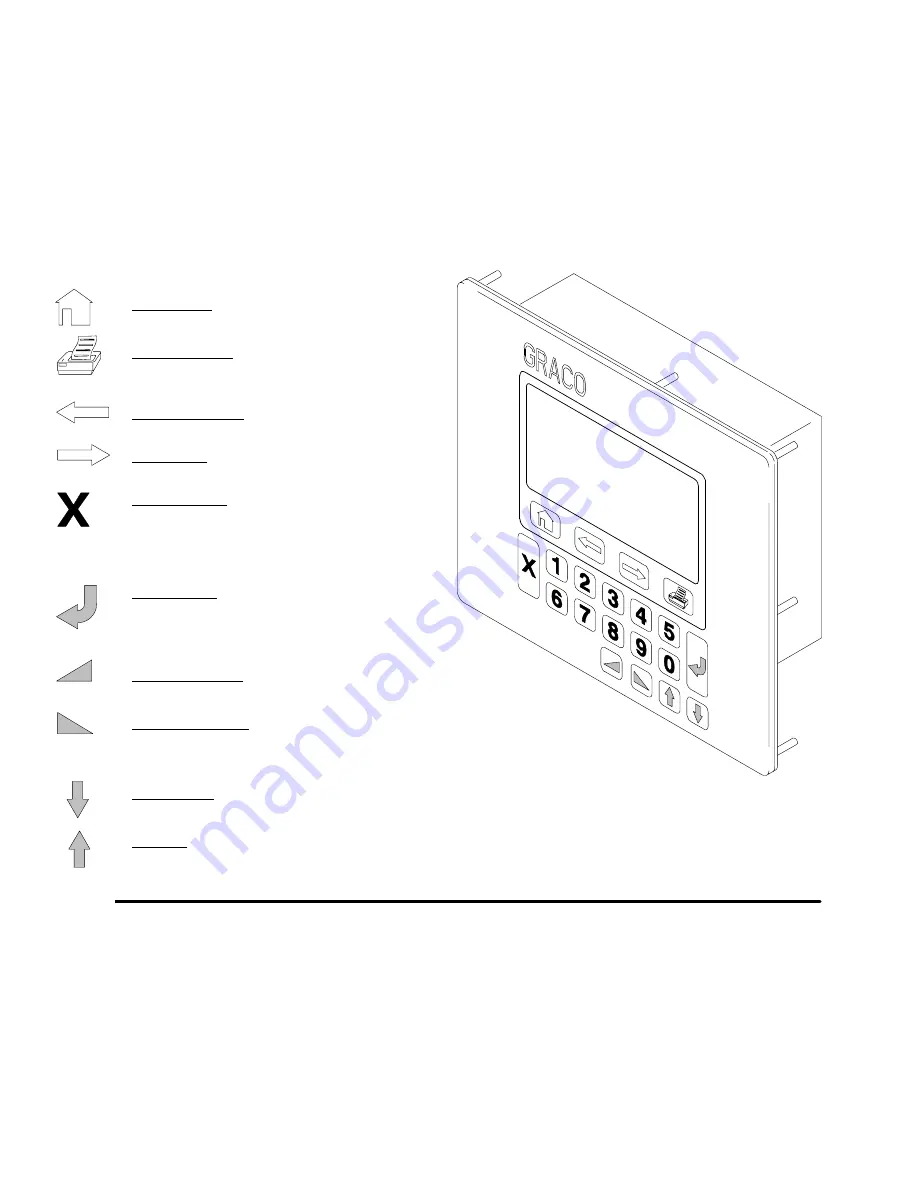
The User Interface is a small terminal with a 16 x 40
character display and a keyboard for entering setup
parameters. The User Interface is available mounted in
the controller door or as a remote station that can be
mounted as desired. See page 3–13. The operation of
the interface remains the same for both versions.
Fig. 4.4
NAVIGATIONAL KEYS
PRINTER Key:
Press to print pre-defined
report.
Screen Navigation Keys
PREVIOUS Key:
Press to view the previous
screen.
NEXT Key:
Press to view the next screen.
CANCEL Key:
When in a configuration or
setup mode, press
X
to cancel a change that
was entered and revert back to the previous
data. When in run mode, press
X
to reset the
totalizers.
ENTER Key:
Press to enter numerical data or
to enter data and move to the next field on
screens with multiple fields.
Selection Toggle Keys
INCREASE Key:
Press to toggle up through
the selections for a data field.
DECREASE Key:
Press to toggle down
through the selections for a data field.
Data Field Navigation Keys
DOWN Key:
Press to move down a line of
data fields.
UP Key:
Press to move up a line of data fields.
HOME Key:
Press to go to the HOME screen.
See page 6–3.
NOTE:
If a number for an option is entered that is not
available, the User Interface will beep to indicate an
error. If the screen is exited while the error is pres-
ent, the screen will automatically return to the
previous existing number that was entered.
Some configuration choices will affect what is
available for choices on related screens.
When an entry is accepted by the system, the
value will be highlighted.
Содержание PrecisionMix ii
Страница 6: ...6 ...
Страница 7: ...1 1 Warnings Warnings 1 ...
Страница 8: ...1 2 Warnings ...
Страница 11: ...Overview 2 1 Overview 2 ...
Страница 12: ...2 2 Overview ...
Страница 15: ...Overview 2 5 ...
Страница 31: ...Installation 3 1 Installation 3 ...
Страница 32: ...Installation 3 2 ...
Страница 58: ...Installation 3 28 Notes ...
Страница 63: ...Installation 3 33 Power up Checklist Fig 3 23 CP Interface Step 5 Step 6 Step 4 Step 7 Step 10 ...
Страница 67: ...Operation 4 1 Operation 4 ...
Страница 68: ...Operation 4 2 ...
Страница 83: ...Operation 4 17 Notes ...
Страница 90: ...Operation 4 24 ...
Страница 91: ...Screen Map 5 1 Screen Map 5 ...
Страница 92: ...5 2 Screen Map ...
Страница 94: ...5 4 Screen Map ...
Страница 95: ...Run Monitor 6 1 Run Monitor 6 ...
Страница 96: ...Run Monitor 6 2 ...
Страница 103: ...Totalizers 7 1 Totalizers 7 ...
Страница 104: ...Totalizers 7 2 ...
Страница 108: ...Totalizers 7 6 ...
Страница 109: ...System Configuration 8 1 System Configuration 8 ...
Страница 110: ...System Configuration 8 2 ...
Страница 138: ...System Configuration 8 30 PrecisionMix II 3K Robotic Interface Integrated Color Change TI0494 Fig 8 1 ...
Страница 142: ...System Configuration 8 34 ...
Страница 143: ...Recipe Setup 9 1 Recipe Setup 9 ...
Страница 144: ...Recipe Setup 9 2 ...
Страница 165: ...10 1 Troubleshooting Troubleshooting 10 ...
Страница 166: ...10 2 Troubleshooting ...
Страница 182: ...10 18 Troubleshooting ...
Страница 183: ...11 1 Service Service 11 ...
Страница 184: ...11 2 Service ...
Страница 192: ...11 10 Service ...
Страница 193: ...12 1 Parts Parts 12 ...
Страница 194: ...12 2 Parts ...
Страница 207: ...12 15 Parts Notes ...
Страница 228: ...12 36 Parts ...
Страница 229: ...13 1 Utilities Software Utilities Software 13 ...
Страница 230: ...13 2 Utilities Software ...
Страница 254: ...13 26 Utilities Software ...
Страница 255: ...14 1 Technical Data Technical Data 14 ...
Страница 256: ...14 2 Technical Data ...
Страница 259: ...14 5 Technical Data Notes ...


