13-10
Utilities Software
Utilities Software
7.
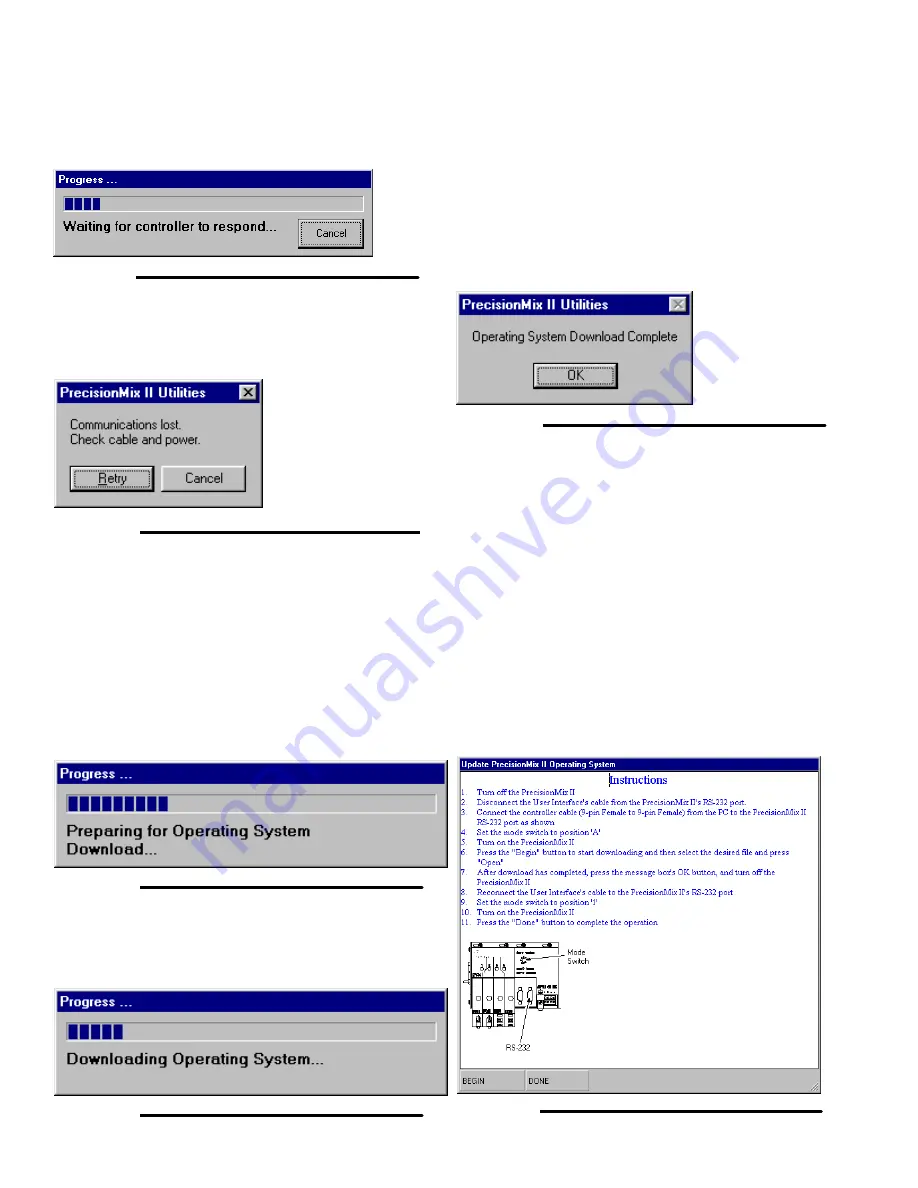
After the BEGIN button is pressed a progress bar
appears while Utilities try to connect with the
controller.
Fig. 13.22
8.
If the controller doesn’t respond within a preset
amount of time the following message box ap-
pears.
Fig. 13.23
In this case, check to make sure the cable is con-
nected, power to the system is turned on, the
mode switch on the controller is in the correct posi-
tion, the correct COM port on the PC is selected,
etc.
9.
After the controller responds, a series of opera-
tions occur to reset and clear the current memory
contents of the controller. The following progress
bar indicates this progress.
Fig. 13.24
10. After the memory has been cleared, the operating
system is downloaded while progress is monitored
with the following progress bar.
Fig. 13.25
11. If an error occurs during download, a series of
message boxes may appear indicating the errors.
The download may be restarted after acknowledg-
ing the message boxes and correcting the cause of
the error by returning to step 2.
12. When the operating system download has com-
pleted the following message box will appear
waiting for the user to acknowledge by pressing
the button.
Fig. 13.26
13. After the download is complete, turn off the Preci-
sionMix II power.
14. Disconnect the communication cable and recon-
nect the User Interface cable to the PrecisionMix II
controller.
15. Set the mode switch to 1.
16. Turn the PrecisionMix II controller power on.
17. Press the DONE button to close the Instructions
window. See Fig. 13.27.
18. The system is now ready to update the Precision-
Mix II Program.
Fig. 13.27
Содержание PrecisionMix ii
Страница 6: ...6 ...
Страница 7: ...1 1 Warnings Warnings 1 ...
Страница 8: ...1 2 Warnings ...
Страница 11: ...Overview 2 1 Overview 2 ...
Страница 12: ...2 2 Overview ...
Страница 15: ...Overview 2 5 ...
Страница 31: ...Installation 3 1 Installation 3 ...
Страница 32: ...Installation 3 2 ...
Страница 58: ...Installation 3 28 Notes ...
Страница 63: ...Installation 3 33 Power up Checklist Fig 3 23 CP Interface Step 5 Step 6 Step 4 Step 7 Step 10 ...
Страница 67: ...Operation 4 1 Operation 4 ...
Страница 68: ...Operation 4 2 ...
Страница 83: ...Operation 4 17 Notes ...
Страница 90: ...Operation 4 24 ...
Страница 91: ...Screen Map 5 1 Screen Map 5 ...
Страница 92: ...5 2 Screen Map ...
Страница 94: ...5 4 Screen Map ...
Страница 95: ...Run Monitor 6 1 Run Monitor 6 ...
Страница 96: ...Run Monitor 6 2 ...
Страница 103: ...Totalizers 7 1 Totalizers 7 ...
Страница 104: ...Totalizers 7 2 ...
Страница 108: ...Totalizers 7 6 ...
Страница 109: ...System Configuration 8 1 System Configuration 8 ...
Страница 110: ...System Configuration 8 2 ...
Страница 138: ...System Configuration 8 30 PrecisionMix II 3K Robotic Interface Integrated Color Change TI0494 Fig 8 1 ...
Страница 142: ...System Configuration 8 34 ...
Страница 143: ...Recipe Setup 9 1 Recipe Setup 9 ...
Страница 144: ...Recipe Setup 9 2 ...
Страница 165: ...10 1 Troubleshooting Troubleshooting 10 ...
Страница 166: ...10 2 Troubleshooting ...
Страница 182: ...10 18 Troubleshooting ...
Страница 183: ...11 1 Service Service 11 ...
Страница 184: ...11 2 Service ...
Страница 192: ...11 10 Service ...
Страница 193: ...12 1 Parts Parts 12 ...
Страница 194: ...12 2 Parts ...
Страница 207: ...12 15 Parts Notes ...
Страница 228: ...12 36 Parts ...
Страница 229: ...13 1 Utilities Software Utilities Software 13 ...
Страница 230: ...13 2 Utilities Software ...
Страница 254: ...13 26 Utilities Software ...
Страница 255: ...14 1 Technical Data Technical Data 14 ...
Страница 256: ...14 2 Technical Data ...
Страница 259: ...14 5 Technical Data Notes ...


