background image

Installation

3–34

Power-up Checklist

Checking Flow Control I/P Transducers

NOTE: 

Only follow this procedure if a Flow Control

system is installed.

1.

Turn on the main power on the PrecisionMix II 3K
controller.

2.

Turn off the air supply to the I/P transducers.

W ARNING

The next test will use free-flowing air from the I/P
transducer. Make sure the area is safe for this test.

3.

Remove the air line from the I/P transducer out-
lets. Turn on the air supply to the I/P transducer.

4.

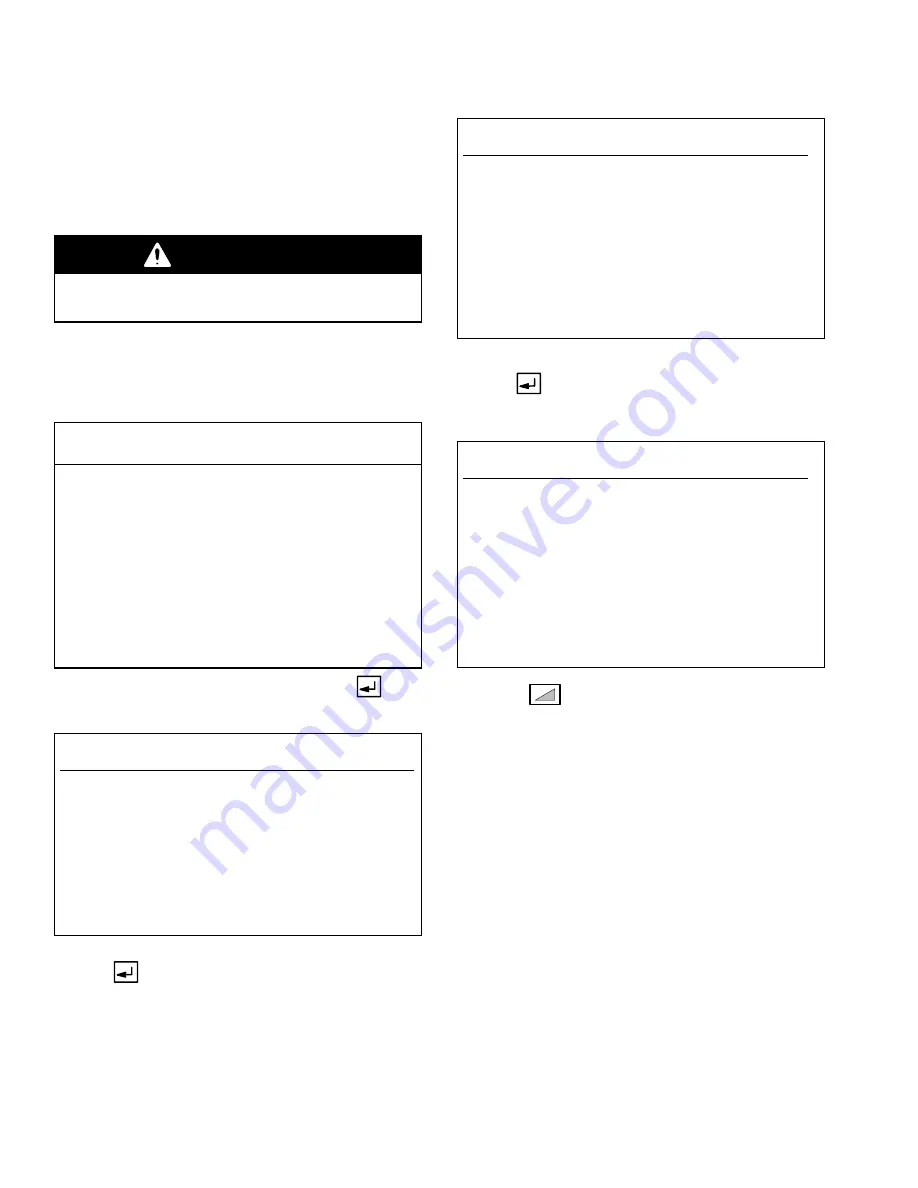
Go to the System Configuration Menu screen.

System Configuration Menu

SYSTEM CONFIGURATION

Station: 00

MENU
1.LANGUAGE

2.STATION NUMBER

3.DISPLAY UNITS

4.RECIPES

5.POTLIFE TIMER

6.FLOW RATE LIMITS

7.SOLVENT METER

8.PURGE SEQUENCE

9.MIXED LOAD VOL.

10.GUNS SETUP

11.MIX/PURGE

12.FLOW CONTROL

13.INTEGRATOR VOLUME

14.COLOR CHANGE

15.PASSWORD CHANGE

16.TIME AND DATE

17.DISPLAY SETUP

18.PRINT SETUP

19.AIR FLOW SWITCH

Select a menu item and press enter: > 12

5.

Type number 12, for 

FLOW CONTROL

, then  

.

C12:

Flow Control

SYSTEM CONFIGURATION

Station: 1

FLOW CONTROL OPTIONS

Select Flow Control Options:

1. OFF

2. Hand Gun Operation

3. Automatic Gun Operation

> 2

Press Enter to Accept Data and Edit

the Flow Control Options.

6.

Type the number for the desired flow control option

then 

.

Flow Control Menu (FCMenu)

SYSTEM CONFIGURATION

Station: 1

FLOW CONTROL: MENU

Select Flow Control Options to Edit:

1. Source of Flow Control Data

2. Analog Input Scaling Range

3. Force Analog Output

4. Delay Time to Start Flow Control

5. Flow Meter Location

> 3

7.

Type number 3 for

 Force Analog Output

then 

.

FC1:

Flow Control Force Output

SYSTEM CONFIGURATION

Station: 1

FLOW CONTROL:FORCE OUTPUT

Select On to Begin Forcing the Outputs:

> ON

Enter a New Output Percentage to Force

the Flow Regulator:

Gun 1 = 100 %

8.

Select 


ON

 and enter 

100%

 to force the fluid

regulator open. Maximum air pressure should flow
from the I/P transducer. Enter 

0%

 to close the Fluid

regulator. There should be no air flow from the I/P
transducer.

9.

Re-install the I/P transducer air lines.

Содержание PrecisionMix ii

Страница 1: ... GRACO INC ąP O BOX 1441ąMINNEAPOLIS MNą55440 1441 Copyright 2001 Graco Inc is registered to I S EN ISO 9001 309107E Read warnings and instructions See page 2 for the Table of Contents EEXia II A T3 ITS03ATEX21382 0359 II 2 G Conforms to ANSI UL standard 2279 Class 1 Zone 0 AExia II A T4 110474 Certified to CAN CSA 22 2 No E79 11 ...

Страница 2: ...sure Test and Solvent Flush the System 3 20 Digital Outputs 3 21 Component Electrical Connections 3 22 Controller Terminal Block 3 29 Ground the System 3 30 Check the Resistance 3 31 Power up Checklist 3 32 Checking Flow Control I P Transducers 3 34 Testing Flow Control External 4 20 mA Input Signal 3 35 Pressure Test and Solvent Flush Procedure 3 36 Test Color Valve Operation 3 36 Pressure Test C...

Страница 3: ...mponent Dump Timer Valve 8 26 C Component Solvent Timer Valve 8 26 Gun 1 Trigger Start Duration Times 8 27 Gun 2 Trigger Start Duration Times 8 27 Special 1 2 5 and 6 Trigger Start Duration Times 8 28 PrecisionMix II 3K Robotic Interface 8 29 Pressure Test and Solvent Flush the System 8 29 PrecisionMix II 3K Robotic Applications 8 29 Integrated Color Change 8 30 Non integrated Color Change 8 31 Di...

Страница 4: ...ce Battery 11 3 Replacing the Controller Battery 11 4 Replacing Isolation Barrier Fuses 11 5 Replacing the User Interface 11 5 Replacing the Power Supply 11 6 Changing the Power Supply Voltage 11 6 Replacing Power Supply Fuses 11 6 Servicing the Operator Station 11 7 Replacing Control Modules 11 8 Replacing Control Submodules 11 9 Parts 12 1 Controller with User Interface 12 3 Part No 243540 12 3 ...

Страница 5: ...o 514037 Printer Paper 12 34 Manual Dump Valve Kits 12 35 2K Fluid Outlet Valves 12 35 Part No 513052 Air Flow Switch 12 35 Part No 241962 Hydro Softfeel Material Application Kit 12 35 Cable Network PC AMR 12 35 Catalyst Supply Modules 12 35 Utilities Software 13 1 Utilities Overview 13 3 Connection Error 13 3 Mode Switch 13 3 Backup PrecisionMix II 13 4 Restore PrecisionMix II 13 7 Update the Ope...

Страница 6: ...6 ...

Страница 7: ...1 1 Warnings Warnings 1 ...

Страница 8: ...1 2 Warnings ...

Страница 9: ...ne Do not turn on or off any light switch in the spray area while operating or if fumes are present Do not smoke in the spray area Do not operate a gasoline engine in the spray area If there is any static sparking while using the equipment stop spraying immediately Identify and correct the problem Keep liquids away from the electrical components Disconnect electrical power at the main switch befor...

Страница 10: ...ment misuse can cause the equipment to rupture malfunction or start unexpectedly and result in serious injury This equipment is for professional use only Read all instruction manuals tags and labels before operating the equipment Use the equipment only for its intended purpose If you are uncertain about usage call your Graco distributor Do not alter or modify this equipment Use only genuine Graco ...

Страница 11: ...Overview 2 1 Overview 2 ...

Страница 12: ...2 2 Overview ...

Страница 13: ...s section provides information on installing a configured PrecisionMix II 3K system After installation is complete a startup checklist is provided to verify the system is installed correctly and ready to begin production Portions of the checklist will guide you to other procedures such as purging the system and configuring the soft ware to prepare the system for production 4 Operation The Pressure...

Страница 14: ...nual 307731 LP Color Change Valve Assy Manual 307941 LP Color Change Valve Manual 308977 HP Color Change Valve Assy Manual Form No Description 308291 HP Color Change Valve Manual 309227 Gun Flush Box Manual 308818 Printer Manual 308292 Fluid Pressure Regulator 309138 System Electrical Schematic 309158 System Configurator Schematic 309234 Coriolis Meter Manual ...

Страница 15: ...Overview 2 5 ...

Страница 16: ...ompo nents into the integrator chambers The flow meters monitor the exact fluid volumes being dispensed and send electrical pulses to the controller The controller monitors these pulses and signals the solenoids to turn the dispense valves on or off accordingly based on the target volumes calculated by the controller Other inputs and outputs are provided to control the purging process signal an al...

Страница 17: ...nent C FC Flow Meter Component C GC Dispense Valve Component C HC Purge Valve usually solvent Component C JC Fluid Shut off Valve Component C KC Ratio Check Valve Component C Component B B Supply Line Component B DB Fluid Filter Component B 100 mesh minimum EB Check Valve Component B FB Flow Meter Component B GB Dispense Valve Component B HB Purge Valve usually solvent Component B JB Fluid Shut of...

Страница 18: ...TI0087B 4 The controller sends a signal to activate the sole noid valve for the component B dispense valve GB See Fig 2 3 5 The component B dispense valve GB opens and Component B flows into the second integrator chamber N The fluid is lined up proportionately with the previously dispensed Component A and C dose The component B dispense valve closes when the target volume for Component B is reache...

Страница 19: ...y are mixed The mixture then flows into the second integrator chamber N See Fig 2 4 8 The three components are given a homogeneous blending as they pass through a second static mixer tube P 9 The three components continue to be alternately fed into the integrators as long as the gun is trig gered Output from the mixer tube to the spray gun may be controlled by a fluid pressure regulator Q After th...

Страница 20: ... meter U bracket and tube off the fluid panel 4 Unscrew the nut of the Component B tube W from the nipple at the dispense valve Y 5 Remove the screws S and take the Component B meter Z bracket and tube off the fluid panel 6 Turn the tubes of both meters 180 so the nuts face in the opposite direction 7 Reinstall the Component B and C meters in the opposite locations 8 Refer to Fig 2 6 Disconnect th...

Страница 21: ...I0227 A B C AP BP CP R G R R R R R G G G G G R G G G G G G R R R R R A B C AP BP CP R G G G G G G R R R R R A B C AP BP CP Detail of Solenoid Box Before Changing Component B and C Tubing Connections After Changing Component B and C Tubing Connections ...

Страница 22: ...adequate volume and pressure to supply the air spray gun The Component A B and C fluid supply pressures need to be bal anced The fluid feed hose gun nozzle and needle size and travel must be sized and adjusted properly to keep the flow control operating at its maximum effi ciency General Operation Sequence 1 When the controller is first turned on a pre config ured pilot air pressure is applied to ...

Страница 23: ... fluid flow with the component A B and C flow meters provides a faster response to changes in the flow rate setpoint RS 485 Fluid Regulator I P 4 to 20 mAAnalog Out TI0162 PrecisionMix II 3K Controller Panel Fluid Panel Flow Control Station Flow Meter Signal Flow Meter Optional User Interface with Color Change Current to Pressure Transducer 4 to 20 mA Analog In Fig 2 7 Typical Installation of One ...

Страница 24: ...ecisionMix II 3K Controller The controller can be configured to control and display the fluid control information including setpoint actual flow milli amp output values to the I P transducer system parameter and I O conditions The controller will indicate when the system is operating within flow control tolerance and when it is not Flow Control Station The Flow Control Station consists of a Flow C...

Страница 25: ...ckly reach the setpoint and avoid unnecessary alarms or corrections refer to page 8 19 Flow Control Low Limit This value is only used with manual guns and is always entered from the User Interface refer to page 9 9 The flow control stops making adjustment if the flow rate falls below the difference of setpoint and the Low Limit volume The warning alarm output will be on when the actual flow rate f...

Страница 26: ...y be performed with the operator switch in the Mix or Standby position If the operator switch is in the Mix position the system will be ready for immediate spraying after a color change The green light on the Operator Station will blink while a color change is in operation The green light indicates that the system is busy and is not ready for spraying Mix Load Volumes If mix load volumes are confi...

Страница 27: ...and off up to two times These outputs are typically wired to the spray guns triggers to allow automatic purging and filling Refer to page 8 27 Special Outputs 1 2 5 and 6 The special outputs are optional outputs that the user can configure for their particular application Each of these valves can be turned on and off up to four times during a color change sequence Refer to page 8 28 Specials 1 and...

Страница 28: ...change valves Then the dump valve for Compo nent A resin will immediately open as well as the solvent valve on the color stack This will allow solvent to flow into the fluid lines through the flow meter and out through the dump valve The color change solvent valve stays open for 5 sec onds then it closes and the new color valve associ ated with the new recipe will open The dump valve remains open ...

Страница 29: ...ve Component A Color Stack Solvent Component B Closes Dump Valve Component B Color Stack Solvent Component C Closes Dump Valve Component C Purge Ends Mix Gun 1 Trigger Gun 2 Trigger Special 1 Special 2 Special 5 Special 6 An example of a color change from one sequence to another is as follows Sequence 1 Purge time 20 Seconds Mix time 20 seconds Component A Dump time 7 seconds Component A Solvent t...

Страница 30: ...ime 8 seconds Component A Solvent time 5 seconds Special 1 on time 0 seconds Special 1 time 20 seconds Special 2 on time 20 seconds Special 2 time 40 seconds Total Sequence Time 60 seconds Actual Valve Times 1 PURGE MIX 2 A DUMP 3 A SOLV 4 B DUMP 5 B SOLV 6 C DUMP 7 C SOLV 8 GUN1 TG 9 GUN2 TG 10 SPEC 1 11 SPEC 2 12 SPEC 5 13 SPEC 6 0 Sec 60 0 Color Chg Seq 1 Enter Function 1 13 01 ...

Страница 31: ...Installation 3 1 Installation 3 ...

Страница 32: ...Installation 3 2 ...

Страница 33: ...numbers and letters in the illustrations Be sure all accessories are adequately sized and pressure rated to meet the system s requirements The Typical Installations shown in Figs 3 1 and 3 2 are only a guideline for selecting and installing system components and accessories and are not an actual system design Contact your Graco distributor for assistance KEY for Figs 3 1 and 3 2 NOTE The typical i...

Страница 34: ...low Control I P Cable Solenoid Network Cable Solenoid Power Cable Fluid Hose Purge Air Air In Solenoid Air Atomizing Air T 1 Resin Dump Key Electrical Pneumatic Fluid NOTE See page 3 3 for key to letter references NON HAZARDOUS AREA HAZARDOUS AREA Fluid Line To Gun 1 User interface is also available as a remote interface see page 3 10 TI0172 Flow Control Meter Cable Component A Component C Compone...

Страница 35: ...le Solenoid Power Cable Fluid Hose Purge Air Air In Solenoid Air Atomizing Air T 1 Resin Dump Key Electrical Pneumatic Fluid NOTE See page 3 3 for key to letter references NON HAZARDOUS AREA HAZARDOUS AREA Fluid Line To Gun 1 User interface is also available as a remote interface see page 3 10 Flow Control Meter Cable Component A Component C Component B TI0225 Connector Network PC or Printer Cable...

Страница 36: ...essures of the Component A B and C fluid supplies to be within 2 psi 14 kPa 0 1 bar of each other at the fluid outlet The fluid supply must be free of pressure spikes which are commonly caused by a pump stroke changeover If necessary install pressure regulators on the fluid inlets to the PrecisionMix II 3K to reduce the fluid supply pressure Contact your Graco distributor for information on fluid ...

Страница 37: ...and stress caused during operation 2 Mark the mounting holes on the wall at a conve nient height for the operator using the equipment as a template Color Change Panel In order to use the standard supplied fluid hose the color change panel must be mounted within 12 in 305 mm of the fluid panel Contact your Graco distribu tor for other available fluid hoses Operator Station or Flow Control Station M...

Страница 38: ...he non hazardous area within 25 ft 7 6 m of the gun flush box 100 ft 30 5 m of cable is provided which con nects the solenoid box with the controller 3 Drill the mounting holes in the wall and install anchors as needed 4 Bolt the equipment securely to the wall Fig 3 4 Controller 22 5 in 572 mm 28 5 in 724 mm 24 in 610 mm Depth 9 in 229 mm 30 in 762 mm TI0165 Fig 3 5 9042A 6 in 152 mm 6 75 in 171 m...

Страница 39: ...tion 2 Drill holes in the floor using the mounting stand base as a template and install anchors as needed 3 Secure the mounting stand to the floor 22 in 559 mm 55 25 in 1403 mm 19 in 483 mm 70 in 1778 mm 28 75 in 730 mm 28 75 in 730 mm 11 in 279 mm 10 in 254 mm 56 in 1422 mm Color Change Panel Fluid Panel Dimensions and Mounting Holes Depth 17 4 in 442 mm Depth 9 in 229 mm 15 in 381 mm 20 56 in 52...

Страница 40: ...nd diagram page 3 29 for wiring connections Install the Controller and User Interface Code A The controller is available with a panel mount user interface or a remote user interface 1 If you are using a remote user interface T Part No 194372 standard cable C1 is provided to connect the remote interface T to the controller B The 9 pin D SUB cable is 50 ft 15 2 m long See Fig 3 7 TI0165 Fig 3 7 T B ...

Страница 41: ...r a power conditioner will need to be supplied The Precision Mix II control is already equipped with a surge suppressor adding one will not be necessary The basic requirements for purchasing a UPS or power condition are as follows 1 Purchase one rated for the desired input voltage 120 Vac or 220 Vac 2 Purchase one with a minimum output current of 125 Watts 3 Purchase one that is rated for industri...

Страница 42: ... II 3K controller B See Fig 3 9 Fig 3 9 N B C6 P S3 S2 S1 S4 TI0165 2 In certain situations the cable C6 may need to be disconnected and reconnected to route the cable as desired If this is necessary follow the steps below and refer to the Electrical Connec tion table and diagram page 3 29 Non intrinsically Safe Fluid Panel Cable Wiring a Connect the cable wires to the terminals in the controller ...

Страница 43: ...tion Code J There are two types of operator station with integrated color change R and without integrated color change Q Be sure the supplied cable C5 can reach the Preci sionMix II 3K controller B 100 ft 30 5 m of cable is supplied pre connected to the operator station The cable is pre stripped and has ferrules assembled See Fig 3 11 TI0165 Fig 3 11 B R Q C5 NOTE It is recommended that the cable ...

Страница 44: ...d on the panel 1 See Fig 3 12 and 3 13 All fluid and pneumatic connections are factory completed The air lines may be shortened if desired 2 Power P and network N cables connecting the color change panel with the controller B are installed at the factory The cables are 50 ft 15 2 m long They may be shortened at the controller end only 3 Ground the color change panel to the same true earth ground u...

Страница 45: ...zing Air Component A Dump Component A Dump Valve Component C Dump Valve Solenoid Box Stack No 1 Solenoid Bank Stack No 2 and 3 Solenoid Bank Solenoid Bank Purge Valve Air and Fluid Connections Splitter Color Change Panel Component A Color Change Valve Stack Component C Stack No 2 Component B Stack No 3 Component A Component C Component B Component B Dump Valve ...

Страница 46: ...reduce the risk of splashing a minimum of two feet 0 6 m of straight pipe or tubing must be connected between the Gun Flush Box and an enclosed waste container for the solvent Fig 3 14 O T W 4 Electrically interlock the Gun Flush Box air supply with the ventilators to prevent the box from operat ing when ventilating fans are not operating Check and follow all National State and Local codes regardi...

Страница 47: ... and Fig 3 15 for connection ports Gun Flush Box Air Tube Connections Solenoid Box Gun Flush Box Ports Description Ports Description C Solenoid Output C Gun trigger cyl inder air acti vates gun trig ger A Pressure Switch A Return air for the gun in the box signal P Air Supply P Supply air in S Safety interlock locks out the atomizing air E Solenoid Ex haust no con nections re quired No connections...

Страница 48: ...tion Install the Gun Flush Box and Solenoid Box Code M N and P continued Fig 3 17 8990A G C C9 B H A2 A1 L D mounted to the back of the fluid panel solenoid box To Gun Non Hazardous Area Hazardous Area One Gun Flush Box Installation A3 ...

Страница 49: ...cond air flow switch through terminal block 11 in the solenoid box of the fluid panel Two Gun Flush Box Installation D mounted to the back of the fluid panel solenoid box A3 A1 A3 A1 Non Hazardous Area Hazardous Area Non Hazardous Area Hazardous Area Non Hazardous Area Hazardous Area TI0471 Solenoid Box II Terminal Blocks Solenoid Box I Terminal Blocks P Mix Fig 3 19 ...

Страница 50: ...ltered to a minimum of 40 micron 9004A Air in Air out Fluid in C12 K F To Controller Fluid out Non Hazardous Area Hazardous Area Fig 3 20 Fluid Connections Figs 3 1 and 3 2 1 Connect the solvent supply line to the solvent inlet on the fluid panel If your system has color change make solvent connections to the color change stack and the catalyst change stack 2 Connect the resin supply line catalyst...

Страница 51: ...a Gun Flush Box to automatically trigger the gun This output will turn on automatically if gun flush boxes are enabled for purging and loading The Gun 2 Trigger output may be turned on or off via the programmable color change sequences It will also turn on if the system is being manually purged or filled 5231 Special 5 This output is not used for Non Integrated Color Change The Special 5 output ma...

Страница 52: ...VDC Power supply 1082 Power supply Blue Ground Pin connector port Graphic User Interface None Pre wired with connec tors 194400 Pre wired connectors Printer Port None Pre wired with connec tors See printer option Pre wired connectors PC Network Interface 3081 White Blue Network B All other P Mix 3K sys tems on the network 3091 Shield Network A tems on the network 3101 Blue White Ground Operator St...

Страница 53: ... Shield 4061 Component B Blue Signal 1 3 4061 1082 Black Common 2 4 1082 1082 Drain Shield PA gnd Shield 4081 Component C Green Signal 1 3 4081 1082 Brown Common 2 4 1082 1082 Drain Shield PA gnd Shield 5171 Solvent Component A Green Signal 1 3 5171 1082 Black Common 2 4 1082 1082 Drain Shield PA gnd Shield 5181 Solvent Component B White Signal 1 3 5181 1082 Black Common 2 4 1082 1082 Drain Shield...

Страница 54: ...Component B Blue Red Signal 2 4 4271 1082 Black Ground PA gnd 1082 2021 Orange 24 VDC 1 3 2021 1082 Drain Shield drain PA gnd Shield 4291 Component C Green White Signal 2 4 4291 1082 Blue Ground PA gnd 1082 2021 Green 24 VDC 1 3 2021 1082 Drain Shield drain PA gnd 1082 4311 Flushing Material Brown Red Signal 2 4 4311 1082 Black Ground PA gnd 1082 2021 Yellow 24 VDC 2021 1082 Drain Shield drain PA ...

Страница 55: ...sh box interlock gun 2 5121 input 24 VDC 5221 Blue Gun trigger gun flush box 2 auto dump 5221 output 24 VDC 5211 Orange Gun trigger gun flush box 1 auto dump 5211 output 24 VDC 2021 Red 24 VDC 2021 1082 Black Common 1082 Flow Control 8041 Red Analog input gun 1 remote 0 20 Ma Field Source 8051 Black Analog input gun 1 remote 0 20 Ma Field Source 1082 Shield Signal Protection Field Source 1082 Shie...

Страница 56: ...e 7111 Spare Input 24 VDC discrete 7101 External process con troller Recipe bit 5 Input 24 VDC discrete 7091 External process con troller Recipe bit 4 Input 24 VDC discrete 7081 External process con troller Recipe bit 3 Input 24 VDC discrete 7071 External process con troller Recipe bit 2 Input 24 VDC discrete 7061 External process con troller Recipe bit 1 Input 24 VDC discrete 7051 External proces...

Страница 57: ...id Gun 1 trigger Input 24 VDC 5061 External solenoid Gun 2 trigger Input 24 VDC 5071 Remote alarm External alarm Input 24 VDC 5081 External process con troller Abort reset Input 24 VDC discrete 5091 External process con troller Color change Input 24 VDC discrete 5101 External process con troller Print report Input 24 VDC discrete 6241 Spare 6231 Remote alarm Purge not complete alarm Output 24 VDC ...

Страница 58: ...Installation 3 28 Notes ...

Страница 59: ...Not Completed Alarm w solvent meter option Purge Load Interlock Not Ready Alarm Potlife Alarm Gun 2 Potlife Alarm Gun 1 Mix Solenoid Output B Flow Meter Input Solvent RSM Run screen monitor NOTE All signals labeled 1082 are GND All signals labeled 2021 are 24V RSM Festo 24V RSM Festo GND Optional Terminal Blocks for Flow Control Remote Analog Input Setpoint 1 Remote Analog Input Setpoint 1 Remote ...

Страница 60: ...surface for the color change valves and solenoids must be electrically connected to the same true earth ground point as the controller enclosure Different ground points may cause current to flow through the network cables causing incorrect signals Operator Station Ground the operator station to a true earth ground Flow Control Station Ground the flow control stations to a true earth ground Gun Flu...

Страница 61: ...Panel Ground Wire must be connected to same true earth ground 6 as the controller and fluid panel are conĆ nected to Fig 3 22 1 3 4 2 1 2 4 5 6 7 8 5 6 KEY 3 7 8 TI0163 Check the Resistance WARNING FIRE EXPLOSION AND ELECTRIC SHOCK HAZARD To reduce the risk of fire explosion or electric shock the resistance between the PrecisionMix II 3K components and true earth ground must be less than 1 ohm Hav...

Страница 62: ...lit the ERR error LED is not lit and the RS232 LED is blinking See Fig 3 23 7 Check that the OK LEDs on all the I O modules are lit 8 Check that the User Interface has powered up and is displaying the initial Run Monitor screen See page 6 3 9 Check that all the lights on the Operator Station including the alarm light illuminate for about 1 second during power up If the Operator Station includes in...

Страница 63: ...Installation 3 33 Power up Checklist Fig 3 23 CP Interface Step 5 Step 6 Step 4 Step 7 Step 10 ...

Страница 64: ...elect a menu item and press enter 12 5 Type number 12 for FLOW CONTROL then C12 Flow Control SYSTEM CONFIGURATION Station 1 FLOW CONTROL OPTIONS Select Flow Control Options 1 OFF 2 Hand Gun Operation 3 Automatic Gun Operation 2 Press Enter to Accept Data and Edit the Flow Control Options 6 Type the number for the desired flow control option then Flow Control Menu FCMenu SYSTEM CONFIGURATION Statio...

Страница 65: ...ONITOR Recipe 1 Station 1 00 00 00 00 00 Gun 1 Setpoint 0000 cc min Flow Actual 0000 cc min Rate Analog out 00 0 mA Setpoint in 00 0 mA Press Enter for a new Setpoint 2 Vary the 4 20 mA signal and note the Setpoint in value changes on the screen For a maximum flow rate setpoint of 2000 cc min the scaling will be as follows 20 mA signal 2000 cc min Actual display on screen 10 mA signal 1000 cc min ...

Страница 66: ...ing properly 4 Turn on the solvent supply to the flush valves and the Component A B and C material supply Repair any leaks Pressure Test Component A NOTE On systems with color change perform steps 1 through 6 On systems without color change begin with step 4 With Color Change 1 Supply solvent pressure to the solvent flush port of the color stack 2 Manually actuate the solvent solenoid valve 1 on t...

Страница 67: ...Operation 4 1 Operation 4 ...

Страница 68: ...Operation 4 2 ...

Страница 69: ...erator switch to STANDBY 2 Relieve fluid and air pressure at the component and solvent feed pumps or pressure pots as explained in their separate instruction manuals 3 Set the operator switch to MIX 4 If using an electrostatic gun make sure the elec trostatic power is turned off 5 Hold a metal part of the spray gun firmly to the side of a grounded metal pail and trigger the gun to relieve fluid pr...

Страница 70: ...e causes the sys tem to cycle between the air and solvent purge sole noid outputs to operate the air and solvent purge valves Purge will not initiate until two seconds after the operator switch has been moved to the purge position This cycling can be either a function of time or of volume if flow meters are connected to measure volume Print Button Pressing the print button will output a run report...

Страница 71: ...enter key has not been pressed The user has 5 seconds to press the enter key and accept the new recipe before the display returns to the old recipe The function of the Color Change Control key entries is dependent on which color change mode has been selected see the table below See page 8 21 for instructions on selecting the color change mode Color Change Mode Function of Key Entries No Color Chan...

Страница 72: ...e press X to reset the totalizers ENTER Key Press to enter numerical data or to enter data and move to the next field on screens with multiple fields Selection Toggle Keys INCREASE Key Press to toggle up through the selections for a data field DECREASE Key Press to toggle down through the selections for a data field Data Field Navigation Keys DOWN Key Press to move down a line of data fields UP Ke...

Страница 73: ...and non essential equipment is re moved from the spray area ____ 7 All flammable liquids in the spray booth are in approved grounded containers ____ 8 All electrically conductive objects in the spray area including paint containers Gun Flush Box and wash cans are electrically grounded and the floor of the spray area is electrically conductive and grounded The PrecisionMix II 3K was tested with lig...

Страница 74: ...le the manifold is pressurized Do not use a tool to open or close the valve stems If manual force cannot turn the valve stems the system pressure must be relieved and the valve properly disas sembled and cleaned to remove the resistance NOTE Refer to Figs 2 2 2 3 and 2 4 pages 2 7 through 2 9 to understand the fluid paths that occur during this procedure which involves the manual manipulation of t...

Страница 75: ...open the component A ratio check valve one half to one full turn 11 Press the manual override button H on the solvent solenoid valve 12 Purge the component A ratio check valve until clean solvent flows from the check valve then close the valve 13 Open the component B ratio check valve one half to one full turn 14 Press the manual override button J on the sol vent solenoid valve 15 Purge the compon...

Страница 76: ...at the end of each workday and before any break longer than the pot life of the fluid Solvent may be used to purge all three components but this will result in longer purge sequences and high solvent usage Call your Graco distributor before choosing this option Recipe Zero If you are using integrated color change you can use Recipe 0 to also purge the color change stacks Refer to page 9 4 Recipe z...

Страница 77: ... for another sequence NOTE If necessary adjust the purge sequence so that only one sequence is required 9 Release the gun trigger when the pressure is relieved and set the operator switch back to Standby 10 Adjust the fluid pressure regulator back to the normal working pressure Emergency Purging Procedure WARNING INJECTION HAZARD To reduce the risk of a serious injury follow the Pressure Relief Pr...

Страница 78: ... 5 bar pres sure To operate properly do not go below 75 psi 5 2 bar or exceed 95 psi 6 6 bar pressure 5 Check that the PrecisionMix II 3K fluid shut off knobs dispense valve knobs and purge valve knobs are set as follows see Fig 4 6 page 4 8 Fluid Shut off Knobs fully open Dispense Valve Knobs three clicks open from fully closed setting Purge Valve Knobs two turns open from fully closed setting 6 ...

Страница 79: ...close the dispense valves further CAUTION Do not use the first 4 to 5 oz 120 to 150 ml of material from the system as it may not be thorough ly mixed due to alarms while loading material into the system b Check the air pressure regulators on the fluid supply tanks The fluid flow rate at the spray gun should be the same regardless of whether the Component A B or C dispense valves are open The press...

Страница 80: ...on or electric shock always turn off the electrostatics on an electrostatic gun before purging or before placing the gun in the Gun Flush Box Stop production at any time by setting the operator switch to Standby If Gun Flush Boxes are installed on the system always place the gun inside its box when the gun is not being used If your stop time will not exceed the pot life of Compo nent A B or C no a...

Страница 81: ...f the flow rate during the first 10 seconds is below the new setpoint increase the Gain Factor by 50 If the flow rate during the first 10 seconds is above the new setpoint decrease the Gain Factor by 50 9 Repeat steps 6 8 until an optimum Gain Factor is achieved 10 Change the Delay Time to an appropriate value too short of a delay time will create inaccurate initial flow rate reading after the gun...

Страница 82: ...Flush Box and close its door NOTE The Gun Flush Box door must be closed for the atomizing air valve to open 7 Set the Operator Station switch Mix to start spraying NOTE The first three PrecisionMix II 3K alarms will be reset by the controller to prevent nuisance alarms during flushing and loading Multiple Gun Flush Box Operation NOTE Guns will be loaded and purged in sequential order The sequence ...

Страница 83: ...Operation 4 17 Notes ...

Страница 84: ... will always print the Run Mode Report See Fig 4 8 Fig 4 8 Print Button Operator Station without Color Change Control Run Mode Report To print the Run Mode Report with the User Interface you must be at one of the run mode screens then press the print key Pressing the print button on the Operator Station will always print the Run Mode Report The Run Mode Report will list the information that can be...

Страница 85: ...MENU 1 MIX RATIO 2 COLOR CHANGE SEQUENCE 3 SYSTEM ALARMS 4 FLOW METER VALUES 5 FLOW CONTROL Select a menu item and press enter 1 The Recipe Report will list the setup information for the recipe selected for setup in the screen above this would be recipe 1 The printer will print a report that is similar to the report below Recipe Report GRACO PMIX II 3K RECIPE REPORT Station 1 0 00 00 00 00 Recipe ...

Страница 86: ...ource booth control Flow Control hand gun Flow Rate Setpoint Source user interface Setpoint Scaling 20ma 1000 cc min Integrator Volume 50 cc Integrated Color Change on Auto Print on Color Change off System Setup Report continued Integrated Color Change Sequence 1 Purge Duration 10 0 sec Mix Duration 10 0 sec First Purge Valve A First Purge Dispense Time 3 0 sec Purge A Dispense Time 2 0 sec Purge ...

Страница 87: ...Component Solvent Duration 0 0 sec Gun Trigger Times sec Gun Trig Start Duration Special Trigger Times sec Spec Trig Start Duration Integrated Color Change Sequence 4 Purge Duration 20 0 sec Mix Duration 20 0 sec First Purge Valve A First Purge Dispense Time 3 0 sec Purge A Dispense Time 2 0 sec Purge B Dispense Time 2 0 sec Purge C Dispense Time 2 0 sec Last Purge Valve B Last Purge Dispense Time...

Страница 88: ...Job Total Solvent 000000000 0 cc Job totals were reset End Job Totals Report Batch Totals Report To print the Batch Totals Report with the User Inter face you must be at the Batch Totals screen refer to page 7 3 then press the print key Batch Totals Screen TOTALIZERS 3 Recipe 1 Station 1 BATCH TOTALS COMP A B C 0002 6 liter COMPONENT A 0000 9 liter COMPONENT B 0000 8 liter COMPONENT C 0000 9 liter...

Страница 89: ...ort To print the Alarm Report with the User Interface you must be at the Alarm History screen refer to page 6 6 then press the print key Alarm History Screen RUN MONITOR Recipe 1 Station 1 00 00 00 00 00 ALARM HISTORY Description Value Time Date 1 A DOSE TIME 23 33 02 22 2 RATIO HIGH CB 00102 04 24 02 22 3 RATIO HIGH 00 97 04 24 02 22 4 C OVERDOSE 01449 03 28 02 22 5 A OVERDOSE 036 7 03 26 02 22 6...

Страница 90: ...Operation 4 24 ...

Страница 91: ...Screen Map 5 1 Screen Map 5 ...

Страница 92: ...5 2 Screen Map ...

Страница 93: ...1 Select 9 4 S102 Menu 9 5 S1 Ratio 9 6 S2 Sequence 9 7 S3 Alarms 9 9 S4 Calibrate 9 11 S5 Flow Control 9 16 1 2 3 4 5 S401 A 9 12 S402 B 9 13 S404 Solvent 9 14 S405 Mixed 9 14 1 2 3 4 1 2 3 4 5 6 7 8 9 10 11 12 13 14 15 16 17 18 4 System Configuration 19 ICC102 Graph 8 23 ICC101 Se quence 8 22 ICC5 B Solvent 8 25 Integrated Color Change ICC11 Special 8 28 ICC10 Special 8 28 ICC12 Special 8 28 ICC...

Страница 94: ...5 4 Screen Map ...

Страница 95: ...Run Monitor 6 1 Run Monitor 6 ...

Страница 96: ...Run Monitor 6 2 ...

Страница 97: ... of the system The readings will be displayed in either cubic centimeters cc liters l ounces oz and or gallons gal depending on how the system has been config ured RM1 Target Actual RUN MONITOR 00 00 00 MIX RATIO A B C B COMPONENT VOLUMES JOB TOTALS Recipe 1 Desired AB 0 00 1 CB 0 00 1 Target A 0 0 B 0 0 C 0 0 COMPONENT A COMPONENT B COMPONENT C SOLVENT Station 1 00 00 Actual 0 00 1 0 00 1 Actual ...

Страница 98: ...cipe 1 Station 1 00 00 00 00 00 Gun 1 Potlife Time Remaining 000 min Timer System Idle Time Remaining 00 min Potlife Time Remaining Potlife time remaining displays the time remaining before a potlife alarm will occur The timer does not start until the controller detects mixed material is in the lines System Idle Time Remaining System Idle Time uses a 4 minute clock that counts down the time that t...

Страница 99: ...ed by the operator if the user interface was set as the source of flow control data during system configuration See page 8 18 If this option is not available Press Enter for a new Setpoint will not appear at the bottom of the screen RM4B Enter New Setpoint RUN MONITOR Recipe 1 Station 1 00 00 00 00 00 Enter new Setpoint for Gun 1 0000 cc min Type the new setpoint for the gun then The Enter New Set...

Страница 100: ...SE 05552 03 26 02 22 7 C OVERDOSE 02630 03 23 02 22 8 EXTERNAL 03 22 02 22 9 A OVERDOSE 037 3 03 22 02 22 10 C OVERDOSE 09917 03 22 02 22 The alarm history screen displays the last 10 alarms that have occurred See the alarm descriptions on page 10 7 The most recent alarm will appear at the top of the screen This screen does not ever completely clear There is a maximum of 10 alarm lines that can di...

Страница 101: ...ade here B comp The B side color valve number chosen for the new color Entering 0 will allow the color to be selected from the B comp associated with the recipe selected Entering 1 3 will cause the color selection to override the recipe color parameter and load the specific selection made here C comp The C side color valve number chosen for the new color Entering 0 will allow the color to be selec...

Страница 102: ...Queue Display RM7A Press to go to the next screen This screen is used to make modifications to the existing queue Zero is not a valid entry for A comp B comp C comp or Sequence If zero is entered for any of these parameters color change will not occur If zero is selected for the recipe a purge down will occur The system will flush out the old color and will not load a new color Valid number entrie...

Страница 103: ...Totalizers 7 1 Totalizers 7 ...

Страница 104: ...Totalizers 7 2 ...

Страница 105: ... you to monitor the amount of fluid that has gone through the individual meters in the system for a particular recipe The readings will be displayed in either cubic centime ters cc liters l ounces oz and or gallons gal depending on how the system has been configured and which screen is being viewed T1 Select Recipe and Totalizer Screen TOTALIZERS 1 Recipe 1 Station 1 RECIPE SELECT Enter New Recipe...

Страница 106: ...ll the fluid that passes through the solvent flow meter To use the solvent totalizer you must have a flow meter on the PrecisionMix solvent inlet T3 Batch Totals TOTALIZERS 3 Recipe 1 Station 1 BATCH TOTALS COMP A B C 00000 0 liter COMPONENT A 00000 0 liter COMPONENT B 00000 0 liter COMPONENT C 00000 0 liter A B C DUMP 00000 0 liter SOLVENT 00000 0 liter Press X key to clear totals Press Print key...

Страница 107: ...NT B 000000 liter COMPONENT C 000000 liter A B C DUMP 000000 liter SOLVENT 000000 liter Press Print key to print Press to print the grand totals The Grand Totalizers are not resettable They keep a running total in liters or gallons of the fluid dispensed Solvent See the Solvent information on previous page A B C Dump See the A B C Dump information on previous page ...

Страница 108: ...Totalizers 7 6 ...

Страница 109: ...System Configuration 8 1 System Configuration 8 ...

Страница 110: ...System Configuration 8 2 ...

Страница 111: ... up the Password Screen if a password is required or the System Configuration Menu screen if no password is required The System Configuration screens allow you to setup the controller to operate according to your system requirements Password Screen TYPE IN THE PASSWORD AND PRESS ENTER xxxx Type the password then This is the PASSWORD screen where you enter the password to access the RECIPE SETUP an...

Страница 112: ...ring configuration are globally applied to all recipes When an entry is accepted by the system the value will be highlighted For initial setup start with menu item 1 LAN GUAGE and go through all the System Configura tion screens providing the necessary information to configure the control Text that appears in grey on the screens in these instructions indicate lines that may or may not appear on yo...

Страница 113: ... power Power down the PrecisionMix II and restart The new language will be displayed C2 Station Number SYSTEM CONFIGURATION Station 0 STATION NUMBER Enter Station number 1 32 1 Note The system must be powered down and powered back up again for the new station number to take effect Type the station number for the controller then Next screen The Station Number screen is used to set an identifica tio...

Страница 114: ...rface 2 Network 3 I O 4 Remote Operator Station Enter a Recipe Source 1 4 4 Type the number of recipes to use then Type the number for the desired recipe source then Next screen Recipes to Use The number entered for the Recipes to use sets the total number of recipes that are available for configura tion If a user selects a recipe number larger than the total recipe number entered here an Invalid ...

Страница 115: ...before the auto matic dump is activated To clear the alarm turn the operator control to purge then spray enough material to clear the alarm You must spray a larger volume of material than the Potlife Timer Reset volume set in Recipe Setup Refer to page 9 9 C6 Flow Rate Limits SYSTEM CONFIGURATION Station 1 FLOW RATE LIMITS ALARM Select Flow Rate Alarms to 1 Off 2 Flow Limit Stops System 3 Flow Lim...

Страница 116: ...rge Valves 1 1 Purge Valve 2 2 Purge Valves 3 3 Purge Valves 3 Select the Purge Method 1 Purge Based on Time 2 Purge Based on Volume PRESS NEXT FOR MORE PURGE PARAMETERS Type the number for the total number of purge valves in your systems then Type the number for the desired purge method as applicable for your system then Next screen Set the total number of purge valves and the purge method Total ...

Страница 117: ...as choices C8C Purge Sequence Purge Alarms SYSTEM CONFIGURATION Station 1 PURGEĄSEQUENCE PURGE ALARMS Enter the Minimum Purge Volume 0000 cc Enter the Maximum Purge Time 000 0 sec NOTE The above parameters are used with the solvent meter for purge related alarms PRESS PREV FOR MORE PURGE PARAMETERS Type the number for the minimum purge vol ume then Type the number for maximum purge time then Press...

Страница 118: ...n Flush Boxes Off 2 Gun Flush Boxes On _ Select Locations for Guns Being Used 1 Gun 1 2 Gun 2 3 Gun 1 and Gun 2 4 Guns selected from I O 5 Guns selected automatically Type the number for the gun locations then Type the number to turn the gun flush boxes on or off then Next screen Select the gun s according to the guns being used with flow control potlife timers and flow alarms The default selectio...

Страница 119: ...TION Station 1 FLOW CONTROL OPTIONS Select Flow Control Options 1 Off 2 Hand Gun Operation 3 Automatic Gun Operation 2 Press Enter to Accept Data and Edit the Flow Control Options Type the number for the desired flow control option then Flow control is used to assure that the same amount of fluid consistently sprays out of the gun at all times for a better finish The flow control is set according ...

Страница 120: ...Color Change Sequences Type the number for the desired integrated color change mode then Read the text at right Select whether to operate with no color change with integrated color change or with integrated color change with queue If No Color Change is selected color changes must be done manually and no further color change setup is required Press the next screen key to go to the next configuratio...

Страница 121: ...day 00 Enter hour 00 Enter minutes 00 Enter seconds 00 Select Day Month Year display format 1 MM DD YY 2 DD MM YY 1 Type the time and date information Press after each entry Type the number for the desired date display format Next screen Use this screen to set time and date information A date display format of month day year MM DD YY or day month year DD MM YY is available ...

Страница 122: ...r Inter face battery is running low If the battery is low replace it immediately Batteries should be replaced every one to two years as part of rou tine maintenance See page 11 3 C18 Print Setup SYSTEM CONFIGURATION Station 1 PRINT SETUP Select the reporting type 1 Network Printer Disabled 2 Printer Enabled 2 Select whether or not a Color Change will automatically generate a run report 1 No 2 Yes ...

Страница 123: ...time delay past 10 seconds if necessary and use the smallest increase possible Most applications will select 1 Air Spray which uses the standard air flow switch or a gun trigger signal from a robot Selection 2 Airless Spray does not use the air flow switch so there is no signal that the gun is trig gered An inline switch must be installed in the fluid line to provide a signal when there is fluid f...

Страница 124: ...word then This password screen only appears if the password is changed from the factory default of 0 zero Menu Screen CMENU SYSTEM CONFIGURATION Station 1 MENU 1 LANGUAGE 11 MIX PURGE 2 STATION NUMBER 12 FLOW CONTROL 3 DISPLAY UNITS 4 RECIPES 5 POTLIFE TIMER 6 FLOW RATE LIMITS 7 SOLVENT METER 8 PURGE SEQUENCE 9 MIXED LOAD VOL 10 GUNS SETUP 13 INTEGRATOR VOLUME 14 COLOR CHANGE 15 PASSWORD CHANGE 16...

Страница 125: ...m Flow control cannot be used without the proper hardware Refer to the Installation section If flow control is installed select 2 or 3 depend ing on whether you are using a hand gun or an automatic gun Flow Control Menu FCMenu SYSTEM CONFIGURATION Station 1 FLOW CONTROL MENU Select Flow Control Options to Edit 1 Source of Flow Control Data 2 Analog Input Scaling Range 3 Force Analog Output 4 Delay...

Страница 126: ... network computer as the source of input Selecting 3 will set an analog signal as the source of input Loop Reset Signal Selecting 1 will set the Flow Control Remote Station as the source of a flow control reset signal Selecting 2 will set digital input as the source of a flow control reset signal FC2 Flow Control Scaling SYSTEM CONFIGURATION Station 1 FLOW CONTROL SCALING Enter Maximum Flow Rate S...

Страница 127: ...screen can be used for troubleshooting It enables you to manipulate the mA output to force the regulator open or closed The Force Output option is disabled turned to OFF when the screen is left FC4 Flow Control Delay Time SYSTEM CONFIGURATION Station 1 FLOW CONTROL DELAY TIME Enter the Delay Time to Start the Flow Control Loop Gun 1 1 0 Sec Type in the delay time for the gun s Press after each ent...

Страница 128: ...ION Select the Flow Meter Location 1 Use Component A B and C Flow Meters 2 Use Meter in Mixed Material Stream 1 Select the flow meter location then Next screen Select 1 if the component A B and C flow meters are being used to monitor fluid flow Selecting 2 if a fluid meter is installed in the mixed material line to monitor fluid flow Refer to page 2 13 ...

Страница 129: ...HE PASSWORD AND PRESS ENTER 0000 If requested type the password then Menu Screen CMENU SYSTEM CONFIGURATION Station 1 MENU 1 LANGUAGE 2 STATION NUMBER 3 DISPLAY UNITS 11 MIX PURGE 12 FLOW CONTROL 13 INTEGRATOR VOLUME 4 RECIPES 14 COLOR CHANGE 5 POTLIFE TIMER 6 FLOW RATE LIMITS 7 SOLVENT METER 8 PURGE SEQUENCE 9 MIXED LOAD VOL 10 GUNS SETUP 15 PASSWORD CHANGE 16 TIME AND DATE 17 DISPLAY SETUP 18 PR...

Страница 130: ...nce between the two modes is that the Queue parameters which are setup in the RUN MON ITOR mode override the normal color change parame ters during the color change ICC101 Color Change Sequence SYSTEM CONFIGURATION Station 1 INTEG COLOR CHANGE Enter Color Change Sequence 1 NOTE Sequence 0 zero is used for the end of day purge only Recipe 0 only Type the number 0 4 desired to define the Color Chang...

Страница 131: ...sec Enter Purge duration time 20 0 sec Enter Mix duration time 20 0 sec First Purge Valve is Valve A Enter First Purge time 3 0 sec Enter A Purge time 2 0 sec Enter B Purge time 2 0 sec Enter C Purge time 0 0 sec Last Purge Valve is Valve B Enter Last Purge time 3 0 sec TotalĄSequenceĄtimeĄisĄ 42 0 sec Type the number of seconds volume to run the selected function Press after each entry Press to r...

Страница 132: ...ials to be dumped from the system before entering the mix manifold The A Component Dump time must not be greater than the total purge time If a larger number is entered the valve will close auto matically when the purge duration time is fin ished ICC3 A Component Solvent Timer Value SYSTEM CONFIGURATION Station 1 INTEG COLOR CHANGE Color Chng Seq 3 A Component Solvent Timer Value Total Sequence ti...

Страница 133: ...ime If a larger number is entered the valve will close auto matically when the purge duration time is fin ished ICC5 B Component Solvent Timer Value SYSTEM CONFIGURATION Station 1 INTEG COLOR CHANGE Color Chng Seq 3 B Component Solvent Timer Value Total Sequence time is 42 0 Sec EnterĄBĄComponentĄSolventĄdurationĄtime 0 0 Sec Duration time must not be larger than the total Sequence time Type the n...

Страница 134: ...ime If a larger number is entered the valve will close auto matically when the purge duration time is fin ished ICC7 C Component Solvent Timer Value SYSTEM CONFIGURATION Station 1 INTEG COLOR CHANGE Color Chng Seq 3 C Component Solvent Timer Value Total Sequence time is 42 0 Sec EnterĄCĄComponentĄSolventĄdurationĄtime 0 0 Sec Duration time must not be larger than the total Sequence time Type the n...

Страница 135: ...ed or go to the next screen Gun Triggers 1 2 The gun triggers are electrical outputs that can be configured to turn on and off up to two times These outputs are typically wired to the gun triggers on the Gun Flush Boxes or the operator s gun control ICC9 Gun 2 Trigger Start Duration Times SYSTEM CONFIGURATION Station 1 INTEG COLOR CHANGE Color Chng Seq 3 GUN 2 TRIGGER START DURATION TIMES Start Du...

Страница 136: ...Use the keys to move up or down the data fields Use the keys to toggle through the available characters for the special outputs descriptions Press to return to the Color Change Sequence Graph screen to view your input if desired or go to the next screen Special Triggers 1 2 5 and 6 The special triggers are optional outputs that the user can configure for their particular application Each of the fo...

Страница 137: ...te a purge cycle or a color change to recipe 0 The second gun may be added at any time during operation Integrated vs Non Integrated Color Changes The integrated color change feature simplifies the amount of robot programming needed to perform a color change The reason for this is that the color change is performed automatically The timing issues related to this automatic color change are handled ...

Страница 138: ...System Configuration 8 30 PrecisionMix II 3K Robotic Interface Integrated Color Change TI0494 Fig 8 1 ...

Страница 139: ...tegrated Color Change TI0494 Fig 8 2 Note When purging through the I O there is a 2 second delay after the purge signal goes high before the purge actually begins this delay allows time for resetting alarms or for relieving pressure in the system before the purge begins ...

Страница 140: ...ge input indicates that a manual color change is taking place When this input is high all totals are accumulated under the A B C Dump category Setting the color change input high also prevents getting Overdose Alarms during the dump of the A or B or C com ponent The Color Change input will trigger an integrated color change if it is kept high for more than 0 2 seconds The color change will only oc...

Страница 141: ...6091 Flow Control Override Maximum Analog The Flow Control Maximum Analog Override input is used when the system is being filled This input will cause the flow control fluid regulator to open so the system can be quickly filled This input is not needed if the mixed load volume fill feature is used The Flow Control Maximum Analog Over ride input does not need to be used during an Integrated Color C...

Страница 142: ...System Configuration 8 34 ...

Страница 143: ...Recipe Setup 9 1 Recipe Setup 9 ...

Страница 144: ...Recipe Setup 9 2 ...

Страница 145: ...ess key 3 then RECIPE SETUP 3 screens allow you to setup recipes ratio programs for a variety of fluids Password Screen TYPE IN THE PASSWORD AND PRESS ENTER 0000 Type the password then This password screen only appears if the password is changed from the factory default of 0 zero After the password is entered the system remains unlocked for 5 minutes allowing the user to navi gate all screens with...

Страница 146: ...mber of recipes available are set during system configuration Refer to page 8 6 Recipe 0 is the global recipe Any changes made to recipe 0 will be copied to all the recipes If Recipe 0 is entered the following warning screen will appear SETUP Recipe 0 Station 1 RECIPE SELECTION You have selected Recipe Zero Any changes made to a recipe parameter will change that particular parameter in all recipes...

Страница 147: ...URGE SEQUENCE 3 SYSTEM ALARMS 4 FLOW METER VALUES Select a menu item and press enter 1 Type the number for the desired menu item then Recipes allow you to store ratio programs for various materials or job requirements After setup the recipes are selected for use on an outside source such as the User Interface The source was determined during system configuration Refer to page 8 6 If integrated col...

Страница 148: ...rt the ratio Example If a 3 2 ratio is desired you would convert the ratio to 1 5 1 A setting of 0 0 1 represents a one component dispense The component A valve will remain open The Component B valve will not open Tolerance Select the tolerance of the ratio entered above If this tolerance is exceeded the PrecisionMix Controller will generate a ratio alarm and the system will shut down The value ca...

Страница 149: ...Fill Sequence Number 1 4 The flush fill sequences were set up during system configuration Refer to the Integrated Color Change Sequence screen on page 8 22 A Color Valve 1 10 Select the color valve to open for the Component A material desired B Color Valve 1 3 Select the color valve to open for the Component B material desired C Color Valve 1 3 Select the color valve to open for the Component C ma...

Страница 150: ...lves appear for setup depends on the number of valves selected during system configura tion Refer to the Purge Sequence screen on page 8 8 The purge sequence activates the purge valves cho sen usually one for Component A one for Component B and one for Component C alternating on and off according to the time set here The value you enter for A PURGE time determines how long the Component A purge va...

Страница 151: ...eset either by a purge or by the passage of a specified amount of fluid The guns that appear for potlife time limit and timer reset depends on the guns selected during system configuration Refer to page 8 10 Gun Potlife Timer Reset Sets the volume of fluid that needs to be dispensed before the pot life timer resets Enter a value that represents the volume of mixed fluid that is in the integrator h...

Страница 152: ...e alarm output 3 of module 2 will be on S3 System Alarms with Flow Control Off SETUP Recipe 1 Station 1 SYSTEM ALARMS Enter Gun 1 Potlife Time Limit 000 minutes Enter Gun 1 Potlife Timer Reset 0000 cc Enter Gun 2 Potlife Time Limit 000 minutes Enter Gun 2 Potlife Timer Reset 0000 cc Enter Minimum Flow Rate Limit 0000 cc min Enter Maximum Flow Rate Limit 0000 cc min Type the desired number entry fo...

Страница 153: ... CALIBRATION 7 OPTION NOT AVAILABLE Select a menu item and press enter 1 Type the desired calibration option number then to start the calibration routine The Meter Calibration Tests screen is used to select which flow meter to calibrate individually or to do a mixed material calibration Selection 4 Solvent Flow Meter Calibration will only appear if a solvent meter was selected during system config...

Страница 154: ...l system operating flow rates Selection 1 2 3 and 4 Selection 1 shown at left Selections 2 6 on the following pages The existing Flow Meter K factor will appear in the first field A new K factor can be entered in this field The flow meter size must be entered in cubic centime ters per electrical pulse The number you enter must be a 3 digit decimal The meters can be calibrated by dispensing materia...

Страница 155: ...lume is 0 cc Enter new Calibration Volume 0 cc OPERATOR SWITCH MUST BE IN STANDBY Selection 2 See the description on page 9 12 S403 Component C Flow Meter Calibration SETUP Recipe 1 Station 1 COMPONENT C FLOW METER CALIBRATION Enter Component C Meter K Factor 0 123 cc pulse Press Enter to begin calibration STOP Calibration Volume is 0 cc Enter new Calibration Volume 0 cc OPERATOR SWITCH MUST BE IN...

Страница 156: ...bration STOP Target Actual New A Volume cc 0 0 0 B Volume cc 0 0 0 C Volume cc 0 0 0 OPERATOR SWITCH MUST BE IN STANDBY Selection 5 This screen is used to do a mixed material calibration which can be the most accurate method of calibrating the component A B and C meters The meter K factors are entered in the screens for Component A B and C Flow Meter Calibration refer to pages 9 12 and 9 13 The fl...

Страница 157: ...bration SETUP Recipe 1 Station 1 GUN 1 METER CALIBRATION Enter Gun 1 Meter K Factor 0 119 cc pulse Press Enter to begin calibration STOP Calibration Volume is 0 cc Enter new Calibration Volume 0 cc OPERATOR SWITCH MUST BE IN MIX Selection 6 See the description on page 9 12 ...

Страница 158: ...ctor setting affects the rate at which the system will adjust to a change in flow rate Start with a setting of 500 and adjust as needed See page 9 17 for graphic examples of three different settings Flow Setpoint The flow setpoint should be set according to the recipe requirements The setpoint for the recipe is loaded when a recipe change is made The flow rate setpoint can be overridden by the ope...

Страница 159: ...your setpoint quickly without jumping too far above or below the new setpoint Gain 1 Slower setpoint transition but less overshooting of the new setpoint 0 200 400 600 Time Flow Rate cc min Gain 1000 Faster setpoint transition but greater overshooting of the new setpoint 0 200 400 600 Time Flow Rate cc min Gain 500 Fast setpoint transition with less overshooting of the new setpoint 0 200 400 600 T...

Страница 160: ...ves must be closed if you choose to do a calibration test Selecting enter on the calibration menus will auto matically open the dispense valve for the meter being tested 2 Enter selection 1 2 3 or 4 for the flow meter you want to calibrate SETUP Recipe 1 Station 1 METER CALIBRATION TESTS 1 COMPONENT A FLOW METER CALIBRATION 2 COMPONENT B FLOW METER CALIBRATION 3 COMPONENT C FLOW METER CALIBRATION ...

Страница 161: ...ontainer is different type in the amount actually dispensed in the new Calibration Volume field and press Enter NOTE New values can be typed in or the toggle keys can be used to increase or decrease values 13 The new Meter KĆFactor will appear in the top field on the screen SETUP Recipe 1 Station 1 COMPONENT A FLOW METER CALIBRATION Enter Component A Meter K Factor 0 124 cc pulse Press Enter to be...

Страница 162: ...ALIBRATION 5 MIXED MATERIAL CALIBRATION 6 GUN 1 METER CALIBRATION 7 OPTION NOT AVAILABLE Select a menu item and press enter 5 3 Move the cursor to STOP and press Enter to begin calibration SETUP Recipe 1 Station 1 MIXED MATERIAL METER 1 CALIBRATION Enter Gun 1 Meter K Factor 0 124 cc pulse Press Enter to begin calibration STOP Calibration Volume is 0 cc Enter new Calibration Volume 0 cc OPERATOR S...

Страница 163: ...ETER CALIBRATION 5 MIXED MATERIAL CALIBRATION 6 GUN 1 METER CALIBRATION 7 OPTION NOT AVAILABLE Select a menu item and press enter 3 1 Make sure the operator switch is set at Standby CAUTION The Component A B and C fluid shut off valves must be closed if you choose to do a calibration test Selecting enter on the calibration menus will auto matically open the dispense valve for the meter being teste...

Страница 164: ... after the sample is dispensed To abort calibration you can select STOP 9 The screen will display the volume of fluid the PrecisionMix II 3K determined was dispensed in the Calibration Volume fields for A B and C Flow Meters based on the previously entered calibration factor 10 If the actual volumes dispensed into the containers are different type in the amount actually dis pensed in the new Calib...

Страница 165: ...10 1 Troubleshooting Troubleshooting 10 ...

Страница 166: ...10 2 Troubleshooting ...

Страница 167: ... This screen displays the revision numbers for all electronic devices connected to the PrecisionMix II system For any device that is not connected or has a fault the revision will be 0 00 The ModBus Receive Command value will increment every time the Preci sionMix II system communicates with the computer that has the Graco s Advance Material Reporting software running 1 Press the HOME key on the U...

Страница 168: ...nent A Dump 3 Color 1 4 Color 2 5 Color 3 6 Color 4 7 Special 1 8 Special 2 Rack 1 Solenoid Bank 2 LED No Function 9 ComponentC Solvent 10 Component C Dump 11 Color 5 12 Color 6 13 Color 7 14 Color 8 15 Color 9 16 Color 10 Rack 2 Solenoid Bank 1 LED No Function 1 Reducer 1 2 Reducer 2 3 Component B Solvent 4 Component B Dump 5 Catalyst 1 6 Catalyst 2 7 Catalyst 3 8 Reducer 3 ...

Страница 169: ...rigger Air Flow Switch 5061 3 External Alarm 5071 4 Abort Reset 5081 5 Color Change 5091 6 Print Report 5101 7 Purge Load Interlock 1 5111 8 Purge Load Interlock 2 5121 Module 1 Outputs LED No Function Terminal Block No 1 Solvent A Valve 5171 2 Solvent B Valve 5181 3 Solvent C Valve 5191 4 Purge Mix Load 5201 5 Gun 1 Trigger On Auto dump 5211 6 Gun 2 Trigger On Auto dump 5221 7 Special 5 5231 8 Sp...

Страница 170: ...Time B Dose Time C Dose Time 6171 2 Flow Control Off Low Flow Flow Control On Gun 1 High Flow Gun 1 Low Flow 6181 3 Flow Control Off High Flow Flow Control On Not Used 6191 4 Potlife 1 6201 5 Potlife 2 6211 6 Purge Load Interlock I O Alarm Invalid Recipe 6221 7 Purge Time Out Purge Not Completed 6231 8 All System Alarms This includes all alarms included for outputs 1 7 plus Memory Failure Control ...

Страница 171: ...following pages In addition the alarm light on the Operator Station turns on and a relevant message is displayed on the User Interface alarm screen Output number 8 on module 2 will be high when any of the alarms occur See page 10 5 for the location of the Con troller modules inputs and outputs To Clear the Alarm and Restart the System All alarms except the Pot Life Alarm can be cleared by moving t...

Страница 172: ...e alarm occurred after you have been spraying for some time the pressures from the fluid supplies could be unbalanced 1 Check the catalyst and resin pressures for A B ratio alarm and catalyst and reducer pressures for C B alarm 2 If the pressures are not about equal adjust both fluid supply pressures with the fluid regulators until the pressures are about the same 3 If the pressures are already ab...

Страница 173: ... A B or C valve to remain open for the duration of the dose time The alarm will alert the user if the dose time is exceeded Checking for a Meter or Cable Failure Manually open the catalyst resin or reducer dispense valve and trigger the gun into a grounded waste con tainer The counts should increase in the first Run screen on the User Interface NOTE This test will probably cause an Overdose alarm ...

Страница 174: ... on Output 3 of Module 2 The PrecisionMix II 3K is dispensing a higher fluid flow rate than pre selected in the Recipe Setup screens Flow Rate Alarms for a System with Flow Control Gun 1 High Low Flow High Low flow alarm output will be on Output 2 of Module 2 Gun 2 High Low Flow High Low flow alarm output will be on Output 3 of Module 2 The Gun 1 and Gun 2 alarms will occur when the fluid flow rat...

Страница 175: ...ses of an Invalid Recipe Alarm The recipe number is greater than the number of recipes configured to run on the system Recipe 0 was selected for mixing The flow meter K factors are set to zero Values for the desired ratio K factors and pot life timers have not been input for the recipe I O Change Alarm output will be on Output 6 of Module 2 When this alarm occurs the recipe number has been changed...

Страница 176: ...e or a poor connection at the back of the User Interface If a communications error occurs check for loose wires or a loose cable If that does not correct the problem turn the power to the system off and than back on again to re initialize communications Invalid Guns From Input Output Alarm The selection of spray guns that idle on active gun prior to purge activate alarm Guns can be added at any ti...

Страница 177: ...otals will start over at zero Batch Total Rollover The Batch Total Rollover warning indicates that the batch totals have been reset to zero which will occur when the totals exceed 99 999 9 liters 26 420 1 gallons The batch totals will start over at zero Grand Total Rollover The Grand Total Rollover warning indicates that the grand totals have been reset to zero which will occur when the totals exc...

Страница 178: ...yst B Resin A Reducer C Solvent A Purge Solvent C Purge Solvent B Purge TI0164 K Fig 10 3 PROBLEM CHECK CAUSE SOLUTION Catalyst Resin Reducer and or Solvent Purge Valve s are not turning on or off correctly Visually inspect air and electrical lines for kinks abrasions severed lines or loose connections The corresponding solenoid LED should come on when the solenoid is actuated refer to Fig 10 3 Ai...

Страница 179: ...hat air pressure to solenoids does not exceed 100 psi 0 7 MPa 7 bar Solenoid is clogged be sure to filter the air supply with a 10 micron filter Solenoid is damaged replace it Solenoid Box FLUID MANIFOLD RESIN FLOWMETER REDUCER FLOWMETER CATALYST SUPPLY SPRAY DEVICE INTEGRATOR RESIN CATALYST AIR VALVE SOLVENT VALVE SOLVENT SUPPLY AIR IN AIR FLOW SWITCH 1 3 4 CATALYST SOLVENT PURGE AIR PURGE RESIN ...

Страница 180: ...ing Gun Flush Box Troubleshooting Fig 10 5 SPRAY DEVICE AA OUT AIR HOSE GFB S GFB P GFB A S P A C DOOR GUN GUN FLUSH BOX MIXED MATERIAL HOSE GUN FLUSH CONTROL BOX AIR INLET AIR INLET AFS Gun Flush Box Pneumatic Schematic ...

Страница 181: ...ROBLEM CAUSE SOLUTION Nothing displayed Power is OFF Turn ON power to the PrecisionMix II 3K Faulty cable Check or replace cable Circuit board failure Replace circuit board EZ Interface 321 module failure Replace module with Part No 114783 Faulty cable Check or replace cable ...

Страница 182: ...10 18 Troubleshooting ...

Страница 183: ...11 1 Service Service 11 ...

Страница 184: ...11 2 Service ...

Страница 185: ...contents allowed to come in contact with skin Dispose of the old battery according to your local waste regulations 1 Leave the power on to the system to avoid losing the User Interface setup memory 2 Disconnect the power A and communications B connectors from the back of the User Interface See Fig 11 1 3 Remove the four screws C from the back cover of the User Interface 4 Remove the back cover car...

Страница 186: ...connecting the cables to avoid damaging the system 3 To have access to the battery door disconnect the cables from the Controller communications ports CAN H and RS232 J See Fig 11 2 4 Turn the power back on WARNING ELECTRIC SHOCK HAZARD Only qualified electricians should per form this procedure To avoid losing the Controller memory the power must be on while the battery is changed Do not touch the...

Страница 187: ...Install a new fuse part no 115429 and re install the barrier cover F TI0176 Fig 11 3 D E Fig 11 4 F Replacing the User Interface 1 Turn the PrecisionMix II 3K power switch D to off See Fig 11 3 2 Disconnect the power A and communications B connectors from the back of the User Interface See Fig 11 5 3 Remove the 8 screws G and remove the User Interface 4 Install the new User Interface and secure it...

Страница 188: ...n the terminals J 1 F C Changing the Power Supply Voltage To change the power supply voltage from 100 120 Vac to 200 240 Vac or the reverse follow this procedure 1 Turn the PrecisionMix II 3K power switch D to off See Fig 11 3 2 Turn off the main power to the PrecisionMix II 3K controller 3 Open the controller door 4 Loosen the terminal screws and remove the jumper J See Fig 11 6 5 Rotate the jump...

Страница 189: ...or if servicing an operator station with color change 4 Remove the 4 screws C from the circuit board 5 Remove the circuit board D 6 If servicing an operator station with color change make sure the P1 slot of the new circuit board aligns with the membrane switch Secure the new circuit board to the cover with the 4 screws C 7 Connect the cable to the P2 circuit board connec tor Connect the membrane ...

Страница 190: ...ip the mounting plate down to unscrew the end plate H that is nearest the module being replaced 6 Latch the mounting plate back in place in the controller 7 Remove the screws K from the modules J between the removed end plate and the module being replaced 8 Slide the module s away from the module being replaced to unplug that module from the others 9 Remove the module Install the new module and pu...

Страница 191: ...nput output submodules 8 Remove the screw M then remove the submo dule N 9 Disconnect the wire harness connector from the submodule 10 Connect the wire harness to the new submodule as shown in the figure for the submodule being replaced 11 Install the submodule back into its slot and secure it with the screw M Fig 11 10 shield and black orange blue white green red Digital Input Submodule 114782 TI...

Страница 192: ...11 10 Service ...

Страница 193: ...12 1 Parts Parts 12 ...

Страница 194: ...12 2 Parts ...

Страница 195: ...ng door 1 24 194988 WIRE grounding panel 1 31 114887 KEY not shown 1 Part No 243541 Controller with Remote User Interface Ref No Part No Description Qty 2 240834 CONTROLLER See page 12 4 for service parts 1 3 514030 CONNECTOR 1 4 104227 NUT lock conduit 1 5 108788 WASHER flat 4 6 105329 NUT hex 4 7 111750 WASHER plain 2 8 108050 WASHER lock spring 2 9 105468 SCREW cap hex head 2 10 114785 HINGE bo...

Страница 196: ...BARRIER intrinsic safety 1 128 114896 BARRIER intrinsic safety 1 Ref No Part No Description Qty 129 114892 INSERTION BRIDGE 2 position 3 130 115307 CONNECTOR plug 1 131 114894 FIXED BRIDGE BAR 5 132 114929 CONNECTOR plug 9 133 114899 CONNECTOR shorting bar 1 134 114900 CONNECTOR shorting bar 1 145 194332 WIRING HARNESS remote I O 1 146 194333 WIRING HARNESS booth control 1 151 194336 WIRE ground p...

Страница 197: ...s 8960A 109 110 111 155 156 157 158 112 112 118 117 125 114 112 113 112 118 117 126 112 132 145 146 116 131 122 112 131 112 134 133 112 115 124 129 123 124 123 129 122 120 130 Detail B Detail C 151 Detail A TI0240 161 ...

Страница 198: ... CABLE flow control 1 1 3 115127 CONNECTOR plug 5 08 mm 5 position not shown 1 2 4 115109 INTERFACE analog 1 1 5 115110 INPUT analog 1 1 6 115111 OUTPUT analog 1 1 7 194702 WIRE HARNESS analog 2 2 8 551576 TRANSDUCER 1 1 9 513652 CABLE 10 104165 FITTING tube 2 2 11 830352 REGULATOR fluid quick flush 1 1 12 597151 FITTING elbow not shown 1 1 13 590332 TUBING 1 4 OD 14 239716 METER GRACO G 3000 none...

Страница 199: ...12 7 Parts Parts Flow Control TI0169 9003A 1a 1b 1c 1d 1e 1f 1g 1n 1g 1h 1j 1k 1m 11 8 9 1 see above Air out Air in 14 2 15 13 16 7 7 6 5 4 Operator Stations Controller 9 15 TI0167 ...

Страница 200: ...sktop 12 VDC not shown 1 6 514001 CORD power 1 Keep these spare parts on hand to reduce down time 1 2 3 Part No 241378 Local Printer Accessory Kit Ref No Part No Description Qty 1 114780 MODULE interface RS232 1 2 193738 WIRE HARNESS local printer 1 Keep these spare parts on hand to reduce down time 8992A 1 2 Software Utilities Kit Part No 241841 Utilities Installation Kit Ref No Part No Descripti...

Страница 201: ...ption Qty 1 243493 FLUID PANEL MODULE See page 12 10 for service parts 1 2 SOLENOID MODULE IS See page 12 12 for parts 1 3 570122 AIR SUPPLY STATION See page 12 16 for parts 1 4 111985 BARRIER IS for barrier slots 1 2 and 7 4 5 514895 BARRIER IS for barrier slots 3 4 5 and 6 6 6 065343 CABLE 25 pair individually shielded 24 AWG 7 061134 HOSE nylon 200 psi 1 4 MPa 14 bar maximum working pressure no...

Страница 202: ...0 114121 ADAPTER male 1 121 110966 O RING 1 122 190050 TUBE integrator 1 123 111260 SCREW set 1 124 111053 HOUSING integrator 1 125 192591 MIXER static 1 Ref No Part No Description Qty 126 192590 BRACKET static mixer 1 127 513817 BULKHEAD 3 8 tube x 1 4 npt f 1 128 196087 TUBE second stage 1 129 115819 ADAPTER tube 1 4 npt f x 3 8 OD tube sst 1 130 196088 TUBE first stage 1 131 115820 TEE 1 4 npt ...

Страница 203: ...175 TI0168 101 137 102 128 143 103 139 140 141 142 104 146 147 148 107 145 144 105 106 107 108 130 105 106 107 129 131 TI0226 125 127 109 124 111 117 126 See Detail at Left 109 118 120 119 114 113 112 123 122 115 113 112 112 113 114 ...

Страница 204: ...olenoid non intrinsically safe P N 552186 only 6 Ref No Part No Description Qty 103 114230 MANIFOLD solenoid 1 104 112698 ELBOW 1 8 npt m x 1 4 O D tube 1 105 114263 CONNECTOR 5 32 tube 12 110 114421 CONNECTOR strain relief 0 170 0 470 2 111 104227 NUT conduit 1 2 2 112 514768 FLOW SWITCH 1 cfm piston 1 4 port 1 113 114128 ELBOW swivel 1 114 115321 MUFFLER 2 Keep these spare parts on hand to reduc...

Страница 205: ...ABLE ASSEMBLY not shown 1 11 195283 SHIELD 1 Keep these spare parts on hand to reduce down time 1 2 3 4 5 6 7 8 9 9 11 TI0210 Part No 243513 Piston Meter Kit for solvent borne Components B and C 0 8 20 cps Ref No Part No Description Qty 1 115063 METER piston for solvent borne materials only see manual 309148 1 2 196071 BRACKET mounting 2 3 196086 TUBE fluid 1 4 551903 SCREW cap socket head 4 5 113...

Страница 206: ...9 SENSOR flow meter 1 3 626204 PLATE mounting 1 4 196086 TUBE fluid 1 5 551903 SCREW cap socket head 4 6 105468 SCREW 2 7 512351 ADAPTER pipe increase 2 8 501684 VALVE check 1 9 513697 FITTING adapter 3 8 tube x 1 4 1 10 513308 FITTING connector 1 11 949911 CABLE ASSEMBLY not shown 1 12 111750 WASHER 2 Keep these spare parts on hand to reduce down time 1 2 3 4 5 7 8 TI0213 9 6 12 10 ...

Страница 207: ...12 15 Parts Notes ...

Страница 208: ...cription Qty 101 551980 AIR REGULATOR ASSEMBLY 1 102 551974 WALL BRACKET 1 103 552137 CHECK VALVE 1 4 npt m 1 104 504235 CONNECTOR 1 4 OD tube x 1 4 npt f 1 Keep these spare parts on hand to reduce down time 7914A 101 Ref 102 103 104 101 101 Ref 3 8 npt Inlet 1 4 OD Tube 1 2 OD Tube Outlet ...

Страница 209: ... machine pan washer head M4 x 0 7 x 8 8 12 194480 HARNESS wire 3 switch 1 13 115033 CONNECTOR plug 5 08 mm 1 Ref No Part No Description Qty 15 194477 CABLE operator station 100 ft 30 5 m 1 15a 194478 CABLE operator station 200 ft 61 m optional 1 18 110874 WASHER 2 19 104029 GROUND STUD 1 21 115322 WASHER 4 22 243556 INTERFACE meter not shown not included with 240835 order separately 1 Keep these s...

Страница 210: ... 3 switch 1 13 115033 CONNECTOR plug 5 08 mm 1 Ref No Part No Description Qty 15 194477 CABLE operator station 100 ft 30 5 m not shown 1 15a 194478 CABLE operator station 200 ft 61 m optional 1 16 114620 MEMBRANE 1 18 110874 WASHER 2 19 104029 GROUND STUD 1 21 115322 WASHER 4 22 243555 INTERFACE meter not shown not included with 240877 order separately 1 Keep these spare parts on hand to reduce do...

Страница 211: ...115207 SCREW 3 1t 115208 SCREW 4 2 115150 CABLE power solenoid 50 ft 16 m 1 2a 115151 CABLE power solenoid 165 ft 50 m optional 1 3 115153 CABLE devicenet single ended 1 3a 115154 CABLE devicenet single ended 165 ft 50 m optional 1 Ref No Part No Description Qty 4 115155 CABLE devicenet exten sion 1 5 115156 CONNECTOR tee device net 1 6 115157 CONNECTOR terminating resistor 1 8 194905 BRACKET colo...

Страница 212: ...CREW 4 1r 115206 SCREW 4 1s 115207 SCREW 3 1t 115208 SCREW 4 2 115150 CABLE power solenoid 1 3 115153 CABLE devicenet single ended 1 4 115155 CABLE devicenet exten sion 1 5 115156 CONNECTOR tee device net 1 Ref No Part No Description Qty 6 115157 CONNECTOR terminating resistor 1 8 194905 BRACKET color change 241387 only 4 9 205324 HOSE fluid PTFE 1 4 x 12 241387 only not shown 1 11 598095 TUBING a...

Страница 213: ...or Without color valves mounting brackets or mounting plate Part No 241387 5 10 Color Shown Part No 242026 5 10 Color Without color valves mounting brackets or mounting plate 1a 1b 1c 1d 1g 2 3 4 5 6 8 9 11 13 14 1f 12 1 see above 1e 1h 1j 1q 1r 1m 1p 1r 1t 1s 1n 1k Dump Valve Location TI0261 TI0171 ...

Страница 214: ...5208 SCREW 4 2 115150 CABLE power solenoid 1 3 115153 CABLE devicenet single ended 1 4 115155 CABLE devicenet exten sion 1 Ref No Part No Description Qty 5 115156 CONNECTOR tee device net 1 6 115157 CONNECTOR terminating resistor 1 8 194906 BRACKET color change 2 9 205324 HOSE fluid PTFE 1 4 x 12 1 11 598095 TUBING air 5 32 OD 12 947994 VALVE dump high pres sure Includes items 12a 12c 1 12a 832503...

Страница 215: ...2 115150 CABLE power solenoid 1 3 115153 CABLE devicenet single ended 1 4 115155 CABLE devicenet exten sion 1 5 115156 CONNECTOR tee device net 1 Ref No Part No Description Qty 6 115157 CONNECTOR terminating resistor 1 8 194906 BRACKET color change 2 9 205324 HOSE fluid PTFE 1 4 x 12 1 11 598095 TUBING air 5 32 OD 12 947994 VALVE dump high pres sure Includes items 12a 12c 2 12a 832503 VALVE color ...

Страница 216: ...High Pressure Color Change Module Part No 241499 2 4 Color Part No 241500 5 10 Color Shown 12 Dump Valve Location 12 1a 1b 1c 1d 1g 1f 1e 1h 1j 1q 1r 1m 1p 1r 1t 1s 1n 1k TI0261 2 3 4 5 6 8 9 11 13 14 1 see above TI0171 ...

Страница 217: ...ption Qty 1 832503 BARE VALVE 2 832904 MANIFOLD center 4 valve 3 833108 MANIFOLD end 4 valve 4 832905 MANIFOLD end 2 valve 5 833107 BLOCK outlet 6 552000 O RING 7 100643 SCREW 8 510947 ROD 9 102040 NUT lock 1 4 20 10 194905 BRACKET mounting 2 11 103195 SCREW cap not shown 8882B 10 8 9 5 2 7 7 1 6 6 3 or 4 10 8 9 1 1 Part of color valve item 1 ...

Страница 218: ...h of the center manifolds 2 Slide the center manifolds onto the rods 4 Place an o ring 6 on the open end of the last center manifold Slide the end manifold 3 or 4 onto the rods 5 Slide a bracket 10 onto the rods and secure with the nuts 9 6 Install the valves 1 on the manifolds with two screws 7 NOTE Each center manifold 2 can hold up to four valves two on each side One end manifold 3 can hold fou...

Страница 219: ... C from the valve and connect the recirculating line to the 1 8 npt f port using a suitable adapter Use sealant on the adapter and torque to 2 3 N m 20 in lb Service WARNING To reduce the risk of serious bodily injury including splashing in the eyes or on the skin injury from moving parts or electric shock always follow the Pressure Relief Procedure and read and follow the warnings given in your p...

Страница 220: ... minimum Order 250 ft 76 m minimum Part No 241394 Gun Flush Box two gun Shown Ref No Part No Description Qty 1 244105 GUN FLUSH BOX See manual 309227 for parts 2 2 570123 KIT wall mount 2 3 570132 KIT atomizing air shutoff 2 4 115125 MODULE solenoid box See page 12 29 for parts 2 5 065338 CABLE 6 conductor 22 AWG 6 598095 TUBING nylon 5 32 7 514030 GRIP cable strain relief 1 9 514768 SWITCH air fl...

Страница 221: ...lock conduit 1 15 598095 TUBE 4 mm OD 2 ft 0 6 m 1 Ref No Part No Description Qty 16 598252 FITTING pneumatic tube 1 19 169797 ADAPTER 1 20 112446 BLOCK clamp end 2 22 112444 BLOCK terminal 2 conductor 2 23 112445 COVER end terminal 1 26 502723 TEE male run 1 27 514228 FITTING reducer 1 31 110874 WASHER flat 2 32 104029 STUD grounding 1 34 115322 LOCKWASHER 4 mm 4 Keep these spare parts on hand to...

Страница 222: ...nd names or marks are used for identification pur poses and are trademarks of their respective owners Part No 244169 Gun Holder Mounting Kit Allows mounting of new gun holders in the Part No 570046 Gun Flush Box Part No 244373 Gun Switch Yoke Conversion Kit Converts Part No 570046 Gun Flush Box to new style upper gun switch yoke assembly Gun Holders for Gun Flush Box Part No 244105 with roller act...

Страница 223: ...15156 Connector Tee Color Change Panel Sole noid Bank 1 ft 0 3 m 194400 CABLE remote user interface Controller Remote User Interface 40 ft 12 m 194477 CABLE flow control 2 Flow Control 2 Flow Control 1 100 ft 30 5 m 194477 CABLE operator station Operator Station Controller 100 ft 30 5 m 194478 CABLE operator station optional Operator Station Controller 200 ft 61 m 194559 CABLE flow control 1 Flow ...

Страница 224: ...e 1 2 194396 HARNESS wire 1 3 111682 KIT screwlock female 1 4 114993 SCREW machine 4 5 194400 CABLE interface not shown 1 6 110874 WASHER flat 2 7 104029 STUD grounding 1 8 115322 LOCKWASHER 4 mm 4 9 195049 SHIELD paint package not shown 1 10 115563 BATTERY not shown 1 Keep these spare parts on hand to reduce down time 1 3 2 9045A 4 8 6 7 ...

Страница 225: ...e mounting stand Mount the color change panel to the upper right of the stand and the fluid panel module to the lower right Audio Visual Alarm Part No 241380 Audio Visual Alarm Kit Ref No Part No Description Qty 1 115014 ALARM 1 9002A A 1 Alarm Wiring Schematic Wire Color Function Sky blue Alarm input Gray Light input Red Jumper for flashing light Brown Jumper for flashing light Yellow Common ...

Страница 226: ...ion Package of 10 shields to protect Operator Station from getting overspray or other contaminants on the keypad and display area Part No 195049 Paint Shield for User Interface Package of 10 shields to protect User Interface from getting overspray or other contaminants on the keypad and display area Part No 241263 Printer Kit Includes Part No 113774 Thermal Printer 40 column and Part No 114990 Cab...

Страница 227: ... steel Part No 570026 Four Gun Valve stainless steel Part No 513052 Air Flow Switch High flow air switch 5 cfm Part No 241962 Hydro Softfeel Material Application Kit Specialized kit for applying and flushing Hydro Softfeel materials Includes manifold valves connectors integrator and tubing Cable Network P C AMR 115769 500 feet 115770 1000 feet Catalyst Supply Modules 949391 15 gallon portable 9495...

Страница 228: ...12 36 Parts ...

Страница 229: ...13 1 Utilities Software Utilities Software 13 ...

Страница 230: ...13 2 Utilities Software ...

Страница 231: ...ng upgraded or the User Interface loses its memory The most likely cause for a memory loss is the failure of the User Interface battery Before using the Utility make sure the computer screen saver is turned off During uploads or downloads do not use any other software on your computer as it may interfere with the process If an Operating System Update or Controller Program Update is done all the to...

Страница 232: ...es set the number of recipes as low as possible CAUTION If the controller battery fails or is not installed cor rectly the controller memory could be lost Backup the PrecisionMix II configuration periodically and before changing the controller battery 1 Select File Backup PrecisionMix II Fig 13 2 from the toolbar or press the Backup button Fig 13 3 in the main window File Backup PrecisionMix II Fi...

Страница 233: ...e to the CAN connector next to the RS232 connector or the utilities software will not operate correctly Fig 13 6 CP Interface User Interface RS232 Connector 6 The default setting for computer communications port is 1 If your computer has 2 serial ports and you use the second port you need to change the Communication Parameters setting the first time you use the software a Select Options Communicat...

Страница 234: ...the backup is complete See Fig 13 11 Fig 13 11 If an error occurs during the backup The backup is terminated and Disconnected will display at the bottom of the Utilities main window Check the cable connection then restart the backup by pressing the upload button again NOTE The backup can be terminated by pressing Cancel on the Progress meter Fig 13 11 11 After the upload is complete turn off the P...

Страница 235: ... 2 An Instructions window to Restore PrecisionMix II will appear See Fig 13 14 If you are familiar with the restore process you can follow the steps in the window The following instructions provide more detailed information Fig 13 14 3 Follow steps 3 to 7 on page 13 5 4 Press the BEGIN button on the Instructions win dow to begin the restore See Fig 13 14 If a connection error occurs see page 13 3 ...

Страница 236: ...or occurs during the restore The configuration restore is terminated and Disconnected will display at the bottom of the Utilities main window Check the cable connection then restart the backup by pressing the upload button again NOTE The restore can be terminated by pressing Cancel on the Progress meter 7 After the download is complete turn off the Preci sionMix II power 8 Disconnect the communica...

Страница 237: ...onMix II Operating System will appear See Fig 13 20 If you are familiar with the update process you can follow the steps in the window The following instructions provide more detailed information Fig 13 20 3 Follow steps 3 to 6 on page 13 5 4 Set the mode switch on the controller to A See Fig 13 21 CP Interface Fig 13 21 RS232 Mode Switch 5 Turn the PrecisionMix II power back on 6 Press the BEGIN ...

Страница 238: ...d the operating system is downloaded while progress is monitored with the following progress bar Fig 13 25 11 If an error occurs during download a series of message boxes may appear indicating the errors The download may be restarted after acknowledg ing the message boxes and correcting the cause of the error by returning to step 2 12 When the operating system download has com pleted the following...

Страница 239: ...ers 1 Select File Update PrecisionMix II Program Fig 13 28 or press the Update PrecisionMix II Program button Fig 13 29 File Update PrecisionMix II Program Fig 13 28 Update PrecisionMix II Program Button Fig 13 29 2 An Instructions window to Update PrecisionMix II Program will appear See Fig 13 30 If you are familiar with the update process you can follow the steps in the window The following inst...

Страница 240: ... the controller responds the Locate Program File List dialog box appears displaying the default directory Locate the Program File List in this directory or the location disk where the file is stored Double click on the file or select it and press the Open button to start the download 4 After the Program File List is selected a series of operations occur to reset the controller The following progre...

Страница 241: ...y the User Interface setup memory could be lost A copy of this setup is on the PrecisionMix II Maintenance Utilities software This utility allows the user to reload or update the program for the User Interface Special instructions will be included with program update files about updating the User Interface 1 Select File Update User Interface Program Fig 13 36 or press the Update User Interface Pro...

Страница 242: ... Connect the computer cable end 9 pin to the computer serial port Connect the other end of the cable which looks like a telephone jack to the User Interface See Fig 13 39 Fig 13 39 4 Press the BEGIN button in the Instructions window to begin the update See Fig 13 38 If a connection error occurs see page 13 3 for instructions 5 After the download button is pressed the Locate Program Files dialog bo...

Страница 243: ...II controller to 0 zero The 0 setting disables the password requirement from the User Interface to enter system configuration or recipe setup menus 1 Follow steps 3 to 6 on page 13 5 2 Turn the PrecisionMix II power back on 3 Select Tools Reset PrecisionMix II Password See Fig 13 42 Fig 13 42 If a connection error occurs see page 13 3 for instructions 4 If the password reset is not successful the ...

Страница 244: ...ee page 13 3 for instructions 4 If setting the date and time is not successful the system will display the warning dialog box shown in Fig 13 46 Correct the problem and retry setting the date and time or cancel the setting Fig 13 46 5 If setting the date and time is successful the system will confirm the reset with the dialog box shown in Fig 13 47 Press the OK button to close the dialog box Fig 1...

Страница 245: ...face Other must be selected during system configuration language selection Refer to section 8 page 8 5 Edit User Interface Language 1 Select Edit Language User Interface See Fig 13 49 Fig 13 49 2 The Locate User Interface Program File dialog box appears displaying the default directory See Fig 13 50 Locate the Program file in this directory or the location disk where the file is stored Double clic...

Страница 246: ...n can be entered directly into this screen or it can be entered into a text file and then imported into the database You must press the Enter key on the comput er keyboard after each entry or press the OK button on the screen to save changes to the database before updating the User Interface Screen Entry Type in the appropriate translation in the Custom Translation column Press the OK button to up...

Страница 247: ...lish text with the desired translation See Fig 13 54 Fig 13 54 d Press the Import button in the Language Editor screen to load the text file A dialog box will warn you that importing a file will overwrite an existing translation See Fig 13 55 Press the Yes button to proceed In order for the text file to import successfully Each line of the text file must be in the same order as it was exported The...

Страница 248: ...ce See Fig 13 57 Fig 13 57 8 Press the Update button Fig 13 58 on the Trans late Database Strings screen Fig 13 58 If a connection error occurs Fig 13 59 see page 13 3 for instructions Fig 13 59 9 The update will send the information to the User Interface This may take some time to complete A Progress meter will display the status of the update Fig 13 60 10 When the Progress window closes the upda...

Страница 249: ...ollowing procedure shows the dialog boxes and screens that will appear when editing the Run Screen Monitor 1 Select Edit Language Run Screen Monitor or Alarms or Printer Reports choos ing the what you want to edit See Fig 13 61 Fig 13 61 2 A Language Editor screen appears See Fig 13 62 There is a column for the English A which cannot be edited and column for the Other Language B 3 In the Other Lan...

Страница 250: ...ss ENTER to enter the text into the Other Language column E and go to the next line of text F See Fig 13 63 5 Continue typing and entering text until all the lines have been completed Fig 13 63 E F 6 Press the Save button to save the changes 7 If the save is successful File saved will display in the bottom right corner of the screen See Fig 13 64 Fig 13 64 ...

Страница 251: ...te process you can follow the steps in the window The following instructions provide more detailed information Fig 13 66 a Follow steps 3 to 6 on page 13 5 b Set the mode switch on the controller to A See Fig 13 67 CP Interface Fig 13 67 Mode Switch c Turn the PrecisionMix II power back on d Press the BEGIN button in the Instruction screen to begin downloading the language file to the Run Screen M...

Страница 252: ...e correct COM port on the PC is se lected etc 12 After the controller responds the following prog ress bar indicates the progress of downloading the language file 13 A Save File dialog box will display Fig 13 68 asking for confirmation to save the Other Lan guage file with the Program files so future Program Updates will include this file Answering Yes is recommended Fig 13 68 14 The Locate Progra...

Страница 253: ...ct the communication cable and recon nect the User Interface cable to the PrecisionMix II controller 17 Set the mode switch to 1 18 Turn the PrecisionMix II controller power on 19 Press the X button to close the Language Editor If desired the Other Language column can be reset to English by pressing the Reset to English button See Fig 13 70 Fig 13 70 ...

Страница 254: ...13 26 Utilities Software ...

Страница 255: ...14 1 Technical Data Technical Data 14 ...

Страница 256: ...14 2 Technical Data ...

Страница 257: ...ng air quality desired Fluid Filtration Required 100 mesh 149 micron minimum Viscosity Range of Fluids 20 to 3000 cps with G3000 meters Heavier viscosities can be proportioned with use of optional meters and hardware Wetted Parts Meters and Fluid Panels 303 304 17 4 stainless steel tungsten carbide with nickel binder Chemrez PTFE CV75 Maximum Power Requirement 125 watts Power Supply Voltage Range ...

Страница 258: ...ft 3 05 m 50 ft 15 2 m Network Cable Minimum Total cable maximum length none 4000 ft 1220 m Maximum Number of Meter Inputs 4 Maximum Number of Colors 10 Maximum Number of Catalysts 3 Maximum Number of Reducers 3 Maximum Number of Recipes 62 Maximum Number of Systems Network 32 Flow Control Operating Flow Rate Range Maximum Turndown 100 2000 cc minute 8 times Example 100 cc to 800 cc minute 200 cc ...

Страница 259: ...14 5 Technical Data Notes ...

Страница 260: ...h above The buyer agrees that no other remedy including but not limited to incidental or consequential damages for lost profits lost sales injury to person or property or any other incidental or consequential loss shall be available Any action for breach of warranty must be brought within two 2 years of the date of sale Graco makes no warranty and disclaims all implied warranties of merchantabilit...

Отзывы: