GMX 200 Installation Manual
Page 3-1
190-00607-04 Revision
D
3 Installation Procedure
3.1 Unpacking Unit
Carefully unpack the equipment and make a visual inspection of the unit for evidence of damage incurred
during shipment. If the unit is damaged, notify the carrier and file a claim. To justify a claim, save the
original shipping container and all packing materials. Do not return the unit to Garmin until the carrier
has authorized the claim.
Retain the original shipping containers for return shipments. If the original containers are not available, a
separate cardboard container should be prepared that is large enough to accommodate sufficient packing
material to prevent movement.
3.2 Special Tools Required
Crimp Tool
A crimp tool meeting MIL specification M22520/2-01 and a positioner/locator are required to ensure
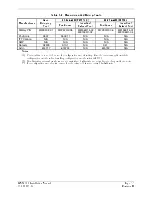
consistent, reliable crimp contact connections for the rear D-sub connectors. Refer to Table 3-2 for a list
of recommended crimp tools.
3.3 Equipment Mounting
3.3.1 Mounting Tube Installation
Use the dimensions shown in Figure D-6 to prepare the mounting holes for the GMX 200. You may also
use the GMX 200 mounting tube itself as a template for drilling the mounting holes. Care must be taken
when installing the mounting tube to ensure you can properly insert and secure the unit.
Secure the mounting tube to the avionics stack using the sixteen flat head screws specified in Section
2.3.3. The mating holes in the avionics stack must also be countersunk to accept the screw head so that
the screw head is flush with the inside surface of the mounting tube or adjoining radios.
CAUTION
Failure to properly countersink the mounting holes will result in damage to the GMX
200. Mounting screw heads must not protrude into the mounting tube.
Ensure the mounting tube is flush to the instrument panel and allow sufficient clearance for
the back of the bezel of the GMX 200 to mount flush to the mounting tube. Sufficient
clearance must exist in the instrument panel opening to allow ease of insertion and removal
of the GMX 200.
CAUTION
If the back of the GMX 200 bezel does not mount flush to the mounting tube, connectors
may not engage fully.
Cable assemblies may be attached to the mounting tube before or after the mounting tube is
installed in the avionics stack. Be sure to use the specified flat head screws so the unit will slide
in and out freely. Attach the front of the mounting tube to the stack. Use support brackets to
attach the rear of the tube to the aircraft.
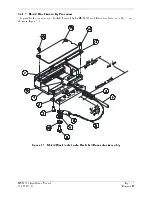
Slide the unit into the tube and
hand-tighten
the threaded screw shaft using a 3/32" hex. The unit will be
pulled into the tube by the shaft, and the connectors will fully engage. The back of the bezel must be flush to
the mounting tube.
To remove the unit from the mounting tube, unscrew the screw shaft. The unit will be loosened and then
may be pulled from the tube. No special extraction tools are required.
Содержание GMX 200
Страница 1: ...190 00607 04 March 2007 Revision D GMX 200 Installation Manual ...
Страница 4: ...Page ii GMX 200 Installation Manual Revision D 190 00607 04 This Page Intentionally Left Blank ...
Страница 18: ...Page 2 4 GMX 200 Installation Manual Revision D 190 00607 04 This Page Intentionally Left Blank ...
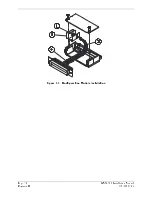
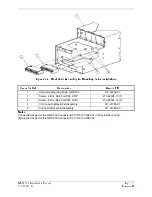
Страница 26: ...Page 3 8 GMX 200 Installation Manual Revision D 190 00607 04 Figure 3 3 Configuration Module Installation ...
Страница 34: ...Page 4 6 GMX 200 Installation Manual Revision D 190 00607 04 This Page Intentionally Left Blank ...
Страница 64: ...Page 5 30 GMX 200 Installation Manual Revision D 190 00607 04 This Page Intentionally Left Blank ...
Страница 72: ...Page 7 2 GMX 200 Installation Manual Revision D 190 00607 04 This Page Intentionally Left Blank ...
Страница 74: ...Page 8 2 GMX 200 Installation Manual Revision D 190 00607 04 This Page Intentionally Left Blank ...
Страница 76: ...Page A 2 GMX 200 Installation Manual Revision D 190 00607 04 This Page Intentionally Left Blank ...
Страница 78: ...Page B 2 GMX 200 Installation Manual Revision D 190 00607 04 This Page Intentionally Left Blank ...
Страница 82: ...Page C 4 GMX 200 Installation Manual Revision D 190 00607 04 This Page Intentionally Left Blank ...
Страница 90: ...Page D 8 GMX 200 Installation Manual Revision D 190 00607 04 This Page Intentionally Left Blank ...
Страница 92: ...Page E 2 GMX 200 Installation Manual Revision D 190 00607 04 This Page Intentionally Left Blank ...
Страница 102: ...Page E 12 GMX 200 Installation Manual Revision D 190 00607 04 This Page Intentionally Left Blank ...
Страница 104: ...Page E 14 GMX 200 Installation Manual Revision D 190 00607 04 This Page Intentionally Left Blank ...
Страница 105: ......
Страница 106: ......


