Page 5-20
GMX 200 Installation Manual
Revision D
190-00607-04
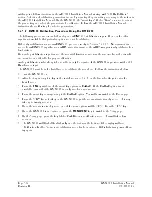
5.5.2 General Serial Data Source Tests
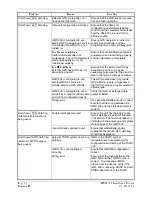
Verify that all external serial interfaces are configured correctly and providing data to the GMX 200.
1.
Turn on power to the GMX 200 and all external data sources connected to it.
2.
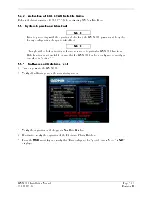
Check the Info page under the System (SYS) function and verify that each of the serial ports is
configured correctly for the installation by looking at the corresponding entry in the ‘Port’ column:
NONE indicates that the port is not configured to receive data.
3.
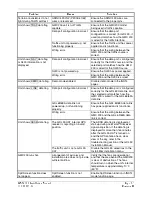
Verify that the data is available to each configured serial port by looking at the corresponding entry in
the ‘Data?’ column: YES indicates data is present, NO indicates data is not present, and ‘---‘ indicates
that the port is not configured.
NOTE
Some data sources (e.g. altitude encoder) require a warm-up period before outputting
valid data. During the warm-up period data may be flagged as invalid.
4.
Before proceeding, ensure that all of the serial data is valid by looking at the corresponding entry in
the ‘Valid?’ column: YES indicates data is valid, NO indicates data is not valid, and ‘---‘ indicates
that the port is not configured.
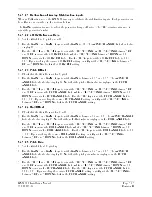
5.5.3 GPS Navigation Source Interface Test
The GMX 200 can receive position and flight plan data from an external GPS Navigation source. If a
GNS 480 is used as the external navigation source, the GMX 200 and GNS 480 can also share baro-
correction data. This check verifies that the units are communicating.
1.
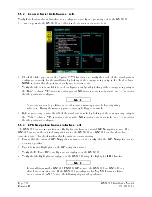
Ensure that the external GPS Navigation is turned on and verify that the GPS Navigation source
acquires a position.
2.
Create/activate a flight plan on the GPS navigation source.
3.
Verify the RTE and POS data flags are not displayed on the GMX 200.
4.
Verify that the flight plan is displayed on the GMX 200 using the flight plan (FPL) function.
NOTE
For installations with a GNS 480 (CNX80) GPS source, the GMX 200 and GNS 480 can
share baro-correction data. If the GMX 200 is configured for MapMX, Pressure altitude,
and no external TAWS Source, the following step must be performed.
Содержание GMX 200
Страница 1: ...190 00607 04 March 2007 Revision D GMX 200 Installation Manual ...
Страница 4: ...Page ii GMX 200 Installation Manual Revision D 190 00607 04 This Page Intentionally Left Blank ...
Страница 18: ...Page 2 4 GMX 200 Installation Manual Revision D 190 00607 04 This Page Intentionally Left Blank ...
Страница 26: ...Page 3 8 GMX 200 Installation Manual Revision D 190 00607 04 Figure 3 3 Configuration Module Installation ...
Страница 34: ...Page 4 6 GMX 200 Installation Manual Revision D 190 00607 04 This Page Intentionally Left Blank ...
Страница 64: ...Page 5 30 GMX 200 Installation Manual Revision D 190 00607 04 This Page Intentionally Left Blank ...
Страница 72: ...Page 7 2 GMX 200 Installation Manual Revision D 190 00607 04 This Page Intentionally Left Blank ...
Страница 74: ...Page 8 2 GMX 200 Installation Manual Revision D 190 00607 04 This Page Intentionally Left Blank ...
Страница 76: ...Page A 2 GMX 200 Installation Manual Revision D 190 00607 04 This Page Intentionally Left Blank ...
Страница 78: ...Page B 2 GMX 200 Installation Manual Revision D 190 00607 04 This Page Intentionally Left Blank ...
Страница 82: ...Page C 4 GMX 200 Installation Manual Revision D 190 00607 04 This Page Intentionally Left Blank ...
Страница 90: ...Page D 8 GMX 200 Installation Manual Revision D 190 00607 04 This Page Intentionally Left Blank ...
Страница 92: ...Page E 2 GMX 200 Installation Manual Revision D 190 00607 04 This Page Intentionally Left Blank ...
Страница 102: ...Page E 12 GMX 200 Installation Manual Revision D 190 00607 04 This Page Intentionally Left Blank ...
Страница 104: ...Page E 14 GMX 200 Installation Manual Revision D 190 00607 04 This Page Intentionally Left Blank ...
Страница 105: ......
Страница 106: ......


