GMX 200 Installation Manual
Page 5-13
190-00607-04 Revision
D
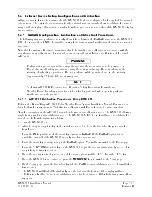
5.4 External Device Setup, Configuration and Calibration
All procedures in this section assume that the GMX 200 has been configured for the applicable external
data sources. The original documentation for the external sensors describes how to calibrate the sensor
using another display – this section describes how those procedures are modified if the GMX 200 display
is used instead.
5.4.1 RADAR Configuration, Calibration and Checkout Procedures
The following steps are performed to verify the interface between the RADAR sensor and the GMX 200
I/O. The radome should NOT be installed during these tests as visual verification of antenna movement
is required.
Note that the Antenna Receiver/Transmitter should be installed and calibrated in accordance with the
manufacturer’s specifications. This manual does not cover the installation or calibration of the actual
ART unit.
WARNING
Configuration procedures include steps that require the radar antenna to be powered on.
Please observe all safety precautions during these steps including: Do not perform in the
vicinity of refueling operations; Do not perform while personnel are in the vicinity
(approximately 20 feet) of the radar sweep area.
NOTE
See FAA AC20-68B “Recommended Radiation Safety Precautions For Airborne
Weather Radar” for safety precautions to be taken by personnel when operating airborne
weather radar on the ground.
5.4.1.1 ART 2000 Calibration Procedures Using GMX 200
Refer to the Bendix/King ART2000 Color Weather Radar System Installation Manual, Revision 4 or
later. Follow the instructions in "Stabilization calibration with Radar Indicator" or its equivalent.
Skip the description in the ART2000 manual on how to enter calibration mode. The GMX 200 allows a
single button push to enter calibration mode. The GMX 200 MUST be in Install mode to calibrate the
radar head. Follow the instructions below.
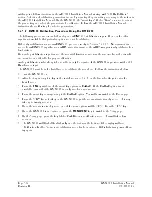
1.
Turn the GMX 200 on.
2.
After boot-up is complete, key-in the install sequence 1, 4, 6, on the line select keys to enter the
Install mode.
3.
Press the FN key until one of the smart key options is RADAR. If the RADAR option is not
available, ensure that the GMX 200 is configured for a radar source.
4.
Press the smart key corresponding to the RADAR option. You will now switch to the Radar page.
5.
Press the STBY/ON line select key on the GMX 200 to put the radar unit into standby mode. This
may take up to twenty seconds.
6.
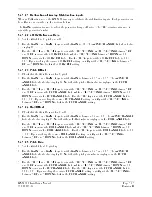
Once the radar is in standby mode, one of the menu options will be TEST. Press the TEST key.
7.
Once the GMX 200 is in Test mode, press the
MENU/ENT
key to switch to the Setup page.
8.
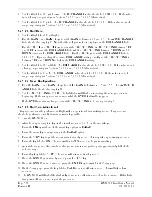
On the Setup page, press the line select key labeled CALB to enter calibration mode. This will take a
few seconds.
9.
The GMX 200 will flash all faults briefly and the text near the bottom of the display will read
“Calibration Enabled” to indicate calibration mode has been entered. If this fails, turn power off and
try again.
Содержание GMX 200
Страница 1: ...190 00607 04 March 2007 Revision D GMX 200 Installation Manual ...
Страница 4: ...Page ii GMX 200 Installation Manual Revision D 190 00607 04 This Page Intentionally Left Blank ...
Страница 18: ...Page 2 4 GMX 200 Installation Manual Revision D 190 00607 04 This Page Intentionally Left Blank ...
Страница 26: ...Page 3 8 GMX 200 Installation Manual Revision D 190 00607 04 Figure 3 3 Configuration Module Installation ...
Страница 34: ...Page 4 6 GMX 200 Installation Manual Revision D 190 00607 04 This Page Intentionally Left Blank ...
Страница 64: ...Page 5 30 GMX 200 Installation Manual Revision D 190 00607 04 This Page Intentionally Left Blank ...
Страница 72: ...Page 7 2 GMX 200 Installation Manual Revision D 190 00607 04 This Page Intentionally Left Blank ...
Страница 74: ...Page 8 2 GMX 200 Installation Manual Revision D 190 00607 04 This Page Intentionally Left Blank ...
Страница 76: ...Page A 2 GMX 200 Installation Manual Revision D 190 00607 04 This Page Intentionally Left Blank ...
Страница 78: ...Page B 2 GMX 200 Installation Manual Revision D 190 00607 04 This Page Intentionally Left Blank ...
Страница 82: ...Page C 4 GMX 200 Installation Manual Revision D 190 00607 04 This Page Intentionally Left Blank ...
Страница 90: ...Page D 8 GMX 200 Installation Manual Revision D 190 00607 04 This Page Intentionally Left Blank ...
Страница 92: ...Page E 2 GMX 200 Installation Manual Revision D 190 00607 04 This Page Intentionally Left Blank ...
Страница 102: ...Page E 12 GMX 200 Installation Manual Revision D 190 00607 04 This Page Intentionally Left Blank ...
Страница 104: ...Page E 14 GMX 200 Installation Manual Revision D 190 00607 04 This Page Intentionally Left Blank ...
Страница 105: ......
Страница 106: ......

