Page 5-14
GMX 200 Installation Manual
Revision D
190-00607-04
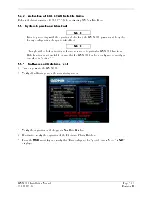
At this point, follow directions in the ART2000 Installation Manual starting with "400 Hz Ref Gain"
section. Selection of calibration parameters is done by adjusting the gain setting according to the values in
the ART2000 Installation Manual. On the GMX 200, the "smart keys" labeled "Gain" are used to adjust
the gain setting and select the parameter to be calibrated. Follow the ART2000 Installation Manual
instructions for calibrating the selected parameters.
5.4.1.2 GWX 68 Calibration Procedure Using the GMX 200
The following procedure covers both analog and ARINC 429 stabilization inputs. If one or the other
input is not available, that particular option need not be calibrated.
If the only stabilization source is ARINC 429, proceed directly to Section 5.4.1.2.7. No adjustment is
needed for ARINC 429 input from an AHRS since it is assumed the AHRS was previously calibrated for
level attitude.
If an analog stabilization input is used, the radar stabilization source must be removed from the aircraft
and mounted on a tilt table for proper calibration.
Analog stabilization values for pitch and roll can only be adjusted if the GWX 68 is provided with a 400
Hz reference input.
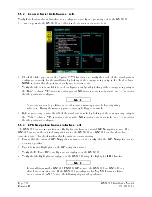
The GMX 200 must be in the Install mode to calibrate the radar head. Follow the instructions below:
1.
Turn the GMX 200 on.
2.
After boot-up is complete, key-in the install sequence 1, 4, 6, on the line select keys to enter the
Install mode.
3.
Press the
FN
key until one of the smart key options is RADAR. If the RADAR option is not
available, ensure that the GMX 200 is configured for a radar source.
4.
Press the smart key corresponding to the RADAR option. You will now switch to the Radar page.
5.
Press the STBY line select key on the GMX 200 to put the radar unit into standby mode. This may
take up to twenty seconds.
6.
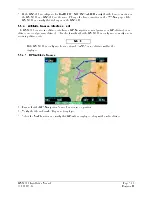
Once the radar is in standby mode, one of the menu options will be TEST. Press the TEST key.
7.
Once the GMX 200 is in Test mode, press the
MENU/ENT
key to switch to the Setup page.
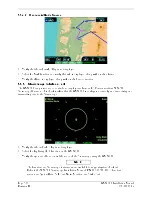
8.
On the Setup page, press the key labeled CALB to enter calibration mode. This will take a few
seconds.
9.
The GMX 200 will flash all faults briefly and the text near the bottom of the display will read
“Calibration Enabled” to indicate calibration mode has been entered. If this fails, turn power off and
try again.
Содержание GMX 200
Страница 1: ...190 00607 04 March 2007 Revision D GMX 200 Installation Manual ...
Страница 4: ...Page ii GMX 200 Installation Manual Revision D 190 00607 04 This Page Intentionally Left Blank ...
Страница 18: ...Page 2 4 GMX 200 Installation Manual Revision D 190 00607 04 This Page Intentionally Left Blank ...
Страница 26: ...Page 3 8 GMX 200 Installation Manual Revision D 190 00607 04 Figure 3 3 Configuration Module Installation ...
Страница 34: ...Page 4 6 GMX 200 Installation Manual Revision D 190 00607 04 This Page Intentionally Left Blank ...
Страница 64: ...Page 5 30 GMX 200 Installation Manual Revision D 190 00607 04 This Page Intentionally Left Blank ...
Страница 72: ...Page 7 2 GMX 200 Installation Manual Revision D 190 00607 04 This Page Intentionally Left Blank ...
Страница 74: ...Page 8 2 GMX 200 Installation Manual Revision D 190 00607 04 This Page Intentionally Left Blank ...
Страница 76: ...Page A 2 GMX 200 Installation Manual Revision D 190 00607 04 This Page Intentionally Left Blank ...
Страница 78: ...Page B 2 GMX 200 Installation Manual Revision D 190 00607 04 This Page Intentionally Left Blank ...
Страница 82: ...Page C 4 GMX 200 Installation Manual Revision D 190 00607 04 This Page Intentionally Left Blank ...
Страница 90: ...Page D 8 GMX 200 Installation Manual Revision D 190 00607 04 This Page Intentionally Left Blank ...
Страница 92: ...Page E 2 GMX 200 Installation Manual Revision D 190 00607 04 This Page Intentionally Left Blank ...
Страница 102: ...Page E 12 GMX 200 Installation Manual Revision D 190 00607 04 This Page Intentionally Left Blank ...
Страница 104: ...Page E 14 GMX 200 Installation Manual Revision D 190 00607 04 This Page Intentionally Left Blank ...
Страница 105: ......
Страница 106: ......


