


__________________________________________________________________________
Cirrus Perspective™ Line Maintenance Manual
Page 6-3
190-00920-00
Rev.
E
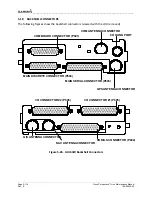
6.5
GRS
77
To
remove:
1.
Disconnect
Backshell
connector
from
unit.
2.
Loosen
four
screws
holding
the
unit
to
the
mounting
rack
(do
not
loosen
mounting
rack
bolts).
To
install:
1.
Inspect
connector(s)
for
damaged
pins.
2.
Fasten
unit
to
mounting
rack.
3.
Connect
Backshell
assembly
to
unit.
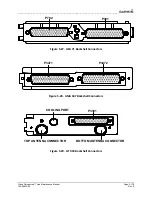
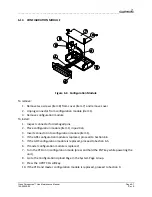
6.6
GMU
44
To
remove:
1.
Loosen
three
screws
connecting
the
unit
to
the
aircraft
mounting
plate.
2.
Disconnect
cable.
To
install:
1.
Inspect
connector
for
damaged
pins.
2.
Connect
cable
and
properly
secure
connector
in
a
stationary
fashion.
3.
Fasten
unit
to
the
aircraft
mounting
rack.
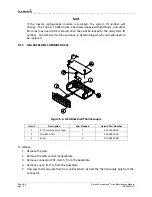
6.7
GDC
74A
To
remove:
1.
Loosen
two
thumb
screws
that
secure
the
unit
to
the
mounting
rack.
2.
Disconnect
Backshell
assembly
and
pitot
‐
static
plumbing
from
unit.
3.
Remove
all
Teflon
tape
or
sealing
compound.
Take
care
not
to
allow
Teflon
tape
or
sealing
compound
to
fall
inside
unit.
To
install:
1.
Inspect
connector(s)
and
pitot
‐
static
plumbing
for
damage.
2.
Install
Teflon
tape
or
sealing
compound
to
pitot
‐
static
plumbing.
3.
Connect
Backshell
assembly
and
pitot
‐
static
plumbing
to
the
unit.
4.
Tighten
two
thumbscrews
that
secure
the
unit
to
the
mounting
rack.
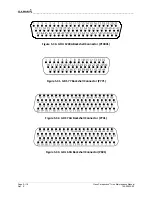
6.8
GEA
71
To
remove:
1.
Loosen
the
Phillips
screw
to
unlock
unit
handle.
2.
Pull
the
GEA
lever
up
towards
the
top
of
the
unit.
This
disengages
the
locking
stud
with
the
dogleg
slot.


