


97
c) Ensure that rigging the rudder cables and setting up the correct tension/
nose leg alignment etc. has been done before adjusting the rudder stop
cables.
d) Deflect the rudder until the required maximum deflection is achieved (see
current HADS), and then adjust the stop cable to match.
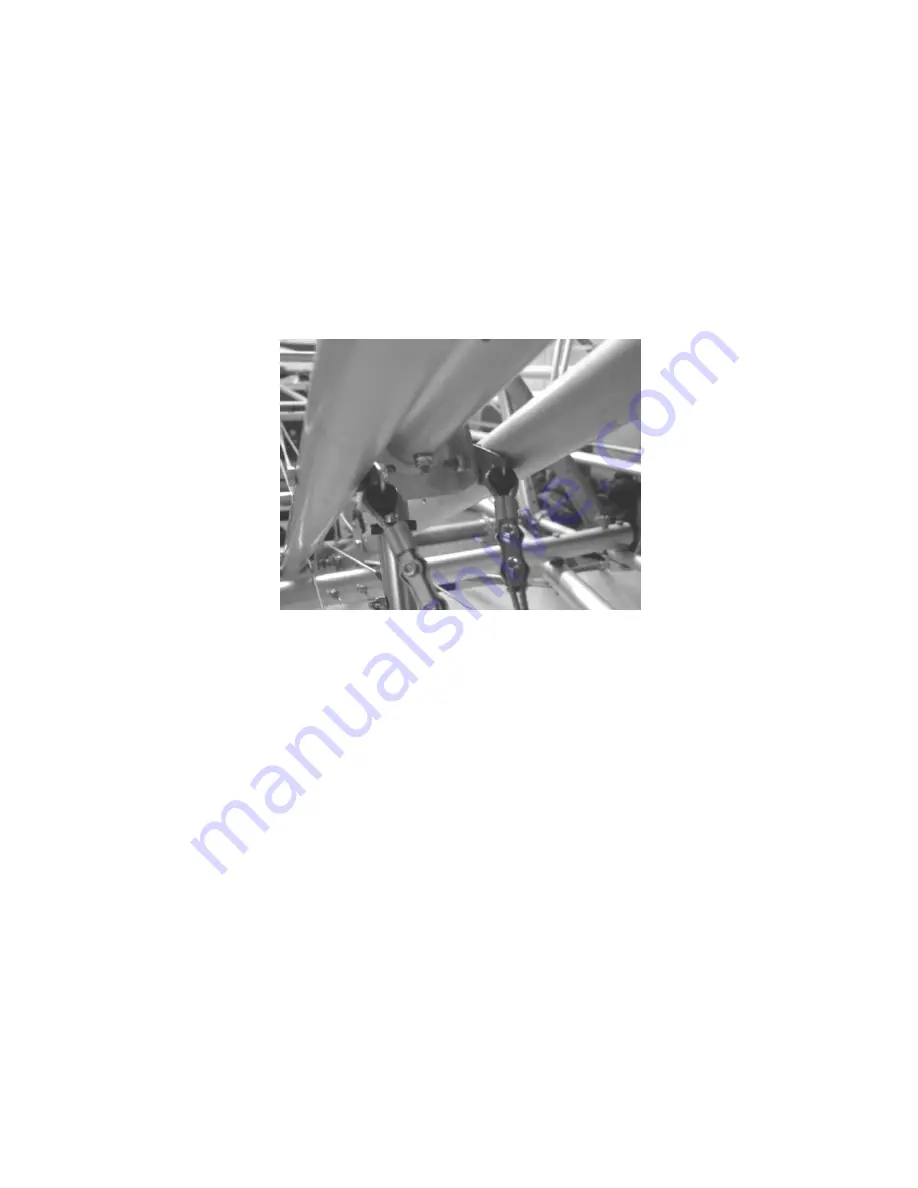
This is done by lightly clamping the cable with the stainless steel wire
clamp supplied. Leave it loose enough so that the cable will slide
through when the spare end is pulled firmly with pliers/grips. Pull the
stop cable until it will go tight to match the rudder deflection. Ensure
that the wire grip is slid up tight enough to push the cable ferrule
against the cable thimble (the cable „eye‟), Figure 114.
Figure 114 rudder stop cable adjustment.
e) When happy with the adjustment, clamp up the wire grip to hold the correct
position.
Do not do this up too tight as it will distort the cable.
f) If you have access to a Nicopress swaging tool crimp the ferrule, remove
the wire clamp and trim the excess cable. Use a hot air gun to shrink the
piece of heat shrink supplied in position over the ferrule and cable end for
neatness.
If you could please return the clamps at your leisure they can be reused
to keep costs to a minimum.
g) If you do not have access to a Nicopress swaging tool then remove the
stop cables, send them back to us and we will crimp them for you.
Leave the clamps in position so we will know where to crimp them!
It‟s
also a good idea to mark them so you know which side to refit them.
h) The bolt securing the rear tang can be done up tight, but do not crush the
tube.
i) The bolt on the pedal end should be loose enough to allow rotation as the
pedal is deflected.
j) Secure the middle of the stop cables with a short length of light Bungee
looped over the control stick torque-tube just out of sight under the
Содержание Nynja Build
Страница 1: ...1 Nynja Build manual Version 1 0...
Страница 2: ...2 Figure 1 tube numbering scheme...
Страница 3: ...3 Figure 2 Basic frame Skyranger...
Страница 4: ...4 Figure 3 uncovered Skyranger frame...
Страница 5: ...5 Figure 4 Uncovered Nynja frame Figure 5 Nynja fuselage with rear fairings removed...
Страница 6: ...6 Figure 6 Nynja fuselage with rear fairings removed rear view Figure 7 simply assemble thus...
Страница 22: ...22 Figure 13 forward fuselage from front quarter Figure 14 Cabin upper rear corner...
Страница 60: ...60 Figures 65 cable arrangement further overview...
Страница 86: ...86 Figure 100 Nynja elevator joiner with integral control horn...
Страница 113: ...113 Figure 135 front jury strut attachment Figure 136 rear jury strut attachment...
Страница 117: ...117 Figure 141 front and rear of tensioning tube File edge of this saddle washer 2 3mm to clear U bracket on fuselage...
Страница 118: ...118 Figure 142 tensioning tube fittings front in left photo note bolt through compression tube rear in right photo...
Страница 183: ...183 Figure 231 heavy duty power wiring schematic Rotax 912...
Страница 184: ...184 Figure 232 low current wiring schematic Rotax 912...
Страница 185: ...185 Figure 233 instrument wiring schematic Rotax 912...
Страница 200: ...200 Nynja Build manual 1 0 18 2 One Piece Door Figure 250 one piece door frame...
Страница 255: ...255 Nynja Build manual 1 0 27 Additional Information 27 1 Example BMAA Homebuilt Registration Form...
Страница 256: ...256 Nynja Build manual 1 0...
Страница 257: ...257 Nynja Build manual 1 0 27 2 Wire locking...
Страница 258: ...258 Nynja Build manual 1 0...
Страница 259: ...259 Nynja Build manual 1 0...
Страница 260: ...260 Nynja Build manual 1 0...
Страница 265: ...265 Nynja Build manual 1 0...


