Thickness Mode:
If you select this mode, you must enter the thickness of your object in the Processes
Section under each individual process. If all processes in your job need to be focused at the same level,
it may save you time to enter the thickness before splitting the job into multiple processes. For more
information on splitting processes see
“Dividing Your Job Into Processes” on page 66.
For more
information about Thickness Mode,
Please note:
The material thickness is still required when using the Vector Cutting Table. If a
thickness is not specified the system will Auto Focus to the top of the grid, not to the top of your
material. To enter the material thickness of the object you will be engraving/marking/cutting
use a pair of calipers for an accurate measurement and enter this value in the “Thickness”
box in the driver.
Plunger:
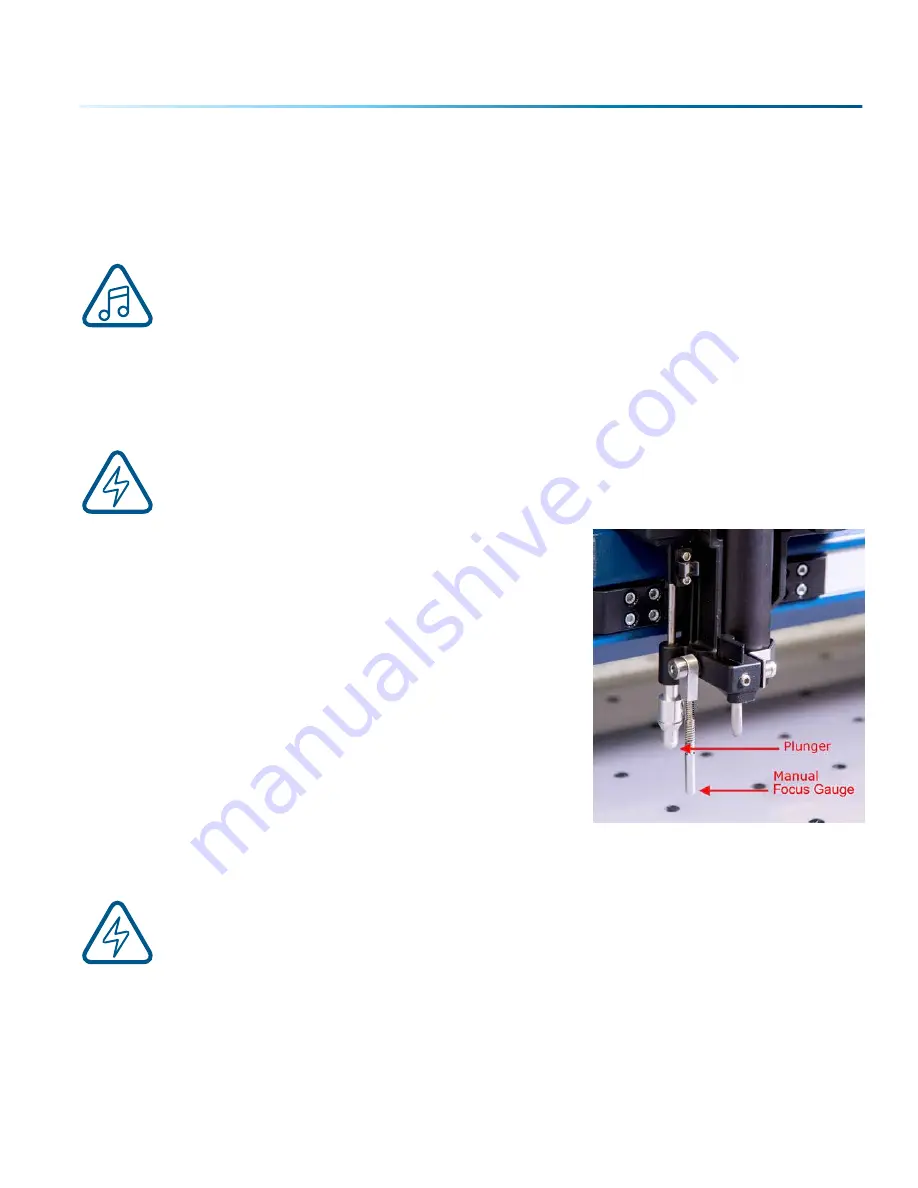
When you enter Jog mode and have jogged the lens carriage above your material, press the
Auto Focus button to use the plunger Auto Focus. The table will then rise until the material touches the
plunger (pictured below), then set the table to the correct height. Your job should now be in focus. You
may also set up Plunger Mode in the Dashboard. For more information,
WARNING:
Do not use the Auto Focus plunger to focus on the Vector Cutting Table or Slat
Table.
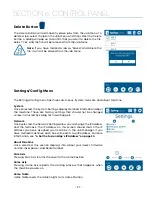
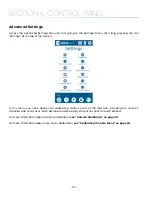
Manual Focus
This photo shows the Manual Focus Gauge that is used to
determine the correct distance from the focus lens to the top of
your material. This gauge is included with your system.
Place the object to be cut or engraved anywhere on the table of
the machine. Select the
Jog
button on the touch screen and use
the
Joystick
to bring the focus gauge to the object. Deselect the
Jog button, then select the
Focus
button on the touch screen and
move the
Joystick
up or down to move the table appropriately
until your material just touches the bottom of the gauge.
The speed at which the table rises or lowers can be controlled
by applying varying pressure upwards or downwards on the
Joystick
.
You may also fine-tune the table height in the Focus Menu. Once the focus position has been established,
flip the gauge back up into its locked position. Press the Focus button to leave the menu and then press
the
Reset
key to bring the laser head back to its Home Position.
WARNING:
Do not leave the Manual Focus Gauge down when running jobs or when using
Auto Focus!
If your material has a taper or curve, pick an intermediate point between the highest and lowest points
being engraved and focus on that point. In general, the area of the material being engraved needs to be
relatively flat. If the area being engraved differs in height by more than about an .125” (3 mm), the image
will begin to look “fuzzy” or out of focus.
- 111 -
SECTION 8: SYSTEM FEATURES
Содержание Fusion Pro 32
Страница 2: ......
Страница 6: ......
Страница 13: ...The following diagrams show the location of each specific label Fusion Pro 32 7 SECTION 1 SAFETY ...
Страница 14: ...Fusion Pro 48 8 SECTION 1 SAFETY ...
Страница 15: ... 9 SECTION 1 SAFETY ...
Страница 18: ......
Страница 28: ......
Страница 60: ......
Страница 98: ......
Страница 108: ......
Страница 132: ......
Страница 162: ......
Страница 184: ......
Страница 202: ......
Страница 214: ......
Страница 216: ......
Страница 242: ......

