Terminal Operation
Each switch may be configured at the switch level through the Terminal Console menu interface, which is
accessed through the setup port. All terminal commands are accessed through a terminal screen or a PC
running terminal emulation software.
NOTE: The preferred method is to make all configuration settings in the local UI.
To connect a terminal to the switch:
1.
Using a serial adaptor, a terminal or a PC that is running terminal emulation software, such as
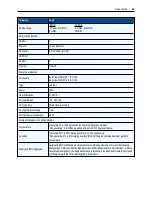
HyperTerminal software, to the setup port on the back panel of the switch. The terminal settings are
9600 bits per second (bps), 8 bits, 1 stop bit, no parity and no flow control.
2.
Turn on the switch and each target device. When the switch completes initialization, the Console menu
will display the following message:
Press any key to continue.
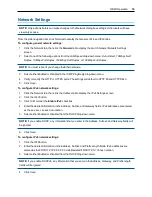
Network Configuration
To configure network settings using the Console menu:
1.
When you turn on the switch, it initializes for approximately one minute. After it completes initialization,
press any key on the terminal or on the computer running the terminal emulation software to access the
Console menu interface.
The terminal may be connected at any time, even when the switch is already turned on.
2.
Once the Console Main Menu is displayed, type the number corresponding to Network Configuration
and press
Enter
.
3.
Type 1 and press
Enter
to set your network speed. For best performance, set the switch at the same
speed as the Ethernet switch to which it is attached. Press
Enter
to return to the Console Network
Configuration menu.
4.
Type 2 and press
Enter
to specify whether you are using a static or DHCP address.
A static IP configuration may be used to provide a user-defined IP address, netmask, or prefix length,
and default gateway for the switch.
DHCP is a protocol that automates the configuration of TCP/IP-enabled computers. When DHCP is
selected, the IP address, netmask or prefix length, and default gateway settings are automatically
assigned to the switch and may not be modified by a switch user.
If you are using the DHCP option, configure your DHCP device to provide an IP address to the switch
and then go to step 6.
5.
Select the remaining options from the Network Configuration menu to finish the configuration of your
switch with an IP address, netmask or prefix length, and default gateway.
6.
Type
0
(zero) and press
Enter
to return to the Console Main menu.
Содержание Avocent AutoView 2108
Страница 1: ...Avocent AutoView 2108 2216 3108 3216 Switch Installer User Guide ...
Страница 6: ...iv Avocent AutoView 2108 2216 3108 3216 Switch Installer User Guide ...
Страница 12: ...6 Avocent AutoView 2108 2216 3108 3216 Switch Installer User Guide ...
Страница 54: ...48 Avocent AutoView 2108 2216 3108 3216 Switch Installer User Guide ...
Страница 70: ...64 Avocent AutoView 2108 2216 3108 3216 Switch Installer User Guide ...


