32
Instruction Manual IM02602008E - Rev. D
Transformer Temperature Controllers
IM02602008E - Rev. D May 2019 www.eaton.com
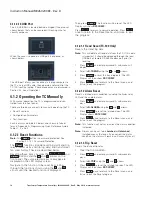
4.1.2.2.18.2 Hours (TIME.DATE/TIME/HOUR)
Selects the current hour for alarm and trip history and trend
logging. The range is
1-24
. Default is
1
.
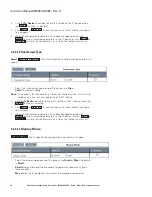
1. Press
Prog
and enter your password. A sub-menu
displays.
2. Scroll to
TIME.DATE
using the
and
arrows.
3. Press
Select
. A sub-menu displays.
4. Scroll to
TIME
using the
and
arrows.
5. Press
Select
. A sub-menu displays.
6. Scroll to
HOUR
using the
and
arrows.
7. Press
Select
.
XX HR
displays for the hour currently
selected.
8. Enter the hour of the day desired using the
and
arrows.
9. Press
Select
to enter your selection.
HOUR
displays.
10. Press
Back
once or twice to return to the sub-menus
or three times to exit the program.
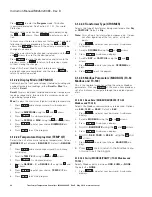
4.1.2.2.19 Change Password (CHW-PWD)
Allows entry of a new password. The range is
0000-ZZZZ
.
Default is
0000
.
Three pushbuttons are password protected:
Reset
,
Prog
, and
Test
. A valid four character, alpha-numeric
password must be entered for these pushbuttons to func-
tion. See Section 4.1.1.3.1, Password Protection.
If the password has been previously changed the display
shows
OLD PWD
, prompting for entry of the old password.
Press
Select
to enter the old password. If the password
has not been changed from the default, or after the old
password has been entered correctly the display shows
NEW PWD
, prompting for entry of the new password.
Press
Select
to enter the new password in the same
manner as normal password entry.
Changing the password is optional.
If the default password
has
not
been changed, simply
press
Select
to enter the Reset, Program, and Test
programs.
If the default password
has
been changed, the new pass-
word must be entered to access the program.
Enter the password as follows:
1. Press the
arrow to change the individual password
character; (
0
through
9
and
A
through
Z
). Press the
arrow to move to the next character in the display.
2. Press
Select
to enter the password.
3. If the password is correct, the LED display shows the
first item in the Reset
,
Program, or Test sub- menu
depending on the function being accessed.
4.1.2.3 Test Functions
Press
Test
to enter the Test mode. This button is pass-
word protected.
See Section 4.1.1.3.1, Password Protection.
The Test functions include testing the relays, the internal
temperature, the LED display, the Test buttons, and the
LEDs.
otee:
N
The TC-100 should be in the normal operating mode
with no active alarm or trip condition and both fans
Off prior to entering the test mode. If alarm or trip
conditions are present or occur while executing test
functions they will take priority over the test function.
Testing these functions involves the
and
arrows,
and the
Select
and
Back
buttons on the front panel.
The associated process messages are displayed on
the LED display screen.
Select the function to be tested by scrolling to the
function desired using the
and
arrows, and then
pressing
Select
.
Depending on the function to be tested the test will
be initiated or more options will be displayed. When
the test is complete the LED display will show
TEST
OVER
.
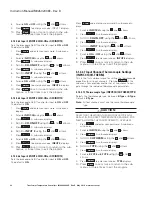
4.1.2.3.1 Test Relays
This tests the
FAN 1
,
FAN 2
,
ALARM
and
TRIP
relays by
simulating an over-temperature condition.
1. Press
Test
and enter password. The Test sub-menu
displays.
2. Scroll to
T-RELAY
using the
and
arrows.
3. Press
Select
. A sub-menu displays.
otee:
N
All four of these relays may be tested individually, as
described below. The procedure is the same for all
relays.
4. Scroll to the relay you want to test. The options are
FAN 1
,
FAN 2
, and
TRIP
. The
ALARM
relay is blocked.
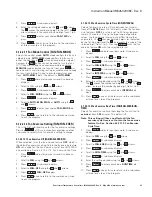
5. Press
Select
. The simulated temperature for that relay,
about 10° C below the setpoint, displays.
6. Press the
arrow, repeatedly, to raise the simulated
temperature. When the simulated temperature reaches
the setpoint, the relay should switch to the active state.
Note that this state depends on the status of the Fail
Safe configuration for the Alarm and Trip relays.
7. Press the
arrow
to lower the simulated temperature
below the setpoint. The relay should return to the non-
active state.
8. Press
Back
once to select another relay to test, from
the
T-RELAY
sub-menu.
9. Repeat Steps 4, through 8 until all relay testing desired
is completed.
10. Press
Back
twice or press
Test
to exit the program.

