28
Eaton RF-System - Help
© 2015 Eaton Electrical Group
If in the main window the option „Display and edit each device details“ is activated each scan will
offer the possibility to display and edit the details of the just scanned device. If this option is
deactivated the Barcodes can be scanned without interruption to speed up the scan process when
no device details needs to be changed.
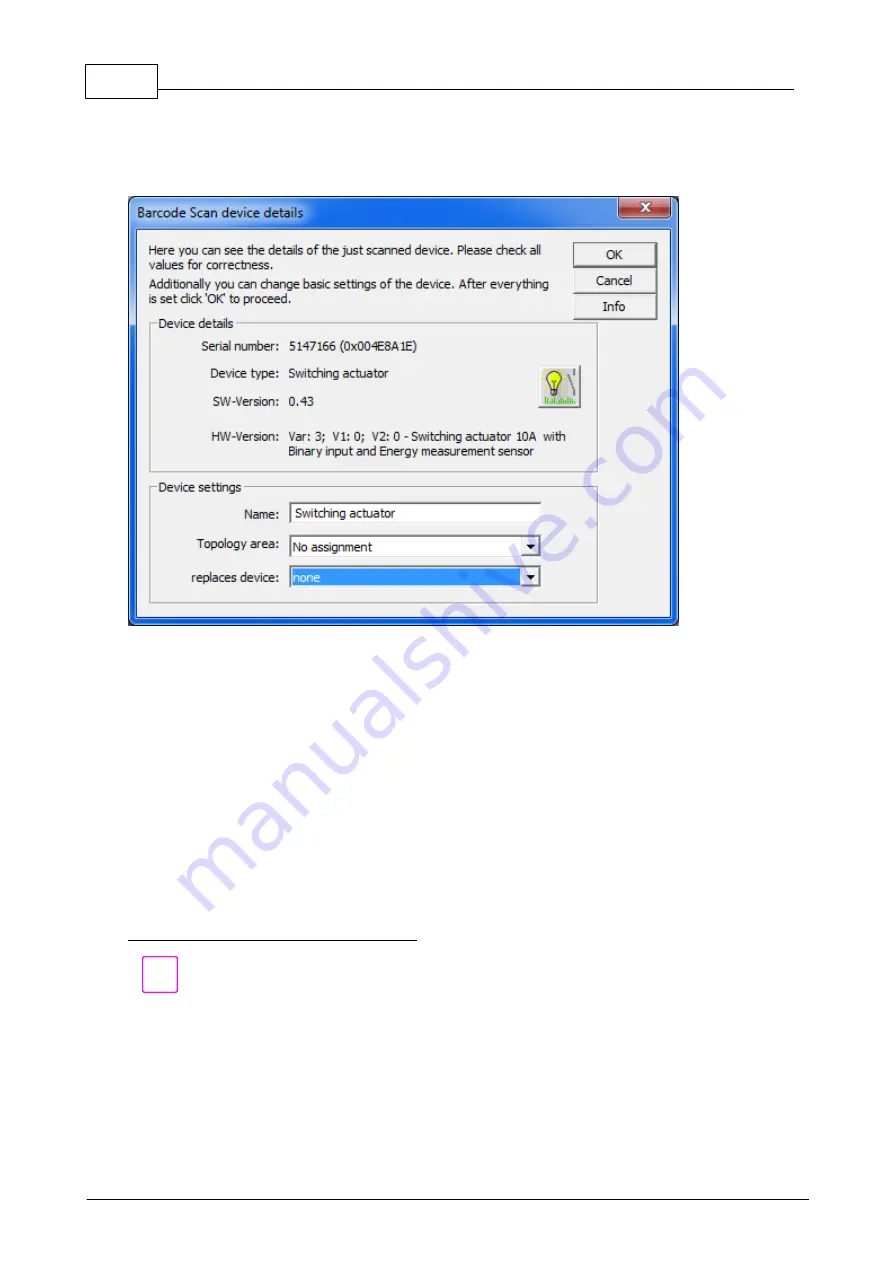
After the positive check of a Code this window will appear and inform about the details of the just
scanned device.
All details (serial number, device type, Software-Version and Hardware-Version) of the device that
results from the Barcode will be displayed and can be rechecked if correct.
Additional the following settings can also be changed:
Name – The name of the device can be edited (max. 21 characters)
Topology area - If available the device can directly be assigned to a Topology area
Replaces device – A virtual or real device can be selected that will be replaced by the scanned
device. Already changed settings to the selected device will be transferred (the selected device will
be removed of the project)
After the desired settings have been made clicking ‚OK‘ or pressing ‚Enter‘ will proceed. The
device will be inserted with the chosen settings and the Barcode-Scan function will be continued.
Clicking ‘Cancel’ will return you to the Barcode-Scan main window without inserting the device.
Display of devices scanned by this function:
Devices that have been inserted by Barcode-Scan will be displayed with a special overlay symbol
(
) to identify them as such. Unless the real device is checked (short scan of the device
property by RF – done automatically during a Scan or Load procedure) the symbol will remain this
way. If this check has been passed successfully the device symbol will be changed to normal and
the device can be loaded.
During this check the device will be set back to factory defaults. By doing so we ensure that the
configuration state of the real device is identical with the inserted device before it has been
configured and the following loading of changes is correct.
Содержание RF System 2.42
Страница 1: ...Eaton RF System 2 42 Manual...
Страница 123: ...123 Eaton RF System 2015 Eaton Electrical Group State Syntax of RM to user...
Страница 193: ...193 Eaton RF System 2015 Eaton Electrical Group...
Страница 197: ...197 Eaton RF System 2015 Eaton Electrical Group 4 Now we select the desired function e g On switch on delay...
Страница 200: ...200 Eaton RF System Help 2015 Eaton Electrical Group 7 And assign the function Blinking to it...
Страница 218: ...218 Eaton RF System Help 2015 Eaton Electrical Group Step 4 Configuration of device type dimming actuator...
Страница 219: ...219 Eaton RF System 2015 Eaton Electrical Group Step 5 Configuration of device type analogue actuator...
Страница 220: ...220 Eaton RF System Help 2015 Eaton Electrical Group Step 6 Configuration of device type shutter actuator...
Страница 223: ...223 Eaton RF System 2015 Eaton Electrical Group Group settings analogue actuator...
Страница 224: ...224 Eaton RF System Help 2015 Eaton Electrical Group Group settings heating actuator...
Страница 225: ...225 Eaton RF System 2015 Eaton Electrical Group Group settings binary input battery supplied...
Страница 226: ...226 Eaton RF System Help 2015 Eaton Electrical Group Group settings binary input 230V Group settings Motion detector...
Страница 227: ...227 Eaton RF System 2015 Eaton Electrical Group Group settings Temperature input...
Страница 229: ...229 Eaton RF System 2015 Eaton Electrical Group Group settings Analogue input Group settings Impulse input...


