05/10
24
Inbetriebnahme des Senders
Getting started with the transmitter
Lösen der Bindung
Schalten Sie den Sender aus.
Schalten Sie das Modell ein.
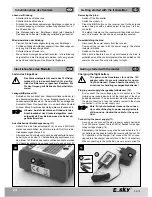
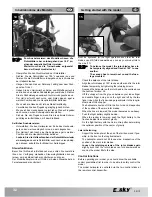
Drücken Sie den Bindungstaster am Empfänger, neben dem
Antennenausgang, mit einem spitzen Gegenstand für ca. 1
bis 2 Sekunden (9).
Die Statusanzeige am Empfänger blinkt jetzt dauerhaft.
Das bedeutet, dass die Verbindung vollständig getrennt ist.
Wiederherstellen der Bindung
Trennen Sie die Spannungsversorgung vom Empfänger.
Verbinden Sie den Empfänger wieder mit der Spannungsver-
sorgung. Die Statusanzeige blinkt.
Schalten Sie den Sender ein.
Wenn beide Anzeigen dauerhaft leuchten, ist die Bindung
hergestellt und die Steuersignale werden auf dem gemein-
samen Kanal übertragen. Das Modell ist flugbereit.
Inbetriebnahme des Modells
Laden des Flugakkus
Das Steckernetzgerät (b) sowie das 12V-Adap-
terkabel (h) sind ausschliesslich für den Be-
trieb des Balancers vorgesehen! Beachten Sie
für den Umgang mit Akkus die Sicherheitshin-
weise!
Ladegerät/Balancer (10)
Schließen Sie zunächst den Niedervolt-Steckverbinder (a)
des Steckernetzgerätes (b) an der Eingangsbuchse (c) des
Ladeadapters/ Balancers an. Dabei muss der innenliegende
Kontakt mit dem Plus-Anschluss (+) und der äußere Kontakt
mit dem Minus-Anschluss des Netzgerätes verbunden sein.
Hinweis: Aus fototechnischen Gründen ist das
Anschlusskabel des Steckernetzgerätes noch
aufgewickelt. Zum Betrieb muss das Kabel ab-
gewickelt werden!
Anschließen der Betriebsspannung (11)
Sobald Sie das Steckernetzgerät (b) an eine 230V-Netz-
steckdose anschließen, leuchtet die rote LED (d) für die Be-
triebsspannungsanzeige (12).
Alternativ kann der Balancer über das mitgelieferte Adapter-
kabel (h) auch an eine 12V Autobatterie angeschlossen wer-
den. Beim 12V Betrieb des Laders schliessen Sie zuerst das
12V Anschlusskabel an den Lader und erst dann an die 12V
-
-
-
-
-
-
-
-
-
-
-
Removing the bind
Switch off the transmitter.
Switch the model on.
Press the BIND button on the receiver, next to the antenna
output, doing so with a pointed object for approx 1 to 2 se-
conds (9).
The status indicator on the receiver will then blink continuo-
usly. This means, the link has been completely severed.
Re-establishing the bind
Disconnect the power supply from the receiver.
Reconnect the receiver with the power supply. The status
indicator will blink.
Switch on the transmitter.
When both indicators have lit up continuously, the bind is
established, and the control signals will be transmitted on the
common channel. The model is ready for flight.
Getting started with the model
Charging the flight battery
The power-cube transformer (b) and the 12V
adapter cable (h) are only intended for opera-
ting the balancer! Please observe the safety in-
structions for handling rechargeable batteries!
Plug-in power supply/charge adaptor/balancer (10)
First connect the low voltage plug-in connector (a) of the
plug-in power supply device (b) at the input jack of the char-
ge adaptor/balancer. The inner contact must be connected to
the plus connection (+) and the outside contact to the minus
connection (-) of the power supply unit.
Note: For photo-technical reasons, the connec-
tion cable of the plug-in power supply device is
still wound up. Unwind the cable for the opera-
tion!
Connecting the power supply (11)
As soon as you connect the plug-in power supply device (b)
to a 230V power socket, the red LED (d) flashes for the ope-
rating voltage display (12).
Alternatively, the balancer may also be connected to a 12V
car battery via the adapter cable that comes with the set. For
12V operation of the charger, first connect the 12V connec-
ting cable to the charger and only then to the 12V car battery.
When connecting to the car battery, be very sure to mind the
-
-
-
-
-
-
-
-
-
-
-
10
11
12
13


