


75
DIGIOP® 3D Camera User Manual
SECTION 6: CONFIGURING QUEUING APPLICATIONS
NOTE
The camera unit must be properly installed and calibrated prior to completing any of the steps in this section.
Up to six zones (queuing, service, counting, or detection) can be added to each D3D-2500.
WARNING
!
Each D3D-2500 captures a maximum of 1900 samples per day across all queue and service zones. If the number of wait/
service times exceeds 1900, data collection stops until the next day. Contact DIGIOP® if you are collecting queue or service
times in extremely high traffic environments, such as at conferences or trade shows.
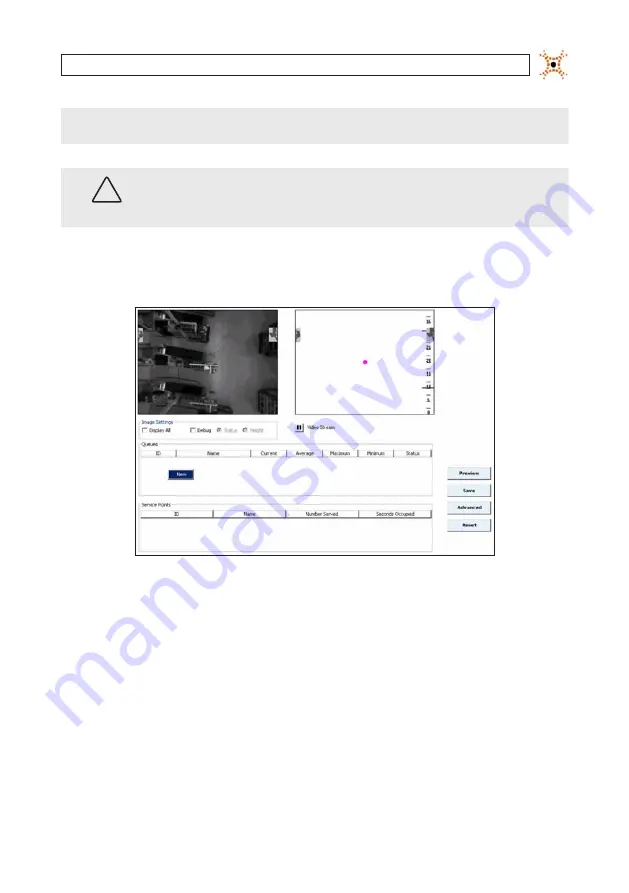
1.
Open the D3D-2500 configuration application using your web browser.
2.
Click
Queuing
. The Queuing tab appears.
3.
Right click on the white space under the table headings in the Queue group. A right-click menu appears with New as the only
option.
4.
Click
New
to create a new queue zone. A new row appears in the table and a blue head zone and green and pink queue count
area appears in the video image.
Содержание D3D-2500
Страница 8: ...viii www digiop com...
Страница 116: ...108 www digiop com SECTION 11 USING THE DIGIOP 3D CAMERA WITH DIGIOP ELEMENTS...
Страница 124: ...116 www digiop com...


